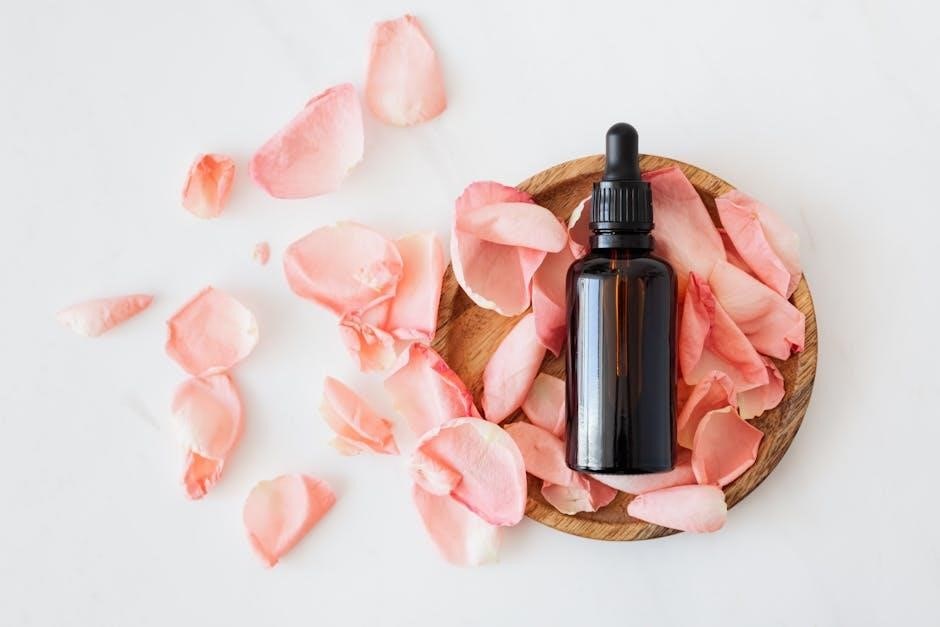
alice in wonderland tarot guidebook pdf

The Alice in Wonderland Tarot Guidebook is an enchanted guide introducing the wisdom of Wonderland. It combines comprehensive instructions with whimsical elements‚ inspired by Disney’s classic tale‚ making it perfect for both beginners and experienced tarot enthusiasts.

Overview of the Guidebook

The Alice in Wonderland Tarot Guidebook is a comprehensive guide designed to enhance your tarot journey. It blends the whimsical world of Wonderland with tarot wisdom‚ offering detailed interpretations of each card. The guidebook features meditative practices‚ journaling exercises‚ and tips for creating a magical reading space. Perfect for both beginners and experienced readers‚ it provides a deeper understanding of the deck’s symbolism and how to integrate its themes into your practice for personal growth and self-discovery. Its enchanting approach makes tarot more accessible and imaginative.

Significance of Alice in Wonderland in Tarot

Alice in Wonderland brings a unique‚ imaginative dimension to tarot‚ blending fantasy with spiritual growth. The story’s themes of curiosity‚ transformation‚ and self-discovery align perfectly with tarot’s purpose of guiding introspection. The whimsical characters and vibrant imagery of Wonderland create a captivating framework for interpreting cards‚ making the deck both visually stunning and deeply symbolic. This fusion allows readers to connect with the familiar narrative while exploring deeper meanings‚ enhancing the tarot experience with wonder and creativity.

History and Symbolism of the Alice in Wonderland Tarot Deck

The Alice in Wonderland Tarot Deck blends fantasy with intuition‚ drawing inspiration from the timeless tale. Its symbolism reflects transformation‚ curiosity‚ and self-discovery‚ captured through whimsical Wonderland characters.

Origins of the Deck

The Alice in Wonderland Tarot Deck originates from the imaginative world of Lewis Carroll’s classic tale. Inspired by Disney’s iconic characters‚ the deck combines artistic whimsy with tarot traditions. Its creation involved collaboration between tarot experts and illustrators‚ blending fantasy with intuitive symbolism. The deck’s design reflects Wonderland’s themes of transformation and curiosity‚ offering a unique twist on traditional tarot. Its enchanted aesthetic and durable construction make it a cherished tool for both beginners and experienced readers seeking a magical connection to their tarot journey.

Key Symbols and Their Meanings

The Alice in Wonderland Tarot Deck is rich in symbolic imagery‚ drawing inspiration from Lewis Carroll’s beloved tale. Key symbols include the Rabbit‚ representing urgency and time‚ the Cheshire Cat‚ embodying intuition and illusion‚ and the Queen of Hearts‚ signifying emotional turmoil. These whimsical elements blend seamlessly with tarot traditions‚ offering profound insights. Each symbol is carefully crafted to guide readers through self-discovery and transformation‚ making the deck a unique tool for exploring deeper meanings in tarot readings.

How to Choose the Right Alice in Wonderland Tarot Deck

Selecting the right Alice in Wonderland Tarot Deck involves considering visual appeal‚ thematic resonance‚ and guidebook inclusivity. Ensure the deck aligns with your energy and practice style for meaningful readings.

Factors to Consider When Selecting a Deck

When choosing an Alice in Wonderland Tarot Deck‚ consider its visual style‚ thematic alignment with your practice‚ and the inclusion of a guidebook. Ensure the artwork resonates with your energy and the cards’ material and size suit your handling preferences. The deck’s ability to evoke the whimsical and symbolic elements of Wonderland is crucial for meaningful readings. Additionally‚ check reviews and compare editions to find one that aligns with your tarot journey and personal connection to the Alice in Wonderland narrative.

Popular Editions of the Alice in Wonderland Tarot

Several editions of the Alice in Wonderland Tarot have gained popularity for their unique interpretations and artwork. The Disney-licensed deck‚ inspired by the classic animated film‚ offers vibrant‚ whimsical illustrations. Another edition combines traditional tarot symbolism with Lewis Carroll’s beloved characters‚ creating a timeless appeal. Some decks include comprehensive guidebooks‚ while others feature deluxe packaging. Each edition captures the essence of Wonderland‚ making them collectible and ideal for both beginners and experienced tarot enthusiasts seeking a magical twist on traditional readings.

Understanding the Deck Structure

The Alice in Wonderland Tarot Deck features 78 cards‚ including 22 Major Arcana cards representing key characters and themes‚ and 56 Minor Arcana cards divided into four whimsical suits.

Major Arcana Cards in the Alice in Wonderland Tarot

The Major Arcana in the Alice in Wonderland Tarot features 22 cards‚ each linked to key characters and themes from the story. These cards symbolize significant life events and personal growth‚ with Alice herself representing the journey of self-discovery. The Mad Hatter‚ Queen of Hearts‚ and other beloved characters embody archetypes that guide users through major transitions. The cards are beautifully illustrated‚ blending whimsy with profound symbolism to enhance tarot readings and deepen connections to Wonderland’s magical world.

Minor Arcana Cards and Their Divisions

The Minor Arcana in the Alice in Wonderland Tarot is divided into four suits: Wands‚ Cups‚ Swords‚ and Pentacles‚ each reflecting different aspects of Wonderland’s whimsical world. The suits are further divided into numbered cards and court cards‚ such as Pages‚ Knights‚ Queens‚ and Kings. Each suit draws inspiration from Wonderland’s characters and themes‚ blending traditional tarot symbolism with the story’s unique charm. This structure allows for nuanced readings‚ exploring everyday challenges and emotional journeys through the lens of Alice’s adventures.

Interpreting the Cards

Interpreting the Alice in Wonderland Tarot cards involves connecting their whimsical imagery to personal experiences‚ using Wonderland’s magic to uncover hidden meanings and inspire introspection.

Understanding Card Meanings and Interpretations

Understanding the meanings of Alice in Wonderland Tarot cards involves connecting their whimsical imagery to personal experiences and emotions. Each card‚ like the White Rabbit or Cheshire Cat‚ symbolizes themes such as time‚ intuition‚ or identity. The guidebook provides insights into these symbols‚ helping readers interpret their significance in spreads. By blending Wonderland’s magic with tarot wisdom‚ users can uncover deeper truths and guidance‚ making the deck a unique tool for self-reflection and intuition.

Reversal Meanings in the Alice in Wonderland Tarot

In the Alice in Wonderland Tarot‚ reversal meanings offer fresh perspectives‚ often revealing hidden truths or challenges. For example‚ the Queen of Hearts in reverse may suggest overcoming control issues‚ while the Cheshire Cat reversed could indicate uncertainty or misdirection. These interpretations encourage readers to reflect on their emotions and actions‚ using Wonderland’s whimsical themes to navigate life’s twists and turns. Reversals remind us to embrace change and trust our intuition for deeper understanding.

Using the Guidebook for Tarot Readings

The Alice in Wonderland Tarot Guidebook offers comprehensive instructions for conducting meaningful readings. It blends whimsical Wonderland magic with practical tarot wisdom‚ guiding both beginners and seasoned readers.

Basic Tarot Spreads for Beginners

Beginners can start with simple tarot spreads like the Three-Card Spread or Celtic Cross. These layouts help interpret cards in context. The guidebook offers tutorials on basic spreads‚ making it easy to grasp the fundamentals. Use the Three-Card Spread for past‚ present‚ and future insights‚ while the Celtic Cross provides deeper analysis. These spreads align with Wonderland’s whimsical essence‚ guiding newcomers to meaningful readings. Start your journey with these foundational techniques to uncover the magic of tarot.

Advanced Techniques for Experienced Readers

Experienced readers can delve into advanced techniques like multi-card storytelling and intuitive card linking. The guidebook explores meditative practices to deepen connections with the deck. It also encourages combining tarot with journaling for profound insights. Advanced readers can use Wonderland’s whimsical elements to enhance intuition and explore complex spreads. These methods allow for richer‚ more layered interpretations‚ making readings more impactful and meaningful. Elevate your practice with these sophisticated approaches to tarot reading.

The Role of Imagination in Tarot Readings

Imagination bridges tarot symbols with personal narratives‚ enhancing readings through Wonderland’s whimsical elements and fostering deeper connections for insightful interpretations.

How to Tap Into Your Imagination for Deeper Readings

Tapping into imagination enhances tarot readings by linking Wonderland’s whimsical themes to personal experiences. Begin by setting clear intentions and journaling insights. Surrender to the story‚ allowing Alice’s adventures to mirror your journey. Practice mindfulness and trust your instincts‚ as imagination bridges the symbolic and the real. Embrace the guidebook’s wisdom to deepen connections and uncover hidden meanings in your tarot practice.

Using Wonderland’s Whimsical Elements in Readings

Wonderland’s whimsical elements‚ such as the Mad Hatter‚ Cheshire Cat‚ and floral motifs‚ add a playful yet profound depth to tarot readings. Use these characters as metaphors for real-life situations‚ fostering creativity and intuition. Incorporate mindfulness practices‚ like visualizing Alice’s journey‚ to connect with the deck’s symbolism. Allow the guidebook’s imaginative guidance to enhance your readings‚ making them more immersive and personally meaningful while embracing the beauty of Wonderland’s enchanting world.

Integrating the Guidebook into Your Tarot Practice

Combine the guidebook with other tarot resources for enhanced readings. Use its imaginative insights to deepen your practice‚ blending Wonderland’s magic with traditional tarot methods seamlessly.

How to Use the Guidebook Effectively

Begin by exploring the guidebook’s comprehensive instructions‚ which blend Wonderland’s whimsical themes with tarot traditions. Use the deck’s magical imagery to deepen interpretations and connect with its unique energy. Regularly practice tarot spreads outlined in the guidebook‚ incorporating journaling to reflect on your journey. Combine the guidebook with other tarot resources for a richer practice‚ and embrace its imaginative approach to enhance your readings and personal growth.

Combining the Guidebook with Other Tarot Resources

Enhance your tarot practice by integrating the Alice in Wonderland guidebook with other tarot resources. Use its unique interpretations alongside traditional decks for diverse insights. Apply the guidebook’s meditative practices and journaling techniques to deepen your understanding. Cross-reference its whimsical themes with other tarot books or online tools for a richer perspective. Experiment with custom spreads combining elements from multiple decks for personalized readings. This blend fosters a dynamic and enriched tarot journey‚ encouraging creativity and growth in your practice.

The Importance of Intuition in Tarot Readings

Intuition is key to meaningful tarot readings‚ guiding interpretations beyond literal meanings. Trusting instincts and inner wisdom enhances connections with the cards‚ fostering deeper self-reflection and insight.

Developing Your Intuitive Skills

Cultivating intuition is essential for profound tarot readings. Start by trusting your instincts and allowing inner wisdom to guide interpretations. Practice mindfulness and meditation to enhance your connection with the cards. Journaling your thoughts and reflections can deepen your intuitive understanding. Embrace the whimsical elements of Wonderland‚ using imaginative exercises to tap into your subconscious. Over time‚ your intuition will become a powerful tool‚ enriching your tarot practice and enabling meaningful self-discovery.

Trust Your Instincts When Interpreting Cards

Trusting your instincts is crucial when interpreting tarot cards. Allow your inner wisdom to guide you‚ as intuition often reveals deeper truths. The enchanted guidebook encourages embracing imaginative elements‚ like Wonderland’s whimsy‚ to enhance trust in your instincts. When a card resonates emotionally‚ acknowledge its significance without overthinking. This connection fosters a personal and meaningful tarot practice‚ helping you navigate life’s challenges with clarity and confidence.

Using the Guidebook for Personal Growth

The guidebook aids personal growth through self-reflection and mindfulness‚ encouraging users to connect with their inner wisdom and cultivate a nurturing environment for self-discovery.

How Tarot Can Aid in Self-Reflection

The Alice in Wonderland Tarot Guidebook offers a unique tool for introspection‚ helping users explore their emotions‚ thoughts‚ and experiences. By engaging with the imaginative and symbolic world of Wonderland‚ individuals can deepen their self-awareness and gain clarity on personal challenges. The guidebook encourages journaling and reflective practices‚ allowing users to connect with their inner wisdom and embrace their growth journey. Its whimsical yet profound approach makes it an ideal companion for those seeking meaningful self-reflection and emotional healing;

Journaling Your Tarot Journey

Journaling your tarot journey with the Alice in Wonderland Tarot Guidebook is a powerful way to document your growth and reflections. By recording insights‚ emotions‚ and card meanings‚ you can track your progress and identify recurring themes. This practice encourages self-discovery and deepens your connection to the whimsical world of Wonderland. Over time‚ your journal becomes a personal roadmap‚ helping you revisit past readings and celebrate how far you’ve come. It’s a meaningful complement to your tarot practice‚ fostering mindfulness and transformation.

Meditation and Mindfulness with the Tarot

Meditation and mindfulness with the tarot deepen your connection to the cards. The Alice in Wonderland Tarot Guidebook introduces the wisdom of Wonderland‚ fostering a mindful practice.

Meditative Practices to Enhance Your Readings

Meditative practices‚ such as deep breathing and visualization‚ can deepen your tarot readings. Ground yourself with a moment of silence‚ then focus on the card’s imagery. Visualize Alice’s journey‚ allowing its symbolism to guide your intuition. Reflect on the card’s themes‚ such as growth or transformation‚ and how they resonate with your life. This mindful approach enhances your connection to the tarot‚ fostering clarity and personal insight.

Using the Guidebook for Mindfulness Exercises

The guidebook offers mindfulness exercises to enhance your tarot practice. Focus on the whimsical imagery of Alice’s world‚ reflecting on its themes of growth and transformation. Practice journaling your insights or meditating in nature to deepen your connection. Use the cards as prompts for mindful reflection‚ fostering self-awareness and clarity in your readings. This approach cultivates a peaceful and intentional mindset‚ aligning with the guidebook’s intent to inspire personal growth and inner harmony.

Creating a Wonderland-Inspired Reading Space

Transform your reading space with whimsical elements from Wonderland. Incorporate curious objects‚ vibrant colors‚ and nature-inspired decor to create an enchanted atmosphere for tarot practice.

How to Set Up Your Tarot Reading Area

Begin by selecting a quiet‚ private space with natural light. Use a red and black checkered cloth to evoke the Queen of Hearts. Add whimsical decorations like floral arrangements with mushrooms and roses‚ a teapot‚ teacups‚ and a tiny clock. Incorporate string lights with hearts and stars for ambiance‚ and a red-shaded lamp for a royal touch. Choose comfortable‚ eccentric seating with floral blankets and patterned pillows. Play soft instrumental music with clock sounds. Display framed Wonderland illustrations and store cards in a decorative box. Add a journal and a Venus flytrap for a personal‚ inviting space that immerses you in Wonderland’s curiosity and self-discovery.

Incorporating Wonderland Themes into Your Space

Bring Wonderland into your tarot space with whimsical touches like floral arrangements featuring mushrooms and roses. Display teapots‚ teacups‚ and oversized clocks to evoke the Mad Hatter’s tea party. Add string lights with heart and star shapes‚ along with a red-shaded lamp for a royal ambiance. Use framed illustrations of Alice‚ the Cheshire Cat‚ and other characters to create an immersive atmosphere. Incorporate a Venus flytrap plant for a touch of curiosity‚ ensuring your space reflects Wonderland’s magic and curiosity‚ perfect for self-discovery and tarot exploration.

Alice’s Journey as a Metaphor for Self-Discovery

Alice’s adventures symbolize personal growth‚ curiosity‚ and self-reflection. Her journey through Wonderland mirrors life’s challenges‚ encouraging introspection and embracing change‚ much like tarot’s transformative power.

How Alice’s Adventures Reflect Personal Growth

Alice’s journey through Wonderland mirrors the process of self-discovery‚ as she navigates unfamiliar challenges‚ embraces curiosity‚ and learns to trust her intuition. Her encounters with whimsical characters‚ like the Cheshire Cat and the Queen of Hearts‚ symbolize inner conflicts and the importance of self-reflection. This transformative adventure encourages readers to confront their fears‚ embrace change‚ and find their own path‚ much like tarot’s role in guiding personal growth and introspection.

Using Alice’s Journey in Your Tarot Practice

Infuse your tarot practice with the whimsy and wisdom of Alice’s adventures by embracing curiosity and intuition; Use the guidebook to draw parallels between Alice’s challenges and your own‚ fostering self-reflection. Trust your instincts‚ just as Alice navigates Wonderland‚ and allow the deck’s imagery to guide you in interpreting cards. This approach enriches your readings‚ making them a transformative journey of discovery and growth‚ much like Alice’s own path through the enchanted realm.

Comparing the Alice in Wonderland Tarot to Other Decks

The Alice in Wonderland Tarot stands out with its whimsical‚ vibrant imagery and Disney-inspired themes‚ offering a unique twist compared to traditional or other themed decks.

Unique Features of the Alice in Wonderland Tarot

The Alice in Wonderland Tarot captivates with its whimsical‚ Disney-inspired imagery and vibrant illustrations‚ offering a fresh perspective on traditional tarot symbolism. Its enchanting guidebook provides detailed interpretations‚ blending fantasy with practical wisdom. Unlike other decks‚ it infuses the magical world of Wonderland‚ making readings feel like a journey down the rabbit hole. This unique fusion of storytelling and tarot makes it a standout choice for those seeking a creative and imaginative approach to tarot practice.

How It Differs from Traditional Tarot Decks

The Alice in Wonderland Tarot stands out by blending whimsical fantasy with tarot traditions. Unlike classic decks‚ it features beloved Wonderland characters‚ creating a unique visual and interpretative experience. The guidebook enhances this by weaving Disney-inspired narratives into card meanings‚ offering a fresh‚ imaginative approach. While traditional decks rely on universal symbolism‚ this deck infuses a playful‚ storytelling element‚ making readings feel more personal and enchanting. Its creative twist appeals to those seeking a magical connection to tarot.

The Alice in Wonderland Tarot Guidebook offers a magical blend of whimsy and wisdom‚ inspiring personal growth and mindfulness. It invites you to embrace the enchantment of Wonderland‚ making tarot accessible and delightful for all seekers of knowledge and self-discovery.

Summarizing the Guidebook’s Value

The Alice in Wonderland Tarot Guidebook is a captivating resource that blends whimsical storytelling with profound tarot wisdom. It offers a unique‚ imaginative approach to self-discovery‚ making it accessible to both beginners and seasoned practitioners. By weaving the magical elements of Wonderland into tarot interpretations‚ the guidebook fosters personal growth‚ mindfulness‚ and intuitive understanding. Its enchanting design and practical insights create a transformative tool for anyone seeking to deepen their tarot practice and connect with the symbolic world of Wonderland.

Encouragement to Start Your Tarot Journey

Embark on a magical adventure with the Alice in Wonderland Tarot Guidebook as your compass. This enchanting resource simplifies tarot‚ making it accessible for beginners while offering depth for experienced readers. Let the whimsical world of Wonderland inspire your intuition and guide you toward self-discovery. Embrace the journey with curiosity and confidence‚ knowing that every card holds a story and a lesson. Take the first step‚ and let the magic of tarot transform your path‚ one card at a time.

horizontal fence plans pdf

Horizontal fence plans offer a modern, versatile solution for outdoor spaces, providing privacy and aesthetic appeal. PDF guides simplify construction with detailed instructions and designs.

1.1 What is a Horizontal Fence?

A horizontal fence is a modern and sleek fencing option where horizontal boards or slats are attached to vertical posts, creating a contemporary design. Unlike traditional vertical fences, horizontal fences emphasize width and can enhance the aesthetic of outdoor spaces. They are often used for privacy, security, and decorative purposes, with materials like wood, metal, or composite. The horizontal layout provides a unique visual appeal, making it a popular choice for homeowners seeking a minimalist or rustic look. It is also versatile, suitable for various settings, from residential yards to commercial properties, offering both functionality and style.

1.2 Benefits of Using Horizontal Fence Plans

Horizontal fence plans offer numerous benefits, including enhanced visual appeal and modern design. They provide privacy and security while adding value to your property. Durability is another advantage, as horizontal fences can withstand various weather conditions. Additionally, these plans are customizable, allowing homeowners to choose materials like wood, metal, or composite. The horizontal layout can also make spaces appear larger. PDF guides simplify the construction process with step-by-step instructions, making it easier for DIY enthusiasts to achieve professional results. Overall, horizontal fences are a practical and stylish solution for outdoor spaces, combining functionality with aesthetics to meet diverse needs and preferences.

Materials and Tools Needed for Horizontal Fence Construction

Cedar or pressure-treated wood, posts, horizontal panels, weather-resistant screws, post-hole diggers, drills, saws, measuring tapes, levels, and safety gear are essential for building a horizontal fence.

2.1 List of Required Materials

To construct a horizontal fence, you’ll need durable materials like cedar or pressure-treated wood for posts and panels. Additional materials include weather-resistant screws, post-hole diggers for digging, drills for pre-drilling holes, saws for cutting wood, measuring tapes for accurate measurements, levels to ensure even installation, and safety gear like gloves and goggles. Concrete or quick-set mix is essential for securing posts. Weather-resistant wood stain or sealant can be applied for protection. For gates, hinges and latches are necessary. All materials should align with local building codes and be suitable for outdoor conditions to ensure longevity and stability of the fence structure.

2.2 Essential Tools for the Project

Building a horizontal fence requires specific tools to ensure precision and efficiency. A post-hole digger or power auger is necessary for digging holes for fence posts. A drill with drill bits is needed for pre-drilling screw holes to avoid splitting wood. A circular or hand saw is essential for cutting posts and panels to the required lengths. Measuring tape and level tools are crucial for accurate measurements and ensuring the fence is evenly aligned. A hammer or impact wrench is used for securing screws and bolts. Safety gear like gloves and goggles should be worn throughout the process. Sandpaper may be needed to smooth rough wood edges, and a concrete mixer or trowel is required for setting posts in concrete.

2.3 Cost Estimate for Materials

Estimating material costs is essential for budgeting your horizontal fence project. Cedar or pressure-treated lumber for posts and panels can range from $10 to $20 per board, depending on length and quality. Metal or vinyl materials may cost more but offer durability. Screws, bolts, and brackets typically add $50 to $100. Concrete for post footings can cost around $40 per bag, with sand or gravel adding another $30 to $50. Decorative elements like post caps or stain may add $20 to $50. Overall, the cost for a 50-foot fence can range from $500 to $1,500, averaging $10 to $30 per linear foot, depending on material choices and design complexity.

Planning and Design Considerations

Planning a horizontal fence involves understanding property lines, local regulations, and design preferences. Measure your space accurately and choose a style that complements your landscape and meets codes.

3.1 Understanding Property Lines and Regulations

Before building a horizontal fence, it’s crucial to identify property lines to avoid legal disputes. Check local building codes and regulations, as they dictate fence height, material usage, and setback requirements. Some areas may require permits, especially if the fence is near public streets or shared boundaries. Ensure compliance with neighborhood covenants or homeowners’ association rules to prevent potential issues. Proper planning helps avoid costly modifications or removals later. Always verify with local authorities to understand specific restrictions and ensure your project adheres to all legal standards for a smooth construction process.

3.2 Choosing the Right Design for Your Space

Choosing the right horizontal fence design involves measuring your space and selecting styles that complement your property. Consider the spacing between panels, height, and material to ensure functionality and aesthetics. Factor in local climate conditions and desired privacy levels. Ensure the design aligns with your home’s architecture and neighborhood guidelines. Use PDF plans to visualize layouts and select finishes like stained wood or metal for a modern look. Blending practicality with style ensures your fence enhances your outdoor space while meeting specific needs. Always consult local resources for inspiration tailored to your area.

3.3 Measuring and Layout Tips

Accurate measuring and layout are crucial for a successful horizontal fence project. Start by drawing a detailed layout plan, marking property lines and fence dimensions. Use post supports and pre-drill holes to ensure alignment. Measure twice to confirm spacing and angles, especially for corners. Set the bottom of the fence 2 inches above the ground to prevent moisture damage. Use a level to ensure posts are straight and panels are evenly spaced; Refer to PDF guides for specific measurements and diagrams to visualize your project. Proper planning prevents costly mistakes and ensures a professional finish. Always double-check local regulations before starting.

Step-by-Step Construction Guide

Start by preparing the site, marking property lines, and installing posts. Attach horizontal panels securely, ensuring proper alignment. Build and install the gate, then add finishing touches like staining or sealing.

4.1 Preparing the Site

Preparing the site is the first critical step in building a horizontal fence. Start by clearing the area of debris, vegetation, and obstructions. Mark the property lines using stakes and string to ensure accurate placement. Check for underground utilities to avoid damage during digging. Level the ground to create an even surface, removing any uneven terrain. Handle materials carefully to prevent damage. Ensure compliance with local building codes and regulations. Measure and layout the fence design according to your plan. Having a well-prepared site ensures a smooth and successful construction process. Proper preparation is key to achieving professional-looking results.

4.2 Installing Posts and Supports

Installing posts and supports is a crucial step in building a horizontal fence. Start by digging holes for the posts, ensuring they are deep enough to provide stability. Set the posts in place, using concrete to secure them firmly. For horizontal fence designs, line posts are often used as corner posts, while gate posts are specifically designed to accommodate vertical nailers. Pre-drill holes for supports and attach them to the posts. Ensure all posts are level and aligned properly before proceeding. Proper installation of posts and supports ensures the structural integrity of your fence. Follow the PDF guide for precise measurements and alignment.

4.3 Attaching Horizontal Panels

Attaching horizontal panels is a straightforward process that requires precision. Start by aligning the pre-notched horizontal slats with the routed holes in the posts. Secure each panel using screws or nails, ensuring a snug fit. For added stability, use vertical nailers between the panels and posts. Make sure the panels are evenly spaced and level. If using a frame, attach the panels to the frame first before securing it to the posts. Leave a small gap at the bottom for drainage and to comply with local building codes. Once all panels are in place, inspect the fence for alignment and stability. Tighten any loose fasteners and ensure all edges are smooth for safety. Properly attaching the panels ensures a durable and visually appealing fence. Follow the PDF guide for precise spacing and alignment tips.

4.4 Building and Installing the Gate

Building and installing the gate is a critical step in completing your horizontal fence. Begin by constructing the gate frame using the same materials as your fence panels. Attach the horizontal panels to the frame, ensuring they are evenly spaced and securely fastened. Install the gate post separately, using a 2×4 vertical nailer for added stability. Mount the gate to the post using hinges and secure it with a latch or lock. Ensure the gate aligns perfectly with the fence and is level. Finish by staining or sealing the gate to match the fence. Proper installation ensures smooth operation and longevity. Follow PDF guides for precise measurements and hardware recommendations.

4.5 Finishing Touches and Inspection

After constructing your horizontal fence and gate, apply finishing touches for a polished look. Sand any rough edges or splinters and clean the entire structure. Apply a stain, sealant, or paint to protect the materials and enhance aesthetics. Inspect the fence for even spacing, secure attachments, and proper alignment. Check the gate’s hinges and latch for smooth operation. Ensure all hardware is tightened and the structure is stable. Review local building codes to confirm compliance. Finally, walk along the fence to ensure there are no gaps or damages. Address any issues promptly to ensure longevity and safety. Refer to your PDF guide for final inspection checklists.

PDF Resources for Horizontal Fence Plans

Download free PDF guides for horizontal fence plans, featuring detailed DIY instructions, Sketchup files, and customizable designs to help you build your perfect fence.

5.1 Free Downloadable PDF Guides

Access a variety of free PDF guides for horizontal fence plans, offering step-by-step instructions and detailed diagrams. These resources cover materials, tools, and construction methods, ensuring a smooth project execution. Many guides include customizable designs, allowing you to tailor your fence to fit your space and style. Whether you’re a DIY novice or an experienced builder, these PDFs provide comprehensive support. Download templates, measurement tips, and design inspiration to create a stunning horizontal fence that enhances your property’s curb appeal and functionality. Start your project confidently with these accessible and informative resources.

5.2 Detailed Instructions in PDF Format

Detailed PDF guides provide comprehensive step-by-step instructions for constructing horizontal fences. Each guide includes lists of required materials, precise measurements, and clear diagrams. Instructions cover post installation, panel attachment, and gate construction, ensuring accuracy. Many PDFs offer customizable designs, allowing you to adapt plans to your specific needs. Troubleshooting tips and safety precautions are also included to help avoid common mistakes. These resources are ideal for both DIY enthusiasts and professionals, offering a user-friendly approach to building a durable and visually appealing horizontal fence. With these detailed plans, you can achieve a professional-grade result with ease and confidence.

5.3 Sketchup and CAD Files for Advanced Designs

For professionals and enthusiasts seeking intricate designs, SketchUp and CAD files provide advanced templates for horizontal fences. These files offer detailed 3D models and precise measurements, enabling customization. Users can modify designs to fit specific spaces or materials, ensuring a seamless integration with outdoor aesthetics. CAD files include layers for posts, panels, and gates, while SketchUp models allow real-time visualization. These resources are perfect for creating unique and complex fence layouts, offering unmatched flexibility and precision. They cater to those who want to push creative boundaries and achieve a bespoke fencing solution tailored to their property’s architecture and landscape.

Legal and Safety Considerations

Ensure compliance with local building codes and obtain necessary permits before construction. Always follow safety guidelines to avoid accidents during the fencing process.

6.1 Obtaining Necessary Permits

Before starting your horizontal fence project, verify local regulations and obtain required permits. Contact your local building department to ensure compliance with zoning laws and property line restrictions. Some areas may require submissions of detailed plans or inspections. Failure to secure permits can result in fines or project halts. Plan ahead and allow time for approvals, as processing times vary. Proper documentation, including PDF plans, will facilitate the permit application process. Remember, compliance ensures safety and avoids legal issues. Always check with authorities to confirm specific requirements for your area.

6.2 Compliance with Local Building Codes

Compliance with local building codes is crucial for a safe and legally approved horizontal fence. Verify height restrictions, setback requirements, and material guidelines. Some areas may require specific designs or inspections. Ensure your fence aligns with neighborhood aesthetic standards and structural integrity. Review local ordinances to understand restrictions on materials, spacing, and styles. Submit detailed PDF plans if necessary for approval. Non-compliance can lead to fines or removal. Always consult local authorities to confirm specifications before construction. This ensures your project meets safety standards and avoids legal complications, providing peace of mind and a durable, long-lasting fence.

6.3 Safety Tips During Construction

Ensure safety during horizontal fence construction by wearing protective gear like gloves and safety glasses. Use proper lifting techniques to avoid injuries. Keep tools sharp and in good condition to prevent accidents. Maintain a clean work area to reduce tripping hazards. When using power tools, follow manufacturer guidelines and ensure proper ventilation. Never leave sharp objects or materials unattended. Inspect equipment regularly for damage. Ensure all helpers are aware of safety protocols. For high structures, use sturdy ladders and always have a spotter. Properly secure panels and posts to avoid collapse. Follow local safety codes and best practices to ensure a safe and successful project.

Maintenance and Repair Tips

Regularly inspect for damage, clean debris, and protect your fence from weather. Repair damaged panels promptly to maintain structural integrity and extend lifespan.

7.1 Regular Inspection Checklist

To ensure your horizontal fence remains sturdy, conduct regular inspections. Check for loose panels, rotting wood, or rusted hardware. Look for signs of weather damage, such as warping or discoloration. Verify that posts are secure and the foundation remains stable. Inspect gate hinges and latches for proper function. Clean debris accumulated between panels to prevent moisture buildup. Address minor issues promptly to avoid costly repairs. Keep a checklist to track inspections and maintain a record for future reference. Regular checks help preserve the fence’s appearance and longevity, ensuring it continues to provide privacy and security for years to come.

7.2 Repairing Damaged Panels and Posts

Begin by assessing the extent of damage to panels or posts. For minor cracks or splits, use wood sealant or filler to reinforce the material. Replace severely damaged panels with new ones, ensuring they match the original design. Check post stability; if loose, re-anchor them with concrete or adjust the footing. Address rotting wood by treating with preservatives or replacing sections. Tighten any loose screws or bolts and inspect for rust, replacing hardware if necessary. For extensive damage, consult a professional to ensure structural integrity. Regular repairs maintain the fence’s functionality and appearance, preventing further deterioration over time.

7.3 Protecting the Fence from Weather Damage

To protect your horizontal fence from weather damage, apply a waterproof sealant or stain, especially to wood surfaces. Use materials like cedar or treated lumber for natural resistance to rot and moisture. Regularly inspect for signs of wear, such as warping or discoloration, and address issues promptly. Ensure the fence is set at least 2 inches above ground to prevent water pooling. Trim nearby plants to reduce moisture exposure and avoid using harsh chemicals that may degrade materials. For metal fences, apply rust-resistant coatings. By maintaining these protective measures, your fence will withstand harsh weather conditions and retain its structural integrity and appearance over time.

Creative Ideas for Customization

Enhance your horizontal fence with decorative elements, lighting, or mixed materials for a unique and personalized look that complements your outdoor space.

8.1 Adding Decorative Elements

Enhance your horizontal fence with decorative elements like intricate wood carvings, metal accents, or lattice panels. These details add visual interest and personality to your design. Consider adding post caps or ornamental hardware for a polished look. Incorporating plants or vines can also blend natural beauty with your fence’s structure. For a modern touch, integrate LED lighting into the panels or posts to create a striking evening display. These decorative elements not only personalize your fence but also increase your property’s curb appeal and value. Explore various styles in PDF guides to find the perfect embellishments for your project.

8.2 Incorporating Lighting

Incorporating lighting into your horizontal fence enhances both functionality and aesthetics. Solar-powered lights or LED strips can be embedded into posts or panels for a subtle glow. String lights woven through the slats create a warm, inviting ambiance. Motion-sensitive lights add security, while decorative post caps with built-in lights provide a elegant touch. PDF guides offer step-by-step instructions for safe and effective installation. Lighting not only highlights your fence’s design but also improves visibility and safety at night. Choose from various styles and placements to match your home’s exterior and create a welcoming outdoor space.

8.3 Mixing Materials for Unique Designs

Mixing materials is a great way to create a one-of-a-kind horizontal fence. Combine wood with metal accents or vinyl for durability and style. Incorporating natural stone or brick posts adds elegance, while recycled materials offer an eco-friendly touch. Contrast textures, like smooth metal slats with rustic wood frames, for visual interest. PDF guides provide inspiration and instructions for blending materials seamlessly. Experiment with color combinations, such as dark metal against light wood, to enhance curb appeal. This approach allows you to personalize your fence, ensuring it complements your home’s architecture while standing out in the neighborhood.

Horizontal fence plans offer a rewarding DIY project, transforming outdoor spaces with style and functionality. These guides make building manageable, ensuring a beautiful and durable result for years.

9.1 Final Thoughts on Building a Horizontal Fence

Building a horizontal fence is a rewarding project that enhances your property’s curb appeal and functionality. With detailed PDF plans, you can achieve professional-like results. Ensure compliance with local regulations and use high-quality materials for durability. Regular maintenance will keep your fence looking its best. Whether for privacy, security, or aesthetics, a horizontal fence offers versatility and style, making it a great addition to any home or garden. Take pride in your DIY accomplishment and enjoy the benefits of your new fence for years to come.

9.2 Encouragement to Start Your Project

Embarking on your horizontal fence project is an exciting journey that can transform your outdoor space. With the right tools and a clear PDF guide, you can confidently bring your vision to life. Don’t hesitate to begin—each step, from planning to completion, is manageable and rewarding. Remember, patience and attention to detail will ensure a beautiful and durable result. Gather your materials, follow the instructions, and watch your project unfold. The sense of accomplishment you’ll feel upon finishing will make every effort worthwhile. Start today and create the perfect fence for your home or garden!

polytune 3 manual

The Polytune 3 is an advanced guitar tuner offering polyphonic, chromatic, and strobe modes. Its compact design and Bonafide Buffer Technology make it a versatile tool for musicians.

The device provides fast and accurate tuning, suitable for both beginners and professionals. The manual and quick start guide are available for download from the TC Electronic website.

1.1 Overview of the Polytune 3 Tuner

The Polytune 3 is a cutting-edge guitar tuner designed for precision and versatility. It features multiple tuning modes, including polyphonic, chromatic, and strobe, catering to various musical needs. The tuner is compact, making it ideal for pedalboards, and offers a bright LED display for clear visibility. It also incorporates the Bonafide Buffer Technology, ensuring high-quality tone preservation. With its intuitive controls and advanced features, the Polytune 3 is a reliable tool for both beginners and professional musicians. The device supports quick tuning adjustments and provides accurate pitch detection, enhancing the overall tuning experience.

1.2 Key Features of the Polytune 3

The Polytune 3 boasts an array of standout features, including polyphonic tuning for simultaneous string detection and strobe mode for precision tuning. It also offers chromatic tuning and supports altered tunings. The Bonafide Buffer Technology ensures signal integrity, making it suitable for long cable runs. A bright LED display provides clear feedback, and the tuner is powered via a 9V input. Its compact design fits seamlessly on pedalboards, while the true bypass option preserves your tone when disengaged. These features combine to make the Polytune 3 a versatile and efficient tuning solution for guitarists.

Installation and Setup

Connect the Polytune 3 to your pedalboard using a 9V power supply and ensure proper installation. Switch between true bypass and buffered bypass modes as needed for optimal performance.

2.1 Power Input Requirements

The Polytune 3 requires a 9V DC power supply with a minimum of 100mA current. Use a high-quality power adapter to ensure stable operation. Avoid using daisy chains if possible.

2.2 Connecting the Power Supply

To power the Polytune 3, use a high-quality 9V DC adapter with a 100mA minimum output. Locate the power input jack on the pedal’s rear panel and insert the adapter firmly, ensuring proper polarity. Always use the recommended adapter to prevent damage or noise issues. Avoid using adapters with higher voltage ratings, as this could harm the device. For optimal performance, connect the adapter directly to a power source rather than using daisy chains or shared power supplies. This ensures stable operation and reduces the risk of interference or malfunction.

2.3 Switching Between True Bypass and Buffered Bypass

The Polytune 3 allows users to switch between True Bypass and Buffered Bypass modes. To access this feature, unscrew the pedal’s back plate and locate the small buffer switch. Flip the switch to select your preferred mode. Buffered Bypass is ideal for maintaining tone clarity in long cable runs or complex pedalboards, while True Bypass ensures minimal signal interference when the tuner is bypassed. After selecting the desired mode, reattach the back plate securely. This feature ensures the Polytune 3 adapts to any guitarist’s setup, providing flexibility without compromising performance.

Tuning Modes

The Polytune 3 offers multiple tuning modes, including polyphonic, chromatic, and strobe, catering to various tuning needs. These modes ensure accurate and efficient tuning for guitarists of all levels.

3.1 Polyphonic Tuning Mode

The Polyphonic Tuning Mode allows you to tune all strings simultaneously by strumming them together. It detects the pitch of each string instantly, providing a clear and efficient tuning process. This mode is ideal for quick adjustments and is suitable for both beginners and experienced musicians. The PolyTune 3 accurately identifies each string’s tuning status, ensuring precise results. Its intuitive display simplifies the tuning experience, enabling users to achieve professional-level accuracy with minimal effort. This feature is particularly useful for live performances and rehearsals, where speed and accuracy are essential. The Polyphonic Mode is a standout feature of the Polytune 3, making it a versatile tool for guitarists.

3.2 Chromatic Tuning Mode

The Chromatic Tuning Mode on the Polytune 3 allows for precise tuning of individual strings. It provides a detailed pitch display, enabling accurate adjustments. This mode is particularly useful for custom tunings or when tuning one string at a time. To activate Chromatic Mode, press and hold the footswitch until the display changes. The mode offers versatility for musicians experimenting with alternate tunings. Its high accuracy ensures reliable results, making it ideal for both studio and stage use. The Chromatic Mode complements the polyphonic feature, offering a comprehensive tuning solution for all guitarists.

3.3 Strobe Tuning Mode

The Strobe Tuning Mode offers high-precision tuning with a spinning LED meter, providing visual feedback for pitch accuracy. It is ideal for fine-tuning and professional settings where exact intonation is crucial.

Activate Strobe Mode by pressing and holding the footswitch until the display changes. This mode is particularly useful for detailed adjustments, making it a favorite among experienced musicians. Its accuracy ensures perfect tuning every time, whether on stage or in the studio. The Strobe Mode complements the Polytune 3’s versatility, catering to guitarists and bassists seeking precise tuning capabilities.

3.4 Altered Tunings and Custom Options

The Polytune 3 supports various altered tunings, allowing musicians to experiment with non-standard pitch setups. These include drop tunings, open tunings, and other custom configurations tailored to specific musical styles or compositions.

Users can access these tunings through the device’s menu system, enabling quick adjustments for creative exploration. The Polytune 3 also allows for custom tuning options, providing flexibility for artists who prefer unique soundscapes or need to match specific musical requirements. This feature enhances versatility, making it suitable for a wide range of musical genres and applications.

Using the Polytune 3

The Polytune 3 offers an intuitive tuning experience with multiple modes, including polyphonic, chromatic, and strobe. Its bright LED display ensures clear visibility, while the Bonafide Buffer preserves tone quality.

4.1 Basic Tuning Process

The Polytune 3 simplifies tuning with its intuitive interface. Begin by plugging your guitar into the tuner or using the built-in microphone. Press the footswitch to activate tuning mode. In Polyphonic mode, strum all strings; the display highlights out-of-tune strings. For individual strings, Chromatic mode is ideal. Adjust strings until the needle centers, indicating perfect pitch. The bright LED display ensures clarity in any setting. This quick process makes tuning efficient and straightforward for musicians of all skill levels.

4.2 Advanced Tuning Techniques

For precise tuning, the Polytune 3 offers advanced features like Strobe mode, which provides ultra-accurate pitch detection. Enable Strobe mode by pressing and holding the footswitch during tuning. The Bonafide Buffer Technology ensures signal integrity, especially in complex pedal setups. Additionally, the tuner allows for custom altered tunings, enabling musicians to experiment with unique sounds. Switching between modes during a session is seamless, offering flexibility for diverse musical needs. These features make the Polytune 3 a powerful tool for professionals seeking precise, customizable tuning solutions. Its versatility enhances the overall tuning experience.

4.3 Switching Between Tuning Modes

Switching between tuning modes on the Polytune 3 is straightforward. Press and hold the footswitch during tuning to cycle through modes. The LED display changes color to indicate the active mode: green for chromatic, red for strobe, and blue for polyphonic. This allows for quick adjustments during performances. Additionally, the tuner retains the last-used mode for convenience. The seamless mode-switching feature ensures minimal interruption to your workflow, whether you’re refining your sound in chromatic mode or using strobe for precision tuning. This flexibility makes the Polytune 3 adaptable to various musical scenarios and preferences.

Manual and Documentation

The Polytune 3 manual is available as a PDF download from the TC Electronic website. It includes detailed instructions, supplementary documentation, and a quick start guide for easy setup and use.

5.1 Accessing the Full Manual

To access the full manual for the Polytune 3, visit the TC Electronic website at www.tcelectronic.com. Navigate to the support section and select your product. The manual is available as a PDF download, ensuring you have comprehensive guidance for setup, features, and troubleshooting. This resource is essential for understanding advanced functionalities and optimizing your use of the tuner. Regularly check for updates to ensure you have the latest version of the manual.

5.2 Quick Start Guide Overview

The Quick Start Guide provides a concise overview of the Polytune 3’s essential features and operations. Available in multiple languages, it covers basic controls, power input requirements, and initial setup steps. The guide is designed to help users quickly understand how to navigate the tuner’s modes, including polyphonic, chromatic, and strobe tuning. It also outlines how to switch between True Bypass and Buffered Bypass. Downloadable from the TC Electronic website, the Quick Start Guide is a handy resource for users who want to start tuning immediately without delving into advanced features.

5.3 Supplementary Documentation

Supplementary documentation for the Polytune 3 is available online, offering in-depth insights into advanced features and troubleshooting. These resources include detailed guides for firmware updates, custom tuning options, and technical specifications. Additionally, supplementary materials cover warranty information, customer support access, and FAQs. Designed to complement the full manual, this documentation ensures users can optimize their tuner’s performance and address any issues. Available as downloadable PDFs, these documents provide comprehensive support for both novice and experienced users, ensuring a seamless experience with the Polytune 3.

Firmware and Updates

The Polytune 3 supports firmware updates to enhance performance and add features. Users can download the latest versions for Mac or Windows from the TC Electronic website.

Regular updates ensure optimal functionality. Visit the support page to check for updates and follow installation instructions to keep your tuner up-to-date with the latest improvements.

6.1 Checking for Firmware Updates

To ensure your Polytune 3 is up-to-date, visit the TC Electronic website. Navigate to the support section and select your product to check for the latest firmware versions.

  • Download the appropriate firmware for your operating system (Mac or Windows).
  • Follow the on-screen instructions to install the update.
  • Regular updates enhance performance and add new features.

Refer to the full manual for detailed installation steps and troubleshooting tips.

6.2 Installing Firmware Updates

Installing firmware updates on your Polytune 3 is essential for optimal performance. Download the latest firmware from the TC Electronic website for either Mac or Windows.

  • Connect your Polytune 3 to your computer using a USB cable.
  • Run the firmware update software and follow the on-screen instructions.
  • Ensure the device is fully updated before disconnecting.

Restart the device after installation to apply changes. Refer to the manual for detailed steps or troubleshooting assistance.

Technical Specifications

The Polytune 3 is a compact tuner featuring polyphonic, chromatic, and strobe modes. It includes Bonafide Buffer Technology and LED brightness adjustment for enhanced performance and visibility.

7.1 Input and Output Details

The Polytune 3 features a standard 1/4-inch input jack for connecting your guitar and a 1/4-inch output jack for connecting to your amplifier or pedalboard. It is designed to work with a 9V DC power supply, requiring 100mA of current for optimal performance. The tuner is compatible with both active and passive guitars, ensuring accurate tuning across a wide range of instruments. The input impedance is 1MΩ, while the output impedance is 100Ω, maintaining the integrity of your guitar signal. The device also includes a true bypass or buffered bypass option, selectable via an internal DIP switch.

The Polytune 3 is designed specifically for guitar tuning, with no support for other instruments. The LED display provides clear visual feedback, with adjustable brightness to suit different lighting conditions.

7.2 Power Consumption

The Polytune 3 requires a 9V DC power supply with a minimum of 100mA current to ensure proper operation. It is not compatible with higher voltage supplies, as this may damage the device. The tuner operates efficiently, consuming approximately 50mA of power during normal use, which increases slightly to 70mA when the LED display is at maximum brightness. To preserve battery life if using a battery, the tuner features an automatic shutdown after 30 minutes of inactivity. Always use a high-quality power supply to maintain consistent performance and avoid potential noise issues.

The device also includes a true bypass or buffered bypass option, selectable via an internal DIP switch, ensuring minimal signal loss while powered off or in buffered mode.

Advanced Features

The Polytune 3 features the Bonafide Buffer Technology, preserving your tone’s integrity. It also offers LED brightness adjustment for optimal visibility in various lighting conditions, enhancing user experience.

8.1 Bonafide Buffer Technology

The Bonafide Buffer Technology in the Polytune 3 ensures your guitar’s tone remains pristine, even when using long cables or multiple effects pedals. This technology preserves signal integrity, preventing tone loss or degradation. It is designed to maintain the natural dynamics and nuances of your instrument, ensuring clarity and responsiveness. Whether you’re playing in a studio or on stage, this feature guarantees your sound stays consistent and high-quality. The buffer is switchable, allowing you to choose between True Bypass and Buffered modes, catering to different tonal preferences and setup needs.

8.2 LED Brightness Adjustment

The Polytune 3 features an adjustable LED brightness setting, allowing you to customize the display to suit your preferences. This ensures optimal visibility in various lighting conditions, whether on a dimly lit stage or in a brightly lit studio. The brightness adjustment is designed to preserve battery life while maintaining clear readability. You can easily modify the LED intensity using the dedicated controls, providing a personalized experience. This feature enhances usability without compromising the device’s performance or tone quality, ensuring it remains a reliable tool for precise tuning in any environment.

Troubleshooting

The Polytune 3 may experience issues like inaccurate tuning or dim LED displays. Ensure proper power connection, adjust settings, or reset the device to resolve these problems effectively.

9.1 Common Issues and Solutions

Common issues with the Polytune 3 include inaccurate tuning or dim LED displays. To resolve these, ensure the power supply is stable and properly connected. Adjust the sensitivity settings if necessary. If the tuner isn’t responding, try resetting the device by holding the footswitch for 10 seconds. For persistent problems, refer to the troubleshooting section in the manual or contact customer support. Regularly updating the firmware can also prevent or fix unexpected issues. Always consult the official TC Electronic documentation for detailed solutions and guidance.

9.2 Resetting the Device

To reset the Polytune 3 to its factory settings, press and hold the footswitch for 10 seconds while the device is powered on. This will restore all settings to their default configuration. Note that this process will erase any custom tuning preferences or altered tunings you have saved. Ensure the device is connected to power before performing the reset. After resetting, calibrate the tuner if necessary for accurate tuning. If you experience any issues during the reset process, refer to the troubleshooting section or the full manual for further guidance.

Warranty and Support

Visit the TC Electronic website for detailed warranty information and access to customer support. The site also offers a comprehensive FAQ section for troubleshooting and assistance.

10.1 Product Warranty Information

The Polytune 3 is backed by TC Electronic’s comprehensive warranty program. For specific details, visit TC Electronic’s support page, where you can also find the FAQ database and additional resources for troubleshooting and maintenance.

Understanding your warranty coverage ensures optimal use and protection of your device. Regular updates and support materials are available to enhance your experience with the Polytune 3.

10.2 Accessing Customer Support

For assistance with the Polytune 3, visit the TC Electronic support page. Here, you’ll find a wealth of resources, including FAQs, troubleshooting guides, and contact information for customer service.

Additionally, the website offers firmware updates, user manuals, and warranty details. For direct inquiries, use the support email or phone number provided on the site. TC Electronic is committed to ensuring your experience with the Polytune 3 is seamless and satisfactory.

FAQs

What tuning modes does the Polytune 3 offer? It includes polyphonic, chromatic, and strobe modes for precise tuning.
How do I switch between modes? Press and hold the footswitch to cycle through options.
Where can I find more info? Visit the TC Electronic website for the full manual and support.

11.1 Frequently Asked Questions

  • What is the best tuning mode for my guitar? Use polyphonic mode for quick tuning and strobe mode for precision.
  • How do I update the firmware? Visit the TC Electronic website and follow the installation guide.
  • Where can I find the manual? Download the full manual from the TC Electronic support page.
  • Can I switch between true bypass and buffered bypass? Yes, adjust the internal settings to change modes.

11.2 Troubleshooting Common Problems

  • If the tuner does not turn on, ensure the power supply is correctly connected and meets the 9V/100mA requirement.
  • If the LED display is dim, adjust the LED brightness settings or ensure the power supply is stable.
  • If the tuner is not switching modes, press and hold the footswitch for 2 seconds to cycle through modes.
  • If tuning is inaccurate, ensure the correct mode (polyphonic, chromatic, or strobe) is selected for your needs.
  • If the buffer is causing tone issues, switch between True Bypass and Buffered Bypass to find the best setting.

For unresolved issues, consult the full manual or contact TC Electronic support.

thomas and kilmann conflict mode instrument pdf

The Thomas-Kilmann Conflict Mode Instrument (TKI) is a widely recognized tool developed by Kenneth Thomas and Ralph Kilmann to assess individual conflict-handling behaviors. It identifies five distinct modes—competing, collaborating, compromising, avoiding, and accommodating—providing insights into how individuals manage disagreements. This framework helps improve communication, leadership, and teamwork by understanding personal preferences in conflict situations.

Overview of the TKI Model

The Thomas-Kilmann Conflict Mode Instrument (TKI) is a framework that assesses how individuals handle conflict by identifying five distinct modes: competing, collaborating, compromising, avoiding, and accommodating. Each mode represents a unique approach to managing disagreements, influenced by assertiveness and cooperation levels. The TKI model provides a practical tool for understanding personal conflict behaviors, enabling individuals to adapt their strategies for better outcomes. It emphasizes recognizing situational demands and aligning conflict-handling styles accordingly, fostering effective communication and collaboration in both personal and professional contexts.

Importance of Conflict Management in Organizations

Effective conflict management is crucial for fostering productivity, collaboration, and employee satisfaction in organizations. Poorly managed conflicts can lead to decreased morale, reduced teamwork, and increased turnover, ultimately harming organizational performance. The Thomas-Kilmann Conflict Mode Instrument (TKI) plays a vital role in addressing these challenges by providing insights into individual conflict-handling styles. By understanding and adapting these styles, organizations can enhance communication, decision-making, and problem-solving. Leaders and teams equipped with conflict management skills can navigate disagreements constructively, promoting a positive work environment and driving organizational success. The TKI serves as a valuable tool for cultivating these essential capabilities.

Structure of the TKI Assessment

The TKI assessment consists of a 30-item questionnaire that evaluates an individual’s preferences for handling conflict. Each item presents two statements, and respondents select the option that best reflects their typical behavior. These items are distributed across five conflict-handling modes: competing, collaborating, compromising, avoiding, and accommodating. After completing the questionnaire, a scoring process identifies the respondent’s scores for each mode, providing a personalized profile. This structure allows individuals to understand their dominant and secondary conflict styles, enabling them to adapt their approach to different situations effectively. The assessment is concise yet comprehensive, making it a practical tool for personal and professional development.

History and Development of the TKI

The Thomas-Kilmann Conflict Mode Instrument was developed by Kenneth Thomas and Ralph Kilmann in 1974 to assess individual conflict-handling behaviors, offering insights into effective conflict resolution strategies.

Creators: Kenneth Thomas and Ralph Kilmann

Kenneth Thomas and Ralph Kilmann, renowned experts in conflict resolution and organizational behavior, co-developed the Thomas-Kilmann Conflict Mode Instrument (TKI) in 1974. Thomas, known for his work in conflict management, and Kilmann, an organizational theorist, collaborated to create a framework that identifies five distinct conflict-handling styles. Their groundbreaking work revolutionized how individuals and organizations approach interpersonal and intergroup conflicts. The TKI has since become a cornerstone in leadership development, team-building, and conflict resolution training, helping individuals understand their preferred modes of handling disagreements and fostering more effective collaboration.

Origins of the Conflict Mode Instrument

The Thomas-Kilmann Conflict Mode Instrument (TKI) was developed in 1974 by Kenneth Thomas and Ralph Kilmann to address the need for a practical framework to understand and manage conflict in organizational settings. Their research focused on identifying distinct styles individuals use when handling disagreements. The TKI emerged from their work in organizational behavior and conflict resolution, aiming to provide a simple yet effective tool for assessing and improving interpersonal and team dynamics. This instrument has since become a cornerstone in conflict management research and practice, offering insights into how individuals navigate complex social interactions.

Evolution of the TKI Over Time

The Thomas-Kilmann Conflict Mode Instrument (TKI) was first introduced in 1974 by Kenneth Thomas and Ralph Kilmann. Over the years, it has undergone updates to reflect evolving research and organizational needs. The 2007 revision enhanced its psychometric properties, ensuring greater accuracy in measuring conflict styles. The TKI has also been adapted into digital formats, expanding its accessibility for global use. Additionally, translations into multiple languages have facilitated its application across diverse cultural contexts, making it a versatile tool for conflict management worldwide. These updates have ensured the TKI remains relevant and effective in modern organizational settings.

The Five Conflict-Handling Modes

The TKI identifies five conflict modes: competing, collaborating, compromising, avoiding, and accommodating. These modes describe how individuals handle disagreements, enabling effective conflict management strategies.

Competing: Definition and Characteristics

Competing is a conflict mode characterized by assertiveness and a focus on achieving one’s own goals, often at the expense of others. Individuals who favor this style prioritize winning, standing firm on their positions, and may use power or argumentation to influence outcomes. This mode is most appropriate in situations where quick decisions are necessary or when the stakes are high. However, excessive reliance on competing can lead to strained relationships and may overlook the value of collaboration or compromise.

Collaborating: Definition and Characteristics

Collaborating is a conflict mode focused on finding a win-win solution by exploring all perspectives and working together to satisfy both parties’ concerns. It combines high assertiveness and high cooperativeness, emphasizing mutual understanding and creative problem-solving. This approach fosters trust, strengthens relationships, and leads to sustainable outcomes. Collaborating is most effective in situations requiring commitment and where the stakes are high. However, it can be time-consuming and may not be practical in urgent or straightforward decisions, as it requires significant effort and open communication from all involved.

Compromising: Definition and Characteristics

Compromising involves seeking a middle ground that partially satisfies both parties, balancing assertiveness and cooperativeness. It is a pragmatic approach aimed at finding an acceptable solution quickly, often by making mutual concessions. This mode is useful in situations where time is limited, maintaining the relationship is crucial, or a temporary solution is needed. While compromising avoids conflict escalation, it may not lead to a fully satisfying outcome for either party, as it prioritizes expediency over optimal results. It is a flexible strategy but may lack the depth of collaboration or the decisiveness of competing.

Avoiding: Definition and Characteristics

Avoiding involves sidestepping or postponing conflict, often by withdrawing from the situation or ignoring the issue. This passive approach minimizes emotional involvement and potential confrontation. While it prevents immediate disagreements, it can lead to unresolved issues and long-term dissatisfaction. Avoiding is useful in trivial matters or when emotions run high, but it can hinder progress and relationship growth. It is characterized by low assertiveness and low cooperativeness, reflecting a reluctance to engage with the conflict directly. Over-reliance on avoiding may result in missed opportunities for meaningful resolution and personal or organizational stagnation.

Accommodating: Definition and Characteristics

Accommodating involves prioritizing others’ needs and goals over one’s own, often at the expense of personal concerns. This approach is characterized by high cooperativeness and low assertiveness, reflecting a willingness to yield to maintain harmony. While it can strengthen relationships and reduce tension, excessive accommodating may lead to resentment and neglect of personal priorities. It is most effective in situations where the issue is less important to the individual or when preserving the relationship is crucial. However, overuse can result in a lack of personal satisfaction and potential exploitation by others.

Theoretical Framework of the TKI

The TKI’s theoretical framework is rooted in two dimensions—assertiveness and cooperativeness—forming a dual-concern model that evaluates how individuals manage conflict by balancing personal and others’ needs.

Conflict Styles and Their Dimensions

The TKI model identifies five conflict-handling styles: competing, collaborating, compromising, avoiding, and accommodating. These styles are shaped by two key dimensions: assertiveness (pursuing one’s own needs) and cooperativeness (addressing others’ concerns). Competing is high assertiveness and low cooperativeness, while collaborating balances both. Compromising seeks a middle ground, avoiding minimizes both, and accommodating prioritizes others’ needs over one’s own; Understanding these dimensions helps individuals recognize their default conflict styles and adapt them to suit different situations, fostering more effective conflict resolution and improved interpersonal dynamics in both personal and professional settings.

Assessing Individual Preferences

The TKI assessment identifies individual preferences for conflict styles through a structured questionnaire. Participants select between paired statements reflecting different behaviors, revealing their tendencies toward competing, collaborating, compromising, avoiding, or accommodating. The instrument provides a personalized profile, highlighting strengths and areas for development. This self-awareness enables individuals to adapt their conflict strategies, fostering effective communication and collaboration. By understanding their default styles, individuals can develop flexibility, enhancing their ability to navigate diverse conflict situations. The TKI thus serves as a practical tool for personal growth, team dynamics, and organizational development, offering actionable insights for improved conflict management.

Understanding Conflict Situations

The TKI framework helps individuals analyze conflict situations by identifying their behavioral tendencies and the effectiveness of their approaches. By understanding their preferred conflict modes, individuals can better navigate disagreements, fostering constructive outcomes. The instrument emphasizes the importance of adaptability, encouraging individuals to align their strategies with the specific context of each conflict. This awareness enables more effective communication and decision-making, ultimately leading to improved relationships and organizational success. The TKI thereby provides a practical lens for understanding and addressing conflict, helping individuals and teams manage disputes more efficiently and collaboratively.

Practical Applications of the TKI

The TKI is widely used in team-building, leadership development, and conflict resolution. It enhances communication, collaboration, and decision-making, helping organizations manage disputes effectively and foster productive work environments.

Improving Team Dynamics

The TKI enhances team dynamics by identifying individual conflict styles, fostering open discussions, and encouraging collaboration. By understanding their preferred modes, team members can adapt their behaviors to complement each other, reducing friction and improving communication. This leads to more effective problem-solving, increased trust, and a constructive approach to resolving disagreements. The TKI helps teams recognize when to compete, collaborate, or compromise, ensuring diverse perspectives are valued and utilized. This awareness promotes a balanced and harmonious team environment, driving productivity and success in organizational settings. The practical insights from the TKI empower teams to navigate conflicts confidently and achieve shared goals.

Enhancing Leadership Skills

Leaders can significantly benefit from the TKI by gaining insights into their conflict-handling styles. This tool helps leaders recognize when to adopt a competitive, collaborative, or accommodating approach, ensuring effective decision-making. By understanding their tendencies, leaders can adapt their strategies to align with organizational goals and team needs. The TKI fosters self-awareness, enabling leaders to communicate more effectively and manage conflicts constructively. It also equips them with the skills to mediate disputes and build a positive work environment. Ultimately, the TKI empowers leaders to lead with confidence, flexibility, and a deeper understanding of their team’s dynamics, enhancing overall leadership effectiveness and organizational success.

Conflict Resolution in the Workplace

The Thomas-Kilmann Conflict Mode Instrument (TKI) is a valuable tool for effective conflict resolution in the workplace. By identifying five conflict-handling modes—competing, collaborating, compromising, avoiding, and accommodating—individuals can better navigate disagreements. The TKI helps employees and managers understand their tendencies, fostering improved communication and reducing misunderstandings. It encourages collaboration, promoting mutual respect and problem-solving. This approach minimizes unproductive conflict and enhances teamwork, leading to a more harmonious and productive work environment. Organizations can leverage the TKI to address conflicts promptly and constructively, ensuring alignment with shared goals and fostering a culture of cooperation and understanding.

The Assessment Process

The TKI assessment is a questionnaire evaluating an individual’s conflict-handling modes, providing insights into their behavior and preferences in conflict situations for personal development.

How the TKI Questionnaire Works

The TKI questionnaire consists of 30 pairs of statements, each describing different behavioral responses to conflict. Participants select the option that best reflects their typical behavior. The instrument measures preferences across five conflict-handling modes: competing, collaborating, compromising, avoiding, and accommodating. By evaluating responses, the TKI identifies an individual’s most and least preferred modes, offering insights into their conflict management style. The questionnaire is designed to be straightforward, allowing individuals to quickly determine their conflict management tendencies and how they align with the five modes. This tool is widely used for personal development and team-building initiatives.

Interpreting TKI Results

TKI results provide a personalized profile of an individual’s conflict-handling preferences across five modes: competing, collaborating, compromising, avoiding, and accommodating. The instrument generates scores for each mode, with higher scores indicating stronger tendencies. The results help individuals identify their dominant styles and areas for development. By understanding their preferences, users can recognize when their approach is effective and when it may be counterproductive; The results also encourage self-reflection on how to adapt their behavior to different conflict situations, fostering improved communication and conflict resolution. The TKI does not label styles as “good” or “bad” but offers a framework for growth.

Using TKI for Personal Development

The TKI provides individuals with insights into their conflict-handling styles, enabling personal growth and improved relationships. By identifying dominant modes, users can recognize strengths and areas for development. The instrument encourages self-awareness, helping individuals adapt their behavior to different situations. It fosters a deeper understanding of when to compete, collaborate, or compromise. Practical strategies are often included to guide users in refining their approaches. This self-reflection process empowers individuals to manage conflicts more effectively, enhancing communication and collaboration. The TKI serves as a powerful tool for fostering personal and professional development by promoting intentional conflict management.

Benefits of Using the TKI

The TKI enhances conflict resolution, improves communication, and fosters collaboration, helping individuals and teams manage disputes effectively. It promotes understanding of personal styles, leading to better outcomes.

Improved Communication

Improved communication is a key benefit of the TKI, as it helps individuals understand their conflict styles and how they interact with others. By identifying personal tendencies, such as competing or avoiding, individuals can adapt their communication strategies to better align with others’ needs. This fosters clearer dialogue, reduces misunderstandings, and enhances mutual respect. The TKI encourages active listening and empathy, enabling more effective exchange of ideas. Better communication leads to stronger relationships and more productive teamwork, ultimately contributing to organizational success. The TKI serves as a valuable tool for fostering a culture of open and constructive interaction.

Effective Conflict Resolution

The TKI enhances effective conflict resolution by providing individuals with insights into their conflict-handling styles. By understanding their tendencies, such as competing or collaborating, individuals can adopt strategies that better suit the situation. This leads to more balanced and constructive approaches to disagreements. The TKI helps minimize misunderstandings and promotes mutually beneficial solutions. It encourages individuals to consider the needs of all parties involved, fostering a collaborative environment. By aligning conflict resolution approaches with situational demands, the TKI empowers individuals to navigate disputes more effectively, leading to improved outcomes and stronger relationships. This tool is invaluable for creating a culture of constructive conflict management.

Enhanced Collaboration

The TKI fosters enhanced collaboration by helping individuals recognize and adapt their conflict styles to align with team goals. By understanding their tendencies, team members can shift from competing to collaborating, creating a more cohesive environment. This tool encourages open communication and active listening, reducing friction and enhancing trust. Collaborative approaches identified by the TKI promote shared problem-solving and collective decision-making. As teams learn to value diverse perspectives, they achieve more innovative and sustainable solutions. The TKI serves as a catalyst for building high-performing teams by aligning individual strengths with collaborative objectives, leading to greater synergy and organizational success.

Limitations and Criticisms of the TKI

The TKI relies on self-reporting, which may introduce bias. It oversimplifies conflict styles and lacks cultural adaptability, limiting its effectiveness in diverse contexts.

Potential Oversimplification of Conflict Styles

The TKI has been criticized for oversimplifying conflict styles by categorizing complex behaviors into just five modes. While this framework offers clarity, it may not fully capture the nuances of real-world conflicts, where individuals often exhibit hybrid or context-dependent behaviors. Critics argue that this reductionism can lead to misinterpretation of an individual’s conflict-handling preferences, as the model does not account for situational factors or cultural influences. Additionally, the reliance on self-reporting may result in biased responses, further limiting the instrument’s ability to provide a comprehensive understanding of conflict dynamics.

Cultural and Contextual Limitations

The TKI may not fully account for cultural differences in conflict resolution, as its framework was primarily developed in a Western context. Cultural norms, such as collectivism vs. individualism, can influence conflict styles, yet the TKI does not explicitly address these variations. Additionally, the instrument’s effectiveness may vary across different organizational or societal contexts, as power dynamics and social hierarchies can shape conflict behaviors. While the TKI provides a useful framework, its universal application may be limited by its lack of cultural adaptability, potentially leading to misinterpretation in diverse settings.

Dependence on Self-Reporting

The TKI relies on self-reporting, which can introduce biases and inaccuracies. Individuals may overestimate or underestimate their conflict-handling behaviors due to social desirability bias or lack of self-awareness. This reliance on personal perception limits the instrument’s objectivity, as respondents may not always provide truthful or accurate assessments. Additionally, cultural or contextual factors can influence how individuals interpret and report their behaviors, further complicating the reliability of the results; While the TKI is a valuable tool, its dependence on self-reporting means it should be used alongside other methods to ensure a more comprehensive understanding of conflict styles.

Impact of the TKI on Conflict Resolution

The TKI has significantly influenced conflict resolution by providing individuals and organizations with actionable insights and practical strategies to manage disputes effectively, fostering collaboration and reducing misunderstandings.

Real-World Applications

The TKI has been widely applied in various organizational settings to enhance team dynamics, leadership development, and workplace conflict resolution. Companies use the TKI to identify employees’ conflict-handling styles, fostering effective communication and collaboration. For instance, in team-building workshops, the TKI helps members understand their tendencies, promoting a balanced approach to conflict resolution. Leaders leverage TKI insights to mediate disputes constructively and improve decision-making processes. Additionally, the TKI is integrated into training programs, equipping professionals with practical strategies to navigate conflicts, ultimately driving organizational success and employee satisfaction. Its practical applications make it a valuable tool for modern organizations aiming to create a harmonious work environment.

Case Studies and Success Stories

Organizations worldwide have reported significant improvements after implementing the TKI. For instance, a multinational corporation used the TKI to resolve cross-departmental conflicts, enhancing collaboration and productivity. In the healthcare sector, medical teams applied TKI insights to improve communication, reducing misunderstandings during critical patient care decisions. Educational institutions have also benefited, with faculty members using the TKI to address departmental conflicts, fostering a more cohesive work environment. These success stories highlight how the TKI empowers individuals and teams to manage disagreements constructively, leading to enhanced workplace harmony and organizational effectiveness. The practical results underscore the TKI’s value in real-world conflict resolution scenarios.

Future Directions for the TKI

The TKI is expected to evolve with advancements in technology and cultural understanding. Future developments may include integrating AI for personalized feedback and expanding its accessibility through digital platforms. Researchers aim to refine the instrument to better address diverse cultural contexts, ensuring its relevance in global settings. Additionally, the TKI could be adapted for specific industries, such as healthcare or education, to tailor conflict resolution strategies. By continuously updating and broadening its scope, the TKI will remain a vital tool for fostering effective conflict management in an increasingly complex and interconnected world. Its adaptability will ensure its enduring impact on organizational and personal growth.

Resources for Further Learning

Explore Thomas and Kilmann’s original publications, online courses, and certified practitioner programs for deeper insights into conflict management. Additional resources include related psychological assessments for comprehensive understanding.

Recommended Reading

For deeper understanding, explore Thomas-Kilmann Conflict Mode Instrument by Kenneth Thomas and Ralph Kilmann (1974). Their book offers insights into conflict styles and practical applications. Additionally, Conflict Management: A Practical Approach by Thomas (2001) provides real-world strategies. Kilmann’s Quantum Organizations (2008) expands on conflict resolution within organizational structures. Supplementary readings include psychological testing books by Anastasi and Urbina, and articles by Ting-Toomey on cross-cultural conflict. These resources offer theoretical foundations and practical tools for effective conflict management, enhancing both personal and organizational development.

Online Courses and Workshops

Explore online courses and workshops that delve into the Thomas-Kilmann Conflict Mode Instrument (TKI) on platforms like Coursera, LinkedIn Learning, and Udemy. These resources offer in-depth training on conflict resolution, leadership, and team dynamics. Courses such as “Conflict Resolution Strategies” and “Leadership Skills for Managers” often incorporate the TKI framework. Participants gain practical insights into identifying and adapting conflict styles, enhancing collaboration, and improving workplace communication. Many workshops also provide interactive exercises and real-world case studies to apply TKI principles effectively. These online resources are ideal for professionals seeking to enhance their conflict management skills remotely.

TKI Certified Practitioners

TKI Certified Practitioners are professionals trained to effectively use the Thomas-Kilmann Conflict Mode Instrument in organizational settings. These experts undergo specialized training to interpret TKI assessments, helping individuals and teams understand their conflict-handling styles. They play a crucial role in fostering improved communication, collaboration, and conflict resolution within organizations; Certified practitioners often work with leaders, managers, and teams to develop strategies that align with their conflict styles, enhancing overall performance and workplace harmony. Their expertise is invaluable for creating a constructive conflict management culture. This certification is recognized globally as a mark of proficiency in applying the TKI framework.

The Thomas-Kilmann Conflict Mode Instrument offers a valuable framework for understanding and managing conflicts, enhancing collaboration and organizational success through improved communication and conflict resolution strategies.

The Thomas-Kilmann Conflict Mode Instrument (TKI) is a widely recognized tool for assessing conflict-handling behaviors, identifying five distinct modes: competing, collaborating, compromising, avoiding, and accommodating. Developed by Kenneth Thomas and Ralph Kilmann in 1974, the TKI helps individuals and organizations understand and manage conflicts effectively. It emphasizes the importance of adapting conflict styles to specific situations, fostering improved communication, collaboration, and leadership. By providing insights into personal preferences, the TKI enables individuals to develop strategies for resolving disputes constructively, ultimately enhancing teamwork and organizational success. Its practical applications make it a valuable resource for personal and professional growth.

The Role of TKI in Modern Organizations

The Thomas-Kilmann Conflict Mode Instrument (TKI) plays a pivotal role in modern organizations by fostering effective conflict resolution and collaboration. It provides a framework for understanding individual conflict styles, enabling employees and leaders to navigate disagreements constructively. By promoting self-awareness, the TKI enhances communication, reduces misunderstandings, and strengthens team dynamics. Organizations leverage the TKI to develop leadership skills, improve decision-making, and create a culture of constructive conflict, ultimately driving innovation and productivity. Its practical insights empower teams to align their conflict-handling approaches with organizational goals, ensuring a harmonious and efficient work environment.

Final Thoughts on Conflict Management

Conflict management is a cornerstone of successful organizations and relationships; The Thomas-Kilmann Conflict Mode Instrument (TKI) offers a robust framework for understanding and navigating conflicts effectively. By fostering self-awareness and collaboration, the TKI empowers individuals to adapt their approaches to different situations, promoting constructive dialogue and mutual understanding. Ultimately, effective conflict management is not about avoiding disagreements but leveraging them to drive innovation, strengthen relationships, and achieve shared goals. The TKI serves as a valuable tool for personal and professional growth, enabling individuals to manage conflicts in a way that fosters harmony and productivity in an ever-evolving workplace.

gravely ztx 52 service manual

Safety Precautions

Always read the manual carefully before operating. Wear protective gear and ensure proper footwear. Keep loose clothing tied back. Never operate near children or pets. Follow all hazard symbols and warnings to avoid accidents.

1.1 General Safety Guidelines

Always read the operator manual thoroughly before using the Gravely ZTX 52. Wear appropriate protective gear, including safety glasses, gloves, and sturdy footwear. Ensure loose clothing and long hair are tied back. Never operate the mower near children or pets. Keep the area clear of obstacles and avoid mowing on uneven terrain. Follow all safety decals and instructions provided in the manual. Ensure the mower is properly assembled and maintained before use. Never modify the equipment without authorization. Keep the operator seat and platform clean and free from debris. Familiarize yourself with controls and functions before starting the engine. Always shut off the engine and allow it to cool before performing maintenance. Use genuine parts and follow recommended torque specifications. Regularly inspect safety features like roll bars and seat belts. Follow all local safety regulations and guidelines for lawn mower operation.

1.2 Hazard Symbols and Warnings

Understand and observe all hazard symbols and warnings in the Gravely ZTX 52 service manual. These symbols alert you to potential dangers, ensuring safe operation and maintenance. Warning symbols indicate risks of injury or damage, while caution symbols highlight important safety procedures. Danger symbols signal extreme hazards that could result in severe injury or death. Always follow the instructions accompanying these symbols. For example, warnings may advise against operating the mower on uneven terrain or without proper guards in place. Familiarize yourself with the symbols located on the equipment and in the manual. Ignoring these warnings can lead to accidents or equipment damage. If a symbol is unclear, consult the manual or contact an authorized Gravely service center for clarification. Adhering to these guidelines is essential for your safety and the longevity of your mower.

Maintenance Schedule

Regular maintenance ensures optimal performance. Check transmission fluid levels monthly and sharpen mower blades every 50 hours. Inspect drive belts for wear and replace as recommended in the service manual.

2.1 Routine Maintenance Tasks

Routine maintenance is essential for optimal performance and longevity of your Gravely ZTX 52. Regularly inspect and clean the mower deck to prevent debris buildup. Check tire pressure and adjust as recommended. Inspect belts and hoses for wear or damage. Sharpen blades monthly to ensure clean cuts. Clean or replace the air filter as needed. Check engine oil levels before each use and top off if necessary. Grease pivot points every 50 hours of operation. Inspect hydraulic fluid levels and top off as required. Always refer to the manual for specific maintenance intervals and procedures to ensure proper functioning and safety.

2.2 Lubrication Intervals

Regular lubrication is essential to ensure smooth operation and extend the lifespan of your Gravely ZTX 52. Refer to the service manual for specific intervals, typically every 50-100 hours of use. Grease all moving parts, including pivot points and wheel bearings, using a high-quality lithium-based grease. For mowing decks, lubricate the spindle assemblies every 100 hours or as needed. Check the manual for exact specifications to avoid over- or under-lubrication. Proper lubrication prevents wear and tear, reducing the risk of costly repairs. Always use the recommended grease type to maintain optimal performance and protect against corrosion. Follow the schedule diligently to keep your mower running efficiently throughout the season.

Engine Service

Refer to the engine manual for service recommendations. Ensure proper oil levels and use recommended grades. Follow guidelines for maintenance to optimize performance and longevity; Regular service ensures reliable operation and prevents potential issues.

3.1 Engine Oil Recommendations

For optimal performance, use high-quality engine oil meeting API certification standards. Recommended viscosity is 10W-30 or 10W-40 for most conditions. Synthetic oil is advised for extreme temperatures. Always check the oil level before starting and top up as needed. Avoid overfilling, as it can damage the engine. Refer to the manual for specific oil capacity. Change the oil every 50-100 hours of operation, depending on usage. Use a filter wrench to remove the old oil filter and dispose of it responsibly. Replace with a genuine or equivalent oil filter. Proper oil maintenance ensures engine longevity and prevents overheating. Consult the manual for any specific recommendations tailored to your model. Always follow the manufacturer’s guidelines to maintain warranty coverage and performance.

3.2 Oil Change Procedure

To perform an oil change on your Gravely ZTX 52, start by warming up the engine slightly to ensure the oil drains easily. Locate the oil drain plug underneath the mower, typically near the front of the engine. Place a drain pan or a suitable container to catch the old oil. Use a socket wrench to remove the drain plug and allow the oil to flow completely. Once drained, replace the plug securely to avoid leaks. Next, remove the oil filter by hand or with a filter wrench. Dispose of the old filter responsibly. Install a new oil filter by hand tightening it in a clockwise direction. Finally, pour in the recommended engine oil through the filler cap. Refer to your manual for the correct oil type and capacity. Dispose of the used oil and filter properly at a recycling center; Always consult the service manual for specific oil change intervals to maintain your mower’s performance.

Transmission and Drive System

Check transmission fluid level regularly, ensuring it meets recommended specifications. Inspect for leaks and wear on drive belts. Maintain proper belt tension and replace if cracks or damage are detected.

4.1 Transmission Fluid Checks

Regular transmission fluid checks are essential for maintaining the performance and longevity of your Gravely ZTX 52. Locate the transmission fluid dipstick, typically found under the seat or near the transmission compartment. Pull out the dipstick and wipe it clean with a lint-free cloth. Reinsert the dipstick, then pull it out again to get an accurate reading. Check the fluid level against the manufacturer’s recommended range. If the level is low, top it off using the specified transmission fluid type. Inspect the fluid for color and consistency; dark or murky fluid indicates it needs to be changed. Always refer to the service manual for the correct fluid capacity and type; Proper fluid maintenance ensures smooth operation and prevents premature wear on transmission components. Schedule regular checks to avoid potential damage and extend the lifespan of your mower’s transmission system.

4.2 Drive Belt Replacement

To replace the drive belt on your Gravely ZTX 52, start by disconnecting the battery to ensure safety. Locate the belt tensioner and release the tension by rotating it counterclockwise. Remove the old belt and inspect the pulleys for debris. Install the new belt, ensuring proper alignment with the pulleys. Re-tension the belt according to the manufacturer’s specifications, typically between 50-70 ft-lbs of torque. Reconnect the battery and test the mower to ensure smooth operation. Replace the belt every 500 hours or as recommended in the service manual. Always refer to the parts diagram for correct belt routing and tensioning procedures. Proper belt maintenance ensures optimal performance and prevents premature wear on other components.

Mowing Deck Maintenance

Regularly inspect and clean the mowing deck to ensure optimal performance. Sharpen blades as needed to maintain cutting quality. Check for wear or damage and replace parts promptly to avoid issues.

5.1 Blade Sharpening Guidelines

Sharpening the mower blades regularly ensures optimal cutting performance and extends blade life. Dull blades tear grass, leaving it vulnerable to disease. Remove blades carefully, wearing gloves, and inspect for damage or wear. Use a grinder or file to sharpen edges to the recommended angle, typically 30° for standard blades. Avoid overheating, which can weaken the metal. After sharpening, balance the blades using a blade balancer to maintain even cutting and prevent vibration. Reinstall securely, ensuring all bolts are tightened properly. Sharpen blades at least twice a season or more frequently if mowing thick or abrasive grass. Always refer to the service manual for specific blade sharpening recommendations for your Gravely ZTX 52 model.

5.2 Deck Cleaning and Inspection

Regular cleaning and inspection of the mowing deck are essential for maintaining optimal performance and ensuring safety. Start by disconnecting the PTO and wearing protective gloves. Use a wire brush to remove grass clippings and debris from the deck’s underside. Check for any bent or damaged blades and replace them if necessary. Inspect the deck for signs of rust or corrosion and apply a rust-inhibiting coating if needed. Lubricate the deck’s pivot points and check belt tension to ensure proper operation. After cleaning, reattach any protective covers and ensure all bolts are tightened securely. Regular inspections help prevent issues like uneven cutting or premature wear. Always refer to the service manual for specific cleaning solutions and lubrication recommendations. Proper maintenance ensures your Gravely ZTX 52 continues to deliver consistent cutting results season after season.

Hydraulic System Maintenance

Regularly inspect hydraulic lines for leaks and damage. Ensure fluid levels meet specifications. Clean filters to maintain system efficiency. Refer to the manual for detailed hydraulic fluid recommendations and replacement intervals.

6.1 Hydraulic Fluid Level Check

Regularly checking the hydraulic fluid level is essential for maintaining optimal performance. Locate the hydraulic fluid reservoir, typically marked with a label or symbol. Ensure the mower is on level ground and the engine is off. Remove the reservoir cap and insert the dipstick to measure the fluid level. If the level is below the recommended mark, add the specified hydraulic fluid type, as indicated in the manual. Avoid overfilling, as this can damage the system. Use a clean rag to wipe the dipstick before reinserting it for an accurate reading. Always refer to the manual for the correct fluid specification and capacity. Check for any signs of leakage around the reservoir or lines and address them promptly to prevent system failure. Regular checks ensure smooth operation and extend the lifespan of the hydraulic components.

6.2 Hydraulic System Troubleshooting

Identify issues in the hydraulic system by checking for leaks, low fluid levels, or unusual noises. Inspect hoses and connections for damage or wear. If the system lacks power, ensure the hydraulic fluid level is correct and the filter is clean. Replace the filter if clogged. Check for air in the system, which can cause erratic performance. Bleed the system if necessary. If the hydraulic pump fails, inspect for debris or excessive wear. Consult the service manual for specific diagnostic procedures. Address any issues promptly to prevent further damage. Always refer to authorized service centers for complex repairs. Regular maintenance, such as fluid changes and hose inspections, can prevent many hydraulic system problems. Keep the hydraulic components clean and well-lubricated for optimal performance. If unsure, contact a professional to avoid compromising the system’s functionality.

Troubleshooting Common Issues

Check for engine issues by reviewing service recommendations. Address poor cutting performance by ensuring blades are sharp and properly aligned. Refer to the manual for detailed solutions and warranty benefits. Always register your product for extended support.

7.1 Poor Cutting Performance

Poor cutting performance on your Gravely ZTX 52 can be caused by dull blades, incorrect mowing deck height, or a clogged deck. Regular blade sharpening and deck cleaning are essential. Check blade balance and ensure they are properly tightened. Uneven cutting may indicate misaligned or bent blades, which require adjustment or replacement. If the issue persists, inspect the mower deck for damage or debris buildup. Refer to the service manual for detailed troubleshooting steps and maintenance schedules to ensure optimal performance. Proper blade maintenance and deck care are critical for achieving a clean, even cut. Always follow safety guidelines when performing inspections or repairs.

7.2 Engine Start Issues

If the engine fails to start, check the battery first. Ensure terminals are clean and connections are secure. A weak or dead battery is a common issue. Verify the starter motor is functioning properly. If clicking sounds occur, the starter may be faulty. Check for blown fuses or tripped circuit breakers in the electrical system.Inspect the ignition switch for damage or wear. Ensure the spark plug is clean and properly gapped. If issues persist, consult the service manual or contact an authorized Gravely service center for professional assistance. Always follow safety guidelines when diagnosing electrical or ignition-related problems.

Battery and Electrical System

Charge the battery in a well-ventilated area, avoiding open flames. Regularly inspect electrical connections for damage or corrosion. Refer to the manual for specific charging procedures and electrical system checks.

8.1 Battery Charging Procedures

Before charging the battery, ensure the mower is turned off and the ignition switch is in the “OFF” position. Disconnect the negative battery cable to prevent electrical discharge. Use a high-quality battery charger specifically designed for lead-acid batteries. Set the charger to the correct voltage and amperage settings recommended in the manual. Avoid overcharging, as it can damage the battery. Monitor the charging process and ensure the area is well-ventilated to prevent hydrogen gas buildup. Once fully charged, unplug the charger and reconnect the negative cable. Always wear protective gloves and eyewear when handling batteries. If unsure, consult the service manual or contact an authorized Gravely service center for assistance. Proper charging ensures optimal performance and extends battery life.

8.2 Electrical System Checks

Regularly inspect the electrical system to ensure proper function. Check all wires, connections, and components for damage or wear. Verify the battery voltage and connections. Use a multimeter to test for short circuits or voltage drops. Inspect switches and fuses for proper operation. Ensure the seat switch and wiring harness are secure and free from damage. Test all lights and accessories to confirm they are working correctly. Refer to the service manual for specific procedures and diagrams. Address any issues promptly to prevent system failures. Always disconnect the battery before performing electrical repairs. Consult an authorized service center if unsure about any procedures.

Warranty and Service Registration

Product registration is crucial for activating warranty benefits. Ensure registration at purchase to validate coverage. Use authorized service centers for warranty-related maintenance. The service manual provides details for registration and locating authorized service centers.

9.1 Product Registration Importance

Registering your Gravely ZTX 52 is crucial for activating the warranty and ensuring proper support. Product registration provides proof of ownership and eligibility for warranty services. It also allows Gravely to contact you with important updates, recalls, or safety notices. Registering ensures access to exclusive resources, such as parts diagrams and troubleshooting guides. Failure to register may void warranty benefits or delay service responses. Visit the official Gravely website or use the provided registration form to complete the process. Keep your purchase receipt and serial number handy for verification. Registration is a simple step that protects your investment and enhances your ownership experience. Always ensure your product is registered to enjoy full benefits and support from Gravely.

9.2 Authorized Service Centers

For maintenance and repairs, always use authorized Gravely service centers. These centers employ trained technicians familiar with your ZTX 52 model. They use genuine parts, ensuring reliability and warranty compliance. To find an authorized center, visit Gravely’s official website or contact their customer support. Using unauthorized services may void your warranty and compromise performance. Schedule regular maintenance at these centers to maintain your mower’s optimal condition and extend its lifespan. Avoid third-party services unless approved by Gravely. Authorized centers provide accurate diagnoses and efficient repairs, minimizing downtime. Keep your ZTX 52 operating at peak performance by trusting only certified professionals. Contact Gravely support for a list of authorized centers near you. Proper servicing ensures safety, efficiency, and longevity of your equipment. Always verify the center’s authorization before scheduling any work.

Additional Resources

Download the service manual and parts diagrams for free from the official Gravely website. Visit Gravely.com for additional resources and support. Contact authorized service centers for further assistance.

10.1 Downloading the Service Manual

Accessing the Gravely ZTX 52 service manual is straightforward. Visit the official Gravely website or authorized service portals. Manuals are available for free download in PDF format. Ensure compatibility with your device for easy viewing. Use the search function to locate specific sections quickly. Refer to the manual for detailed instructions and safety guidelines. Regularly check for updates to ensure you have the latest version. For convenience, printed manuals can also be purchased if preferred. Always prioritize reading the manual before performing any maintenance or repairs. This resource is essential for understanding your equipment’s capabilities and ensuring proper operation. Secure your warranty by registering your product upon purchase, as outlined in the manual. Utilize the provided parts diagrams and catalogs for accurate repairs and replacements. Downloading the manual is a crucial step in maintaining your Gravely ZTX 52 effectively and safely.

10.2 Parts Diagrams and Catalogs

Parts diagrams and catalogs for the Gravely ZTX 52 are essential for identifying and ordering replacement components. These resources provide detailed illustrations and part numbers, ensuring accuracy when servicing or repairing your mower. You can download the parts manual for free, which includes diagrams for components like the engine, transmission, and deck. Specific parts such as arm rest kits, seat switches, and belts are listed with their respective numbers. Use the search function in the catalog to locate parts by model number or description. Always refer to the official Gravely website or authorized dealers for genuine parts. This ensures compatibility and maintains your mower’s performance. If unsure about a part, consult the manual or contact customer support for assistance.

aerochamber size guide

Proper sizing is crucial for effective medication delivery. This guide helps patients and caregivers choose the right AeroChamber size‚ ensuring optimal treatment outcomes. Learn about size options‚ Flow-Vu features‚ and mask fit to enhance inhaler therapy.

Overview of AeroChamber Sizes

AeroChamber sizes are designed to accommodate various patient needs‚ ensuring optimal medication delivery through proper fit and functionality. The chambers are categorized into small‚ medium‚ and large‚ catering to different age groups and face sizes. Small sizes are typically recommended for young children‚ while medium and large sizes are designed for older children and adults‚ respectively. Each size ensures a proper seal and comfortable fit‚ which are essential for effective medication delivery. The Flow-Vu Inhalation Indicator is a key feature that helps confirm correct use‚ providing visual feedback during inhalation. Portability and ease of use make AeroChamber an ideal choice for on-the-go medication administration. By offering a range of sizes‚ AeroChamber ensures that patients of all ages can find a device that meets their specific needs‚ enhancing treatment outcomes and overall health management.

Importance of Proper Sizing for Effective Medication Delivery

Proper sizing of an AeroChamber is essential for effective medication delivery. Using the correct size ensures that the medication is delivered directly to the lungs‚ where it is most needed. A poorly fitting chamber can lead to reduced medication efficiency‚ as particles may not reach the lungs effectively. The Flow-Vu Inhalation Indicator plays a crucial role in confirming proper use‚ helping to coordinate actuation with inhalation. Ensuring a proper seal‚ especially for masks‚ is vital for children and adults alike. Proper sizing enhances comfort and ensures that the device works as intended‚ maximizing the therapeutic benefits of inhaled medications. By selecting the right size‚ patients can achieve better control over their respiratory conditions and improve overall health outcomes.

Understanding AeroChamber Sizes

AeroChamber sizes are categorized into small‚ medium‚ and large‚ catering to different age groups and needs. Proper sizing ensures optimal medication delivery and comfort for users.

Small‚ Medium‚ and Large: Key Differences

AeroChamber sizes—small‚ medium‚ and large—are designed to meet the needs of different age groups and preferences. The small size is ideal for young children‚ while the medium suits older children and teenagers. The large size is typically recommended for adults or those with larger lung capacities. Each size ensures proper medication delivery by accommodating varying inhalation flows and mask fits. The Flow-Vu Inhalation Indicator helps confirm correct use across all sizes. Proper sizing is essential for optimal therapy outcomes‚ as it ensures the medication reaches the lungs effectively. Consulting a healthcare professional is recommended to determine the most suitable size for individual needs.

Age Recommendations for Each Size

AeroChamber sizes are tailored to accommodate different age groups‚ ensuring effective medication delivery. The small size is recommended for young children‚ typically those aged 5 and under‚ while the medium size suits older children and teenagers. The large size is designed for adults or individuals with larger lung capacities. Proper sizing ensures the mask fits comfortably‚ preventing medication loss and maximizing therapeutic benefits. For children under 5‚ pediatric masks are available to ensure a proper seal. The Flow-Vu Inhalation Indicator aids in confirming correct use across all age groups. Always consult a healthcare professional to determine the most appropriate size for individual needs‚ as proper fit is essential for optimal therapy outcomes.

Mask Sizing: Ensuring Proper Fit

Proper mask sizing is critical for effective medication delivery with AeroChamber. The mask should fit comfortably‚ enclosing the mouth and nose without obstructing vision. For children‚ selecting the correct pediatric mask size ensures a proper seal‚ preventing medication loss; Adults and older children typically use larger masks. The Flow-Vu Inhalation Indicator helps confirm correct use‚ ensuring the mask is sealing properly. A well-fitting mask minimizes leaks‚ maximizing the amount of medication delivered to the lungs. Regularly check the fit‚ especially for growing children‚ to maintain effectiveness. Proper mask sizing is essential for achieving optimal treatment outcomes and ensuring the AeroChamber functions as intended. Always consult a healthcare professional if unsure about the correct size or fit.

Features of AeroChamber Plus Flow-Vu

The AeroChamber Plus Flow-Vu offers advanced features like the Flow-Vu Inhalation Indicator‚ ensuring proper medication delivery. Its anti-static design and portable construction make it ideal for on-the-go use‚ enhancing therapy effectiveness.

Flow-Vu Inhalation Indicator: How It Works

The Flow-Vu Inhalation Indicator is a visual tool designed to ensure proper use of the AeroChamber Plus. It moves during inhalation‚ indicating that the patient is breathing in correctly. This helps coordinate the actuation of the inhaler with the inhalation‚ ensuring medication is delivered effectively. The indicator provides reassurance for patients and caregivers that the device is being used properly. Its clear visibility makes it easier to confirm that the medication is reaching the lungs. This feature is particularly useful for training and improving adherence to treatment. By ensuring proper technique‚ the Flow-Vu Inhalation Indicator enhances the overall effectiveness of inhaler therapy‚ making it a valuable component of the AeroChamber Plus design.

Anti-Static Valved Holding Chamber: Benefits

The Anti-Static Valved Holding Chamber in the AeroChamber Plus is designed to reduce static cling‚ preventing medication particles from adhering to the chamber walls. This ensures a consistent and accurate dose delivery with each inhalation. The anti-static properties enhance the efficiency of medication dispersion‚ making it more effective for patients. Additionally‚ the one-way valve system allows for easy exhalation‚ improving patient comfort during use. This feature is particularly beneficial for children and individuals with limited lung capacity‚ as it simplifies the inhalation process. The chamber’s durability and ease of cleaning further contribute to its long-term reliability‚ making it a key component in effective aerosol therapy. Overall‚ the anti-static technology optimizes medication delivery‚ ensuring better treatment outcomes for users of all ages.

Portability and Ease of Use

The AeroChamber Plus Flow-Vu is designed with portability and ease of use in mind‚ making it ideal for on-the-go medication delivery. Its lightweight and compact design allows patients to carry it effortlessly‚ ensuring consistent treatment regardless of location. The chamber’s user-friendly design simplifies the inhalation process‚ making it accessible for both children and adults. The Flow-Vu Inhalation Indicator provides visual confirmation of proper use‚ enhancing confidence in medication delivery. Additionally‚ the device’s portability ensures that patients can maintain their treatment regimen without interruption‚ whether at home‚ school‚ or while traveling. This combination of convenience and effectiveness makes the AeroChamber Plus Flow-Vu a practical choice for managing respiratory conditions efficiently. Its design caters to a wide range of needs‚ promoting better health outcomes through reliable and straightforward use.

Guidelines for Selecting the Right AeroChamber

Selecting the right AeroChamber involves considering age‚ face size‚ and medication needs. Proper mask fit and particle size analysis ensure optimal delivery. Consult healthcare professionals for personalized advice.

How to Measure and Choose the Correct Size

Choosing the correct AeroChamber size involves measuring the patient’s face and understanding their age and medication needs. Use the provided sizing chart to determine the best fit. Ensure the mask cushion surrounds the face without obstructing sight or comfort. For children‚ select sizes based on age recommendations‚ while adults should opt for larger models. Proper sizing ensures effective medication delivery and prevents waste. Coordinating with healthcare professionals can provide personalized recommendations. The Flow-Vu Inhalation Indicator helps confirm correct use‚ while anti-static chambers improve medication distribution. Portability and ease of use make AeroChamber an ideal choice for on-the-go therapy. Always prioritize proper fit and functionality for optimal outcomes.

Role of Healthcare Professionals in Size Selection

Healthcare professionals play a vital role in selecting the correct AeroChamber size for patients. They assess individual needs‚ including age‚ facial structure‚ and medication requirements‚ to recommend the most suitable size. Professionals demonstrate proper use‚ ensuring patients understand how to achieve an effective seal and coordinate inhalation with actuation. They also provide personalized advice‚ considering factors like portability and ease of use. Regular follow-ups with healthcare providers ensure the chosen size remains appropriate over time‚ especially for growing children. Their expertise helps optimize medication delivery‚ improving treatment outcomes and patient satisfaction. By guiding patients through the selection process‚ healthcare professionals ensure the AeroChamber is used effectively and comfortably.

Particle Size Analysis and Medication Delivery

Particle size analysis is crucial for ensuring effective medication delivery via AeroChamber; The device is designed to handle varying particle sizes‚ ensuring optimal lung deposition. Proper sizing of the AeroChamber ensures that medication particles are not too large to be trapped in the chamber or too small to be exhaled. This balance is essential for maximizing therapeutic benefits. Studies show that AeroChamber’s Anti-Static Valved Holding Chamber improves particle size distribution‚ enhancing medication delivery. For children‚ smaller particle sizes are critical due to narrower airways. Healthcare professionals use particle size analysis to recommend the most suitable AeroChamber size‚ ensuring medication reaches the lungs effectively. This tailored approach improves treatment outcomes and patient satisfaction‚ making AeroChamber a reliable choice for inhalation therapy.

Additional Considerations

Specialized chambers cater to unique needs‚ while proper mask fit and portability enhance usability. Regular maintenance and healthcare professional guidance ensure optimal performance and personalized treatment outcomes for patients.

Specialized Chambers for Different Needs

AeroChamber offers specialized chambers to cater to diverse patient requirements. The AeroChamber Plus Flow-Vu is designed for ages 5 and older‚ combining portability with effective medication delivery. For specific needs‚ the AeroChamber HC MV is tailored for use with metered-dose inhalers‚ ensuring precise dosing. These chambers are crafted to address unique conditions‚ such as asthma or COPD‚ providing tailored solutions. By offering a range of sizes and features‚ AeroChamber ensures that patients‚ from children to adults‚ can find a device that suits their specific needs. This customization enhances treatment outcomes and improves overall patient comfort. Specialized chambers not only optimize medication delivery but also simplify the process of managing respiratory conditions effectively. They are designed to meet the varied demands of different patient groups‚ ensuring personalized care and improved health outcomes.

Optimizing Inhaler Use with AeroChamber

Using an AeroChamber enhances the effectiveness of inhaler therapy by ensuring medication reaches the lungs. The Flow-Vu Inhalation Indicator helps coordinate actuation with inhalation‚ providing visual confirmation of proper use. This feature ensures that medication is delivered accurately‚ maximizing therapeutic benefits. The anti-static valved holding chamber minimizes particle loss‚ improving drug delivery efficiency. Proper mask sizing is essential for a good seal‚ preventing medication waste and ensuring optimal results. The portability of AeroChamber devices makes them ideal for on-the-go use‚ while their ease of use simplifies the process for patients of all ages. By addressing key factors like particle size and inhalation technique‚ AeroChamber optimizes medication delivery‚ leading to better treatment outcomes and improved respiratory health management.

Cleaning and Maintenance Tips

Regular cleaning and maintenance of your AeroChamber are essential for optimal performance and hygiene. Rinse the chamber with warm water after each use‚ ensuring no medication residue remains. Allow it to air dry thoroughly to prevent moisture buildup. Avoid using harsh chemicals or abrasive materials‚ as they may damage the device. Replace worn-out masks or seals promptly to maintain a proper fit. Cleaning helps prevent bacterial growth and ensures consistent medication delivery. Always follow the manufacturer’s guidelines for care and maintenance. Proper upkeep extends the life of your AeroChamber and ensures it continues to function effectively. Regularly inspect the device for any signs of wear or damage and address them promptly to maintain its efficiency and effectiveness.

Proper AeroChamber sizing enhances medication delivery and treatment outcomes. Choose the right size‚ use Flow-Vu for assurance‚ and maintain your device for optimal performance and hygiene. Breathe easier with confidence.

Final Thoughts on AeroChamber Size Guide

Choosing the right AeroChamber size is vital for effective medication delivery. Proper sizing ensures optimal treatment outcomes‚ while features like the Flow-Vu Inhalation Indicator provide assurance of correct use. Mask fit is equally important‚ as it ensures a proper seal and efficient delivery of medication. Healthcare professionals play a key role in guiding patients to the correct size‚ considering factors like age and specific needs. Regular cleaning and maintenance of the device are essential to ensure its longevity and effectiveness. By following the AeroChamber size guide and maintaining proper usage habits‚ patients can achieve better control over their respiratory conditions. Always consult a healthcare provider for personalized recommendations to maximize the benefits of AeroChamber therapy.

Resources for Further Information

For additional guidance‚ consult the official AeroChamber website‚ which offers detailed size charts and instructional videos. Medical journals like the American Journal of Respiratory and Critical Care Medicine provide evidence-based recommendations. Patient education portals such as Healthline and Mayo Clinic also offer comprehensive guides on AeroChamber use. Healthcare professionals can refer to clinical guidelines from organizations like the American Thoracic Society for in-depth particle size analysis and device selection. Local pharmacies and medical supply stores often provide hands-on demonstrations and sizing support. Online forums and support groups can share real-world experiences‚ aiding in informed decisions. Always verify information through reputable sources to ensure accuracy and relevance to your specific needs.

calorie density chart pdf

Calorie density refers to the number of calories per unit weight of food, emphasizing water and fiber content. Understanding this concept helps in making informed dietary choices for effective weight management and balanced nutrition.

Definition of Calorie Density

Calorie density, also known as energy density, measures the number of calories per unit weight of food, typically expressed as calories per 100 grams or calories per pound. It reflects how much energy is packed into a specific volume of food. Foods high in water and fiber, such as fruits and vegetables, generally have lower calorie density, while processed foods and fats tend to have higher calorie density. This concept is crucial for understanding how different foods contribute to overall calorie intake. By focusing on calorie density, individuals can make informed choices about portion sizes and nutrient balance. Lower-calorie-density foods often provide greater satiety, helping to manage hunger and support weight management goals. This metric is a key tool for creating balanced meal plans and promoting sustainable eating habits.

Relevance of Calorie Density in Diet Planning

Calorie density plays a pivotal role in effective diet planning by helping individuals manage their food intake and achieve their nutritional goals. Understanding calorie density enables people to make informed decisions about portion sizes and food choices, ensuring they consume the right amount of energy while maintaining satiety. This concept is particularly valuable for weight management, as it allows individuals to eat satisfying volumes of food without exceeding calorie limits. By focusing on low-calorie-density foods, such as fruits, vegetables, and lean proteins, dieters can create balanced meals that promote sustained energy and overall health. The calorie density chart serves as a practical guide, providing clear visual comparisons of various foods and aiding in the development of personalized meal plans. This approach not only supports weight loss but also fosters a healthier relationship with food, making it easier to maintain long-term dietary balance.

Importance of Calorie Density

Calorie density is crucial for weight management and sustainable eating, helping individuals feel full with fewer calories by focusing on water and fiber-rich foods.

Role in Weight Management

Calorie density plays a pivotal role in weight management by helping individuals create a calorie deficit while feeling satisfied. Foods with low calorie density, such as fruits and vegetables, provide fewer calories per unit weight, allowing for larger portions without excessive calorie intake. This approach reduces hunger and increases satiety, making it easier to stick to a weight loss plan. By focusing on foods high in water and fiber content, individuals can naturally consume fewer calories without feeling deprived. This method is particularly effective for sustainable weight loss, as it emphasizes nutrient-dense foods that promote overall health. Using a calorie density chart can help identify optimal food choices, enabling individuals to make informed decisions that align with their weight management goals. This strategy not only supports weight loss but also encourages a balanced and maintainable eating pattern.

Understanding Food Volume and Nutrients

Food volume and nutrient content are closely linked to calorie density, influencing how satisfying and nutritious a meal is. Foods high in water and fiber, such as fruits and vegetables, have lower calorie density but greater volume, providing essential nutrients without excess calories. These foods are rich in vitamins, minerals, and antioxidants, promoting overall health. Conversely, processed foods often lack water and fiber, leading to higher calorie density and lower nutrient value. Understanding this relationship helps in selecting foods that offer both satiety and nutritional benefits. By prioritizing whole, unprocessed foods, individuals can maintain a balanced diet that supports long-term health and weight management. This approach ensures that meals are not only filling but also packed with the nutrients necessary for optimal bodily function, making it easier to adhere to a healthy eating plan.

Key to Sustainable Weight Loss

Calorie density is a cornerstone of sustainable weight loss, as it focuses on maximizing nutrient intake while managing calorie consumption. Foods with low calorie density, such as fruits, vegetables, and lean proteins, provide fewer calories per unit weight, allowing individuals to feel full without overeating. This approach encourages a natural calorie deficit, essential for weight loss, while reducing hunger and cravings. By emphasizing whole, unprocessed foods, which are high in water and fiber, calorie density promotes satiety and long-term adherence to a healthy diet. Unlike restrictive diets, this method fosters a balanced and enjoyable eating pattern, making it easier to maintain weight loss over time. The calorie density chart serves as a practical tool to guide food choices, ensuring that meals are both nourishing and aligned with weight management goals.

Practical Guide to Using the Chart

The calorie density chart helps identify foods with fewer calories per unit weight, aiding in portion control and meal planning for sustainable weight management and balanced nutrition;

How to Read and Interpret the Chart

Reading and interpreting a calorie density chart involves understanding the relationship between food weight and calorie content. The chart typically lists foods with their calorie density, measured in calories per 100 grams or per pound. Foods are categorized into groups such as very low, low, medium, and high calorie density. Low-calorie-density foods, like vegetables and fruits, provide fewer calories per gram, while high-calorie-density foods, such as oils and nuts, offer more calories in smaller portions. By identifying these categories, you can make informed decisions about portion sizes and nutrient balance. The chart also helps differentiate between foods that are nutrient-dense but low in calories, making it easier to plan meals that promote satiety and support weight management. Understanding the chart enables you to prioritize foods that offer more volume and nutrients while keeping calorie intake in check, aligning with your dietary goals.

Calculating Calorie Density of Foods

Calorie density is calculated by dividing the total calories in a food by its weight in grams or pounds. The formula is: Calorie Density = Total Calories / Weight (in grams or pounds). This measurement helps determine how many calories are packed into a specific volume of food. For example, a food with 100 calories per 100 grams has a low calorie density, while one with 500 calories per 100 grams has a high calorie density. Water and fiber content significantly influence calorie density, as they add volume without contributing many calories. Foods like fruits and vegetables naturally have high water content, making them lower in calorie density. This calculation is essential for categorizing foods and creating balanced meal plans. By using a calorie density chart, you can quickly identify which foods provide more nutrients per calorie, helping you make healthier choices. This method simplifies portion control and supports sustainable weight management.

Creating a Balanced Meal Plan

A balanced meal plan using a calorie density chart focuses on combining foods from all categories to ensure nutrient variety and satiety. Start by identifying high-, medium-, and low-calorie density foods. Incorporate plenty of low-calorie density options like vegetables and fruits to provide volume and nutrients without excess calories. Pair these with moderate portions of medium-density foods, such as whole grains and lean proteins, for sustained energy. High-calorie density foods, like nuts and oils, should be used sparingly to avoid overconsumption. Plan meals around a variety of colors and textures to maximize nutrient intake. Use the chart to guide portion sizes and ensure meals are visually appealing and satisfying. This approach supports weight management while promoting overall health and energy levels. By balancing calorie density with nutrient density, you can create meals that are both nourishing and enjoyable.

Categories of Calorie Density

Calorie density categorizes foods based on calories per unit weight. Categories include very low-calorie density foods (e.g., vegetables), low (e.g., fruits), medium (e.g., whole grains), and high (e.g., fats).

Very Low-Calorie Density Foods

Very low-calorie density foods are typically rich in water and fiber, making them highly satiating while providing fewer calories. Examples include non-starchy vegetables like leafy greens, cucumbers, and tomatoes, as well as fruits such as strawberries, citrus, and berries. These foods often contain less than 0.6 calories per gram, making them ideal for weight management. Broth-based soups and salads with minimal dressing also fall into this category. The high water content in these foods contributes to their low calorie density, allowing individuals to consume larger portions without exceeding calorie goals. Incorporating these foods into meals can help reduce overall calorie intake while maintaining satisfaction and providing essential nutrients. This category is particularly beneficial for those aiming to lose weight or maintain a healthy diet, as it emphasizes nutrient-dense, low-energy foods that promote feelings of fullness and support long-term dietary balance.

Low-Calorie Density Foods

Low-calorie density foods offer a balance of nutrients and energy, typically ranging from 0.7 to 1.5 calories per gram. These foods are ideal for those seeking to manage their weight without feeling deprived. Examples include whole grains like brown rice, quinoa, and oats, as well as lean proteins such as chicken, turkey, and fish. Legumes, low-fat dairy products, and certain fruits and vegetables also fall into this category. These foods provide sustained energy and essential nutrients while keeping calorie intake in check. Incorporating low-calorie density foods into meals allows for portion flexibility, helping individuals maintain a healthy weight and overall well-being. They are a practical choice for balanced nutrition, offering both satisfaction and nutritional value without excessive caloric intake.

Medium-Calorie Density Foods

Medium-calorie density foods fall within the range of 1.6 to 3.9 calories per gram, offering a moderate energy content relative to their weight. These foods are ideal for balancing meals, as they provide sufficient energy without overloading on calories. Examples include bread, crackers, cheese, and higher-fat meats like lean beef or pork. These foods are often more calorie-dense than low-calorie options but still offer a reasonable portion size for those managing their weight. Incorporating medium-calorie density foods into a meal plan allows for variety and satisfaction while maintaining nutritional balance. They are particularly useful for individuals who need to manage their calorie intake but still enjoy a diverse diet. By understanding their calorie density, one can better portion these foods to align with dietary goals, ensuring a mix of nutrients and energy without excessive consumption.

High-Calorie Density Foods

High-calorie density foods are those with a significant amount of calories packed into a small volume, typically exceeding 4 calories per gram. These foods, such as oils, nuts, seeds, dried fruits, and processed snacks like chips and cookies, are energy-dense but often low in water content. While they can be beneficial for those needing to gain weight, they require careful portion control for weight management. These foods vary in nutritional value; some, like nuts, offer healthy fats and proteins, while others, such as sugary snacks, provide empty calories. Understanding their calorie density helps in making informed dietary choices, balancing nutrient intake, and maintaining health. The calorie density chart likely categorizes these foods based on specific caloric thresholds, guiding appropriate portion sizes and integration into a balanced diet. Mindful consumption is key to avoiding overindulgence and supporting overall well-being.

Nutritional Insights

Understanding calorie density helps balance diets by prioritizing nutrient-rich, low-calorie foods, promoting satiety and sustainable weight management while ensuring adequate nutrition for overall health and well-being.

The Science Behind Calorie Density

Calorie density, or energy density, measures calories per unit weight of food, typically expressed as calories per 100 grams or calories per pound. It is influenced by a food’s water and fiber content, which naturally lower calorie density. Foods high in water, like fruits and vegetables, tend to have fewer calories per gram, while processed foods, often stripped of water and fiber, have higher calorie density. This concept is rooted in the physiological response to food volume, where foods with lower calorie density provide a sense of fullness with fewer calories. Understanding this science helps in designing diets that promote satiety and support weight management by focusing on nutrient-dense, low-calorie foods. The calorie density chart PDF provides a visual guide to compare foods, aiding in informed dietary choices aligned with health and weight goals.

Debunking Common Myths

While calorie density is a valuable tool for weight management, several myths surround its application. One common misconception is that all low-calorie-density foods are inherently healthy, which is not always true. For example, some processed foods may have low calorie density but lack essential nutrients. Another myth is that high-calorie-density foods should be completely avoided, but they can be part of a balanced diet when consumed in moderation. Additionally, some believe that calorie density alone determines satiety, but factors like protein content and fiber also play significant roles. Understanding these nuances helps in making informed dietary choices rather than relying on oversimplified assumptions.

Role of Macronutrients

Macronutrients—carbohydrates, proteins, and fats—play a crucial role in determining calorie density. Each macronutrient provides a different number of calories per gram: carbohydrates and proteins offer about 4 calories per gram, while fats provide 9 calories per gram. Foods high in water and fiber content, such as fruits and vegetables, tend to have lower calorie density, whereas processed foods, which are often high in fats and added sugars, have higher calorie density. Understanding the macronutrient composition helps in interpreting calorie density charts effectively. For instance, lean proteins and whole grains are moderate in calorie density, making them ideal for balanced meals. By focusing on foods with a balance of macronutrients and high nutrient density, individuals can create satisfying and nutritious meal plans that support overall health and weight management goals.

Practical Applications

Calorie density charts help plan meals, grocery shop, and control portions effectively. They guide food choices for weight management, ensuring satisfaction and nutrient balance while meeting dietary goals.

Maintaining Weight with Calorie Density

Maintaining weight with calorie density involves balancing high- and low-calorie foods to meet daily energy needs without overeating. By focusing on foods with lower calorie density, such as vegetables and lean proteins, individuals can enjoy larger portions while consuming fewer calories. This approach helps prevent weight gain by naturally regulating calorie intake. Incorporating water-rich and high-fiber foods, which have lower calorie density, supports feelings of fullness and satisfaction. Conversely, limiting highly processed or high-calorie-density foods, like oils and sweets, helps avoid excessive calorie consumption. Using a calorie density chart, individuals can make informed choices, ensuring they meet nutritional needs while maintaining a healthy weight. This method promotes a balanced diet and sustainable weight management without restrictive eating.

Enhancing Meal Satisfaction

Calorie density plays a crucial role in enhancing meal satisfaction by allowing individuals to enjoy larger portions of nutrient-dense foods without excessive calorie intake. Foods with low calorie density, such as fruits, vegetables, and lean proteins, provide volume and fiber, which contribute to feelings of fullness. By incorporating these foods into meals, individuals can satisfy their hunger while maintaining a balanced calorie intake. High water content in foods like soups and salads further enhances satiety, making meals more satisfying. Understanding calorie density helps in selecting foods that offer both nutritional value and volume, reducing the likelihood of overeating. This approach not only supports weight management but also promotes overall dietary satisfaction, ensuring meals are both enjoyable and healthful; By leveraging the calorie density chart, individuals can make informed choices to create meals that are filling, nutritious, and aligned with their dietary goals.

Budget-Friendly Eating Strategies

Using a calorie density chart can help create budget-friendly meal plans by focusing on nutrient-dense, cost-effective foods. Foods with low calorie density, such as whole grains, legumes, and vegetables, often provide more volume and satisfaction at a lower cost. Incorporating these into meals reduces the need for expensive, high-calorie ingredients. Planning meals around seasonal produce and bulk purchases of staples like beans and grains can further lower expenses. Additionally, broth-based soups and salads are affordable and filling, leveraging water content to enhance satiety. By prioritizing foods with high nutrient-to-cost ratios, individuals can enjoy balanced, satisfying meals without overspending. This approach aligns with financial goals while promoting healthy eating habits, ensuring that meals are both economical and nutritious. The calorie density chart serves as a valuable tool for making informed, budget-conscious food choices that support overall well-being.

Additional Resources

Explore additional resources, including comprehensive guides and articles, to deepen your understanding of calorie density. Visit our website for downloadable charts and expert tips to enhance your nutrition journey effectively.

Accessing the Calorie Density Chart PDF

Accessing the Calorie Density Chart PDF is straightforward and convenient. You can find it on trusted nutrition websites, health portals, or platforms offering dietary resources. Many sources provide free downloads, while others may require signing up for newsletters or creating an account. Ensure you download the chart from reputable sources like the USDA or well-known nutrition websites to guarantee accuracy. Once downloaded, print the chart on high-quality paper for clear visibility. You can also save it digitally on your phone or tablet for easy reference during shopping or meal planning. Some websites offer customizable versions, allowing you to tailor the chart to your specific dietary needs. By having the chart handy, you can make informed decisions about portion sizes and food choices, aiding in weight management and balanced nutrition. Always verify the source and date to ensure the information is up-to-date and reliable.

Printing and Using the Chart Effectively

Printing the Calorie Density Chart PDF ensures easy access and daily use. For the best results, print it on high-quality paper or cardstock to enhance readability. Consider laminating the chart to protect it from wear and tear, especially if you plan to use it frequently. Place it in a visible location, such as on your refrigerator or near your dining table, to serve as a constant reminder for mindful eating. When using the chart, start by identifying your daily calorie goals and compare them with the calorie densities of your favorite foods. This helps in portion control and meal planning. You can also use the chart to balance your plate by combining low- and medium-calorie density foods. Over time, this practice will help you develop healthier eating habits and make sustainable choices for weight management and overall nutrition.

Integrating the Chart into Daily Life

Integrating the Calorie Density Chart PDF into your daily routine can simplify healthy eating and support long-term weight management. Begin by referencing the chart during meal planning to balance high- and low-calorie density foods. This approach ensures satiety while maintaining a calorie deficit for weight loss. When grocery shopping, use the chart to make informed choices, prioritizing foods with higher water and fiber content. At mealtimes, refer to the chart to gauge portion sizes and avoid overeating. Pairing low-calorie density options like vegetables with moderate ones like whole grains creates balanced meals. Over time, this practice helps develop intuition about food choices, making healthy eating second nature. By consistently using the chart, you can cultivate sustainable habits that promote overall well-being and nutritional balance without feeling deprived.

manual link

What is Manual Link Building?

Manual link building involves acquiring high-quality backlinks through personalized outreach, content creation, and relationship building, offering control over link context and sustainability.

Definition of Manual Link Building

Manual link building is a strategic SEO practice where backlinks are acquired through deliberate, human-driven efforts. Unlike automated methods, it involves personalized outreach, content creation, and relationship-building to secure high-quality, relevant backlinks. This approach allows for full control over link placement, context, and relevance, ensuring sustainability and alignment with SEO guidelines. By focusing on quality over quantity, manual link building fosters long-term results and enhances a website’s authority and visibility in search engines.

Key Differences from Automated Link Building

Manual link building differs from automated link building in its approach and outcomes. Automated methods rely on software to generate backlinks quickly, often resulting in low-quality or irrelevant links. In contrast, manual link building involves human effort, personal outreach, and strategic content creation to secure high-quality backlinks. This approach ensures greater control over link placement, relevance, and context, leading to more sustainable and authoritative results. Manual link building prioritizes quality over quantity, aligning with SEO best practices and avoiding risks associated with automated tactics, such as spam penalties or irrelevant link acquisition.

Benefits of Manual Link Building

Manual link building enhances SEO by acquiring high-quality, relevant backlinks, improving brand authority, and ensuring long-term, sustainable results with controlled link context and placement.

Control Over Link Quality and Context

Manual link building allows precise control over link quality and context, ensuring backlinks are placed on authoritative, relevant websites. This targeted approach enhances SEO performance and brand credibility, avoiding spammy or irrelevant links. By carefully selecting domains with high authority and topical relevance, businesses can maintain a natural link profile. This control ensures each link contributes positively to the website’s ranking and user experience, aligning with search engine guidelines for sustainable growth.

Long-Term Results and Sustainability

Manual link building is a time-tested strategy that delivers long-term results and sustainability. By acquiring high-quality, relevant backlinks, businesses can achieve stable and consistent search engine rankings. Unlike automated methods, manual link building focuses on nurturing relationships and creating valuable content, ensuring that links remain relevant over time; This approach minimizes the risk of penalties and builds a solid foundation for sustained organic growth. With careful planning and execution, manual link building fosters lasting improvements in website visibility and authority.

Improved Brand Authority and Credibility

Manual link building significantly enhances a brand’s authority and credibility by securing backlinks from reputable, industry-related websites. High-quality links signal to search engines that your content is trustworthy and valuable, boosting your site’s reputation. Consistent, relevant backlinks also improve brand visibility, making your business appear more established and reliable. Additionally, manual link building fosters relationships with influencers and thought leaders, further cementing your brand’s credibility. Over time, this strategic approach helps build a strong online presence, making your brand a trusted resource in your niche.

Manual Link Building Strategies

Effective strategies include guest posting, creating linkable assets, personalized outreach, leveraging online communities, and utilizing social media to acquire high-quality, relevant backlinks.

Guest Posting and Content Collaboration

Guest posting involves writing informative articles for other websites in exchange for backlinks. This strategy builds relationships and authority. Content collaboration allows co-creation with influencers or sites, enhancing credibility and reach. Both methods ensure natural, relevant links that align with SEO guidelines, avoiding spam tactics. They focus on topical relevance, improving brand visibility and trust. Regular monitoring of link performance ensures long-term benefits, making these tactics sustainable and effective for manual link building efforts.

Creating Linkable Assets

Creating linkable assets involves developing high-quality, engaging, and valuable content that naturally attracts backlinks. Examples include infographics, in-depth guides, case studies, and research reports. These assets are designed to provide unique insights or solutions, making them shareable and link-worthy. By focusing on relevance and utility, linkable assets encourage others to reference them, enhancing your website’s authority and visibility. This strategy aligns with white-hat practices, ensuring sustainable and ethical link acquisition. It also fosters long-term results, as valuable content continues to attract links over time, contributing to improved brand credibility and organic traffic growth.

Personalized Outreach and Relationship Building

Personalized outreach is a cornerstone of manual link building, focusing on tailored communication to establish meaningful connections with influencers, bloggers, and website owners. By crafting unique, relevant messages that address specific needs, you build trust and foster collaboration. Relationship building involves ongoing engagement, such as commenting on posts, sharing content, and offering value without direct link requests. This approach ensures that outreach efforts are genuine and mutually beneficial, leading to high-quality backlinks and long-term partnerships that enhance your website’s authority and visibility in a sustainable manner, aligning with ethical SEO practices. This method stands out as it prioritizes quality over quantity, ensuring each connection is meaningful and impactful.

Leveraging Online Communities and Forums

Leveraging online communities and forums is a powerful manual link-building strategy that involves active participation in niche-specific discussions. By contributing valuable insights and expertise, you build trust and authority within these platforms. Sharing relevant content or resources naturally leads to opportunities for backlinks, as users often reference or share helpful information. This approach focuses on genuine engagement, ensuring that links are earned organically. Targeting forums like Reddit, Quora, or industry-specific groups allows you to connect with your audience, enhance brand visibility, and acquire high-quality backlinks in a white-hat, sustainable manner.

Utilizing Social Media Platforms

Utilizing social media platforms is a strategic approach to manual link building that involves sharing high-quality content and engaging with your target audience. Platforms like LinkedIn, Twitter, and Facebook allow you to connect with industry professionals, influencers, and potential link partners. By participating in relevant discussions, sharing valuable insights, and promoting your content, you can attract attention and earn backlinks naturally. Social media also enables relationship-building, which can lead to collaborative opportunities and organic link acquisitions; Consistent engagement and networking on these platforms can significantly enhance your manual link-building efforts and improve your website’s online presence.

Step-by-Step Guide to Manual Link Building

Research target websites, craft personalized outreach messages, create high-quality content, and build relationships with influencers to secure relevant and sustainable backlinks effectively.

Research and Identify Target Websites

Identifying the right websites is crucial for effective manual link building. Start by researching websites within your niche or industry that are relevant, authoritative, and contextually aligned with your content. Use SEO tools to evaluate metrics like domain authority, organic traffic, and engagement. Prioritize websites that offer guest posting opportunities, forums, or resource pages. Ensure the sites are free from spam and have a strong reputation. This step ensures that your outreach efforts are targeted and increase the likelihood of securing high-quality, sustainable backlinks. Avoid irrelevant or low-authority sites to maintain link equity and SEO compliance.

Crafting Personalized Outreach Messages

Crafting personalized outreach messages is essential for successful manual link building. Avoid generic templates and instead tailor your approach to the recipient, highlighting mutual benefits. Address the recipient by name, reference their work, and explain why your content aligns with their audience. Keep the message concise, clear, and free of jargon. Emphasize the value proposition and ensure the tone is professional yet approachable. Proofread your message to avoid errors and ensure clarity. Personalized outreach increases the likelihood of positive responses and fosters meaningful relationships, making it a cornerstone of effective link-building campaigns.

Creating High-Quality, Relevant Content

Creating high-quality, relevant content is a cornerstone of manual link building. It involves developing valuable, informative, and engaging material that naturally attracts backlinks. Focus on topics that resonate with your audience and align with your niche. Use strategic formats like guides, infographics, or tutorials to make your content shareable and link-worthy. Ensure your content addresses specific needs or solves problems, making it more likely to be referenced by others. By prioritizing originality and insight, you create assets that stand out and earn organic backlinks, enhancing your site’s authority and visibility.

Building Relationships with Influencers

Building relationships with influencers is a key component of manual link building. By connecting with industry leaders and thought leaders, you can secure backlinks through guest posts, mentions, or collaborations. Start by engaging with their content, commenting on their work, and sharing their posts. Over time, build a rapport that leads to collaboration opportunities. Influencers can introduce your content to their audience, creating natural backlinks. Approach them with a clear value proposition, ensuring mutual benefit. This strategy fosters long-term partnerships and enhances your site’s credibility and reach through trusted voices in your niche.

Tools and Resources for Manual Link Building

Utilize SEO tools like Ahrefs and SEMrush for link prospecting, Canva for creating visual assets, and Mailchimp for outreach to streamline your manual link-building efforts effectively.

SEO Tools for Link Prospecting

SEO tools like Ahrefs, SEMrush, and Moz simplify link prospecting by identifying high-authority websites, analyzing backlinks, and providing filters like domain rating and topical relevance to refine targets. These tools allow users to export lists and track outreach efforts, ensuring efficient and strategic link building. Their robust features help in uncovering niche-specific opportunities, making manual link-building campaigns more effective and focused on quality over quantity.

Content Creation Tools for Linkable Assets

Content creation tools like Canva, Adobe Spark, and Photoshop help design visually appealing graphics and infographics, while platforms like Grammarly ensure error-free writing. Tools like Surfer SEO and Clearscope assist in optimizing content for topical relevance, enhancing its appeal for backlinks. Additionally, tools such as HubSpot’s Blog Ideas Generator provide inspiration for creating highly shareable and linkable assets. These resources empower creators to produce compelling, high-quality content that naturally attracts links, aligning with the goals of manual link-building strategies.

Email Outreach Tools for Effective Communication

Email outreach tools like Mailchimp, BuzzStream, and Hunter.io streamline communication, enabling personalized and efficient outreach. Mailchimp helps craft professional email campaigns, while Hunter.io simplifies finding email addresses. BuzzStream organizes outreach efforts and tracks responses, ensuring follow-ups. These tools enhance the clarity and effectiveness of outreach messages, making it easier to connect with website owners and influencers. By leveraging these resources, marketers can maintain consistent communication and build meaningful relationships, which are vital for successful manual link-building campaigns.

Common Mistakes to Avoid in Manual Link Building

Common mistakes include spamming, over-optimization, and ignoring website relevance. Poor targeting and neglecting link performance monitoring can lead to penalties and credibility loss, harming SEO efforts.

Spamming and Over-Optimization

Spamming and over-optimization are common pitfalls in manual link building. Spamming involves acquiring links from irrelevant or low-quality sites, which can trigger search engine penalties. Over-optimization refers to excessive use of keyword-rich anchor texts, making links appear unnatural. Both practices violate SEO guidelines and can lead to decreased rankings. It’s crucial to focus on acquiring links from authoritative, topically relevant sources and maintaining a natural anchor text distribution to ensure compliance with search engine algorithms and avoid detrimental consequences.

Ignoring Website Relevance and Authority

Ignoring website relevance and authority is a critical mistake in manual link building. Acquiring links from irrelevant or low-authority sites can harm your SEO efforts and lead to penalties. Search engines prioritize links from authoritative, topically relevant sources, as they indicate trust and credibility. Targeting irrelevant websites wastes time and resources, offering little to no value. Always prioritize sites with high domain authority and content alignment to ensure your backlinks contribute positively to your SEO strategy and avoid potential setbacks.

Not Monitoring Link Performance

Not monitoring link performance is a significant oversight in manual link building. Without tracking, it’s impossible to gauge the effectiveness of acquired backlinks. Over time, links can become broken, or their quality may degrade, negatively impacting SEO efforts. Regular monitoring helps identify and address issues like broken links or spammy anchor text. By analyzing metrics such as referral traffic and domain authority, you can refine your strategy and ensure your backlink profile remains healthy. Neglecting this step risks wasting resources and missing opportunities to optimize your link-building efforts for better search engine performance and organic growth.

Best Practices for Manual Link Building

Adopt a natural approach, focus on relevance, and ensure compliance with SEO guidelines to build a sustainable and ethical backlink profile that boosts search rankings.

Maintaining a Natural Link Profile

Maintaining a natural link profile is crucial for SEO success. This involves acquiring backlinks gradually and ensuring they come from diverse, high-quality sources. Avoid sudden spikes in link acquisition, as search engines may interpret this as manipulative. Instead, focus on earning links through valuable content, genuine outreach, and organic sharing. A natural link profile aligns with search engine guidelines, reducing the risk of penalties. Over time, this approach builds trust and authority, enhancing your website’s visibility and ranking in search results.

Focusing on Topical Relevance

Focusing on topical relevance ensures backlinks come from sources closely related to your niche, enhancing SEO effectiveness. This approach aligns with search engine algorithms, which prioritize content relevance. By targeting websites with similar themes, you build a natural, authoritative link profile. Topical relevance also attracts targeted traffic, increasing engagement and conversion rates. Avoid generic or unrelated links, as they may harm credibility. Instead, pursue links from domains that resonate with your audience, fostering long-term SEO success and maintaining compliance with search engine guidelines. This strategy reinforces your website’s authority and improves its visibility in search results.

Ensuring Compliance with SEO Guidelines

Ensuring compliance with SEO guidelines is crucial for maintaining a penalty-free link profile. Manual link building allows you to avoid black-hat practices like spamming or over-optimization, ensuring all acquired links are natural and relevant. By adhering to search engine policies, such as Google’s Webmaster Guidelines, you safeguard your website from penalties. This approach fosters trust with search engines and your audience, promoting long-term success. Always prioritize quality, relevance, and transparency in your link-building efforts to stay aligned with SEO best practices and avoid harmful tactics that could jeopardize your website’s rankings and credibility.

Manual link building remains essential for SEO success, offering control over quality and context. It ensures long-term results and aligns with future trends in digital marketing.

The Importance of Manual Link Building in Modern SEO

Manual link building is a cornerstone of modern SEO, enabling websites to gain high-quality backlinks that enhance visibility and authority. Unlike automated methods, it ensures links are relevant, contextual, and aligned with search engine guidelines. This approach fosters sustainable growth, as manually acquired links are more likely to remain valuable over time. By prioritizing quality and relevance, manual link building helps businesses build trust with search engines and users, driving organic traffic and improving rankings. It remains a critical strategy for achieving long-term SEO success in a competitive digital landscape.

Future Trends in Manual Link Building

Manual link building will continue to evolve, emphasizing personalization, relationship-building, and topical relevance. Future trends include leveraging AI for outreach optimization while maintaining human touch. Focus will shift to acquiring links from authoritative, niche-relevant sites, ensuring natural link profiles. Increased emphasis on evergreen content and strategic collaborations will dominate. Businesses will prioritize long-term partnerships over quick gains, aligning with SEO guidelines to avoid penalties. The integration of social proof and community engagement will also play a role, making manual link building a cornerstone of sustainable SEO strategies in the years to come.

actuary exam p study guide

Actuary Exam P is a foundational exam for aspiring actuaries, focusing on probability concepts and statistical foundations. It is the first step in the SOA certification process, testing candidates’ understanding of probability theory, distributions, and stochastic processes. Passing Exam P demonstrates a strong grasp of mathematical principles essential for actuarial work. Preparation requires a deep study of probability concepts, random variables, and practical applications. This guide provides a comprehensive overview to help candidates navigate the exam effectively.

1.1 Overview of Actuary Exam P

Actuary Exam P is a foundational professional exam focusing on probability concepts and statistical foundations. It assesses understanding of random variables, probability distributions, and stochastic processes. The exam consists of multiple-choice questions, requiring precise problem-solving skills. Candidates must demonstrate mastery of theoretical and practical applications of probability theory. With a duration of 180 minutes, it includes 30 questions, testing both core knowledge and analytical abilities. Thorough preparation is essential to succeed in this critical first step toward actuarial certification.

1.2 Importance of Passing Exam P

Passing Actuary Exam P is crucial for advancing in the actuarial profession, as it validates a candidate’s understanding of probability and statistical concepts. It is a foundational requirement for further certifications and demonstrates analytical skills essential for risk assessment. Employers often mandate this certification for entry-level actuarial roles, making it a competitive edge in the job market. Success in Exam P builds confidence and equips professionals to tackle complex problems in insurance, finance, and related fields. It also aligns with long-term career goals, enabling progression toward advanced designations like C and F exams.

1.3 Brief History and Evolution of the Exam

Actuary Exam P, introduced by the Society of Actuaries (SOA), has a history dating back to the early 2000s as part of the modern certification process. Initially designed to assess probability concepts, it has evolved to include advanced statistical methods and practical applications. The exam syllabus has been updated periodically to reflect industry advancements and emerging techniques. Once a 3-hour exam with 30 questions, it remains a cornerstone for actuarial education, ensuring candidates possess a robust understanding of probability theory. Its evolution underscores the profession’s commitment to relevance and rigor in actuarial training.

Understanding the Exam Format

Actuary Exam P is a multiple-choice exam with 30 questions, lasting 3 hours. It assesses understanding of probability concepts and their practical applications in actuarial contexts.

2.1 Exam Structure and Duration

Actuary Exam P consists of 30 multiple-choice questions and has a 3-hour duration. The exam is divided into two sections, with a 15-minute break in between. Candidates are advised to allocate their time wisely, spending approximately 6 minutes per question. The format ensures a balanced mix of theoretical and practical applications, testing both problem-solving skills and knowledge of probability concepts. Proper time management is crucial to complete all questions and review answers before submission.

2.2 Types of Questions and Question Formats

Actuary Exam P features multiple-choice questions (MCQs) that test both theoretical knowledge and practical application of probability concepts. Questions are designed to assess problem-solving skills, with some requiring mathematical calculations and others focusing on conceptual understanding. The exam includes scenario-based problems, probability distribution applications, and stochastic process questions. Candidates should expect a mix of straightforward and complex questions, with some requiring step-by-step reasoning. Familiarity with question formats and strategies for managing time effectively are essential for success. Practical exposure through past papers and practice exams is highly recommended.

2.3 Grading System and Passing Criteria

Actuary Exam P uses a numerical grading system, with scores ranging from 0 to 10. The passing score is 6, indicating satisfactory performance. The exam is graded based on the number of correct answers, with no negative marking for incorrect responses. Results are typically reported as “Pass” or “Fail,” with detailed score breakdowns provided post-exam. Understanding the grading criteria helps candidates gauge their readiness and focus on areas needing improvement. Achieving a score of 6 demonstrates a solid grasp of probability concepts and problem-solving skills required for actuarial practice.

Syllabus and Topics Covered

Actuary Exam P covers probability concepts, random variables, distributions, joint and conditional probability, and correlation. Mastering these topics is essential for actuarial work and real-world applications.

3.1 Probability Concepts and Foundations

Probability concepts form the core of Actuary Exam P, introducing fundamental principles like basic probability rules, conditional probability, and Bayes’ theorem. Candidates explore probability measures, axioms, and properties, essential for understanding randomness. The section covers discrete and continuous probability spaces, Venn diagrams, and probability laws. Key topics include probability mass functions, cumulative distribution functions, and joint probabilities. Mastery of these foundational concepts is crucial for solving real-world actuarial problems and progressing through subsequent exams.

3.2 Random Variables and Their Properties

Random variables are mathematical representations of uncertain outcomes, forming a cornerstone of probability theory. They can be discrete, taking distinct values, or continuous, spanning an interval. Key properties include expected value, variance, and standard deviation, which summarize central tendency and dispersion. Probability mass functions (PMF) for discrete variables and probability density functions (PDF) for continuous variables describe likelihoods. Understanding these concepts is vital for modeling real-world uncertainty and calculating probabilities, essential skills for actuaries. Mastery of random variables is critical for advancing in probability theory and practical applications.

3.3 Probability Distributions (Discrete and Continuous)

Probability distributions are crucial for modeling outcomes in actuarial science. Discrete distributions, like binomial and Poisson, describe outcomes with distinct values. Continuous distributions, such as normal and uniform, represent outcomes over an interval. Key properties include probability mass functions (PMF) for discrete variables and probability density functions (PDF) for continuous ones. Understanding these distributions is essential for quantifying uncertainty and calculating probabilities in real-world scenarios. Mastery of both types is vital for solving problems in Exam P and applying probabilistic models in actuarial practice effectively.

3.4 Joint and Conditional Probability

Joint probability measures the likelihood of two events occurring simultaneously, while conditional probability assesses the probability of one event given another has occurred. Both concepts are fundamental for analyzing dependencies between variables. Bayes’ Theorem is a key tool for updating probabilities based on new information. Understanding these principles is essential for solving complex probability problems in Exam P. Practical applications include risk assessment in insurance and portfolio management. Mastery of joint and conditional probability enhances the ability to model real-world scenarios and make informed decisions in actuarial contexts, ensuring accurate and reliable outcomes.

3.5 Correlation and Regression Analysis

Correlation measures the strength and direction of the relationship between two variables, while regression analysis models this relationship to predict outcomes. Understanding these concepts is crucial for analyzing data in actuarial science. Correlation coefficients, such as Pearson’s r, quantify linear relationships, and regression techniques, like simple and multiple linear regression, help predict variable behavior. These tools are essential for risk assessment, predictive modeling, and understanding variability in actuarial contexts. Mastery of correlation and regression enhances the ability to analyze and interpret data, aiding in informed decision-making and accurate forecasting in financial and insurance applications.

Study Materials and Resources

Key resources include textbooks like A First Course in Probability by Ross, online platforms such as Coaching Actuaries, and practice exams from Actex. Flashcards and concise study guides are also invaluable tools for focused preparation and quick revision.

4.1 Recommended Textbooks and Study Guides

For Actuary Exam P preparation, A First Course in Probability by Sheldon Ross is highly recommended for its comprehensive coverage of probability concepts. Actex Study Guides are also widely used, offering detailed explanations and practice problems. Additional resources include ASM Study Manuals and the SOA’s official study materials, which align closely with the exam syllabus. These textbooks and guides provide a solid foundation for understanding probability theory, random variables, and distributions, ensuring thorough preparation for the exam.

4.2 Online Platforms and Courses

Online platforms like Coaching Actuaries and ADAPT provide comprehensive resources for Exam P preparation. These platforms offer video lessons, interactive tools, and practice exams tailored to the syllabus. They cover probability concepts, random variables, and distributions in depth. Additionally, they include progress tracking and personalized study plans. These resources are ideal for self-paced learning and complement traditional study materials. Utilizing these platforms ensures a well-rounded preparation and enhances understanding of complex topics through engaging and structured content.

4.3 Practice Exams and Past Papers

Practice exams and past papers are essential tools for Exam P preparation, offering real exam conditions and question formats. They help identify weak areas and improve time management. Regular practice builds familiarity with probability problems and reinforces learning. Past papers provide insights into recurring topics and difficulty levels. Candidates should review mistakes thoroughly to understand gaps in knowledge. Simulating exam conditions ensures readiness and boosts confidence. Consistent practice is crucial for mastering probability concepts and achieving success in the exam.

4.4 Flashcards and Summarized Notes

Flashcards and summarized notes are powerful tools for active learning and quick revision. They help break down complex probability concepts into digestible chunks, enabling easy recall. Flashcards can focus on key formulas, definitions, and properties of distributions. Summarized notes condense lengthy topics into concise, understandable formats. Use mnemonics or memory aids to enhance retention. Regularly review and update these materials to reinforce learning. Digital tools like Anki offer spaced repetition for optimal retention. These resources are invaluable for mastering probability theory and staying organized during preparation.

Developing a Study Plan

Create a structured study plan with realistic goals, timelines, and milestones. Allocate specific hours to each topic, ensuring consistent progress. Schedule regular breaks and revision sessions.

5.1 Setting Realistic Goals and Milestones

Setting realistic goals and milestones is crucial for effective preparation. Start by breaking down the syllabus into manageable sections, assigning specific deadlines for each topic. Prioritize challenging areas like probability distributions and stochastic processes. Use a calendar to track progress, ensuring steady advancement. Milestones should include completing practice problems, reviewing weak areas, and taking mock exams. Regularly assess and adjust goals to maintain momentum and motivation throughout the preparation journey for Actuary Exam P.

5.2 Allocating Time for Each Topic

Allocate study time based on the weight and difficulty of each topic. Dedicate more hours to complex areas like probability distributions and random variables. Assign specific time blocks for each section, ensuring balanced progress. For example, spend 30% of your time on probability foundations, 25% on random variables, and 25% on distributions. Regularly review and adjust your schedule to reflect your mastery of each topic, ensuring no area is overlooked. Consistent time allocation helps maintain momentum and thorough preparation for Actuary Exam P.

5.3 Incorporating Regular Revision Sessions

Incorporate regular revision sessions to reinforce learning and prevent knowledge gaps. Schedule weekly revision sessions to review previously studied topics, focusing on weak areas. Use summaries, flashcards, and practice problems to actively engage with the material. Regular revision helps solidify understanding, enhances retention, and builds confidence. Consistency is key to mastering complex probability concepts and ensuring readiness for Actuary Exam P. Balance revision with new topics to maintain steady progress and avoid burnout during preparation.

5.4 Balancing Study with Work and Personal Life

Balancing study with work and personal life is crucial for maintaining productivity and well-being. Create a detailed schedule to allocate specific times for studying, working, and personal activities. Set realistic goals to avoid overcommitting and ensure adequate rest; Use time-management techniques like the Pomodoro method to stay focused during study sessions. Regular breaks and leisure activities can prevent burnout. Communicate your commitments to employers and family to gain their support. Consistency in balancing these aspects will help maintain progress in exam preparation while preserving overall life balance.

Effective Study Techniques

Utilize active learning, mnemonics, and focused study sessions to enhance retention. Teach concepts to others to deepen understanding and identify knowledge gaps. Regular practice exams refine test-taking skills and build confidence.

6.1 Active Learning and Engagement

Active learning involves engaging with material through discussions, problem-solving, and interactive exercises. For Actuary Exam P, candidates should solve practice problems, participate in study groups, and explain concepts aloud. This method enhances understanding and retention. Interactive tools, such as online platforms and flashcards, also promote engagement. Regularly testing oneself ensures familiarity with exam formats and strengthens problem-solving skills. By actively participating in the learning process, candidates can identify weak areas early and address them effectively, leading to better exam performance and confidence.

6.2 Using Mnemonics and Memory Aids

Mnemonics and memory aids are powerful tools to enhance retention and recall of complex concepts. Techniques like acronyms, rhymes, and mind maps help organize information, making it easier to remember. For Actuary Exam P, creating associations or visual cues can aid in recalling probability formulas and distributions. Mnemonics also reduce study time by consolidating information into memorable formats. By incorporating these strategies, candidates can improve retention, especially for abstract concepts, and perform better under exam pressure. These methods complement active learning and focused study sessions effectively.

6.3 Focused Study Sessions and Time Management

Effective time management is crucial for success in Actuary Exam P. Focused study sessions involve dedicating specific blocks of time to individual topics, minimizing distractions, and maintaining concentration. Prioritize challenging areas and allocate time accordingly. Regular breaks and a structured schedule help maintain productivity. Techniques like the Pomodoro method can enhance focus during study sessions. By managing time efficiently, candidates can cover the syllabus thoroughly, ensuring a balanced approach to preparation. This methodical strategy reduces stress and maximizes learning outcomes, leading to improved exam performance.

6.4 Teaching Concepts to Others

Teaching concepts to others is a powerful study technique that reinforces your own understanding. Explaining ideas to peers or mentors helps identify knowledge gaps and solidifies retention. Actively engaging with the material by teaching it forces you to organize thoughts clearly and articulate complex ideas simply. This method also enhances problem-solving skills and builds confidence. Additionally, teaching others fosters collaboration and motivation, creating a supportive study environment. By sharing knowledge, you deepen your grasp of probability concepts and develop communication skills essential for professional success.

Practice Exams and Assessment

Regular practice exams are crucial for assessing readiness and identifying weak areas. They simulate real exam conditions, helping candidates manage time and build confidence effectively.

7.1 Importance of Regular Practice

Regular practice is vital for mastering Actuary Exam P. It helps reinforce probability concepts, identify knowledge gaps, and improve problem-solving speed. Consistent practice builds familiarity with exam formats and question types, reducing anxiety. By solving past papers and mock exams, candidates enhance their ability to apply theoretical knowledge practically. Regular practice also aids in time management, ensuring a balanced approach during the actual exam. It fosters a deeper understanding of complex topics and boosts confidence, which are essential for success in this challenging exam.

7.2 Analyzing Mistakes and Weak Areas

Analyzing mistakes is crucial for improving performance in Actuary Exam P. Reviewing incorrect answers helps identify patterns of errors and weak areas. Understanding where you went wrong allows you to address specific gaps in knowledge or understanding. Regularly assessing mistakes enables targeted studying, ensuring that difficult concepts are thoroughly grasped. By retracing steps and retaking practice exams, candidates can refine their problem-solving strategies and build confidence. This process also highlights areas requiring additional focus, making study sessions more efficient and effective in preparing for the exam.

7.3 Simulating Exam Conditions

Simulating exam conditions helps build stamina and familiarizes candidates with the exam format. Create a quiet, dedicated space and adhere to the exact time limits. Practice under timed conditions to enhance time management skills and reduce anxiety. Taking regular breaks during practice mimics the actual exam experience. Reviewing practice exams under exam-like conditions ensures readiness. This approach helps identify areas needing improvement and reinforces problem-solving strategies. By replicating exam day scenarios, candidates can mentally prepare and refine their ability to perform under pressure, ultimately improving their chances of success.

7.4 Interpreting Practice Exam Results

Interpreting practice exam results helps identify strengths and weaknesses; Analyze your scores to pinpoint areas needing improvement and track progress over time. Focus on understanding mistakes, not just correcting them. Review incorrect answers to grasp underlying concepts and refine problem-solving strategies. Pay attention to time management and question types that proved challenging. Use these insights to adjust your study plan and prioritize difficult topics. Regularly tracking improvements ensures a tailored approach to preparation, enhancing readiness for the actual exam and building confidence in your abilities.

Common Challenges and Solutions

Procrastination and exam anxiety are common hurdles. Create a structured study plan and practice mindfulness to stay focused. Break difficult topics into smaller parts and seek support when needed.

8.1 Overcoming Procrastination

Procrastination is a common challenge for exam candidates. To overcome it, break your study plan into smaller, manageable tasks and set clear, achievable milestones. Use time management techniques like the Pomodoro method to stay focused. Prioritize difficult topics early when your mind is fresh. Create a accountability system, such as studying with a group or sharing progress with a mentor. Reward yourself for completing tasks to maintain motivation. Regularly review and adjust your schedule to avoid burnout. Stay consistent, as steady progress is key to mastering Exam P.

8.2 Managing Exam Anxiety and Stress

Exam anxiety and stress can hinder preparation and performance. To manage these, practice mindfulness, deep breathing exercises, and regular physical activity to reduce tension. Maintain a healthy lifestyle, including balanced nutrition and sufficient sleep. Break study sessions into manageable intervals using techniques like the Pomodoro method. Stay organized and prioritize tasks to avoid last-minute cramming. Visualize success and remind yourself of past achievements to boost confidence. Seek support from peers or mentors to discuss concerns and share strategies for staying calm. Regular relaxation practices, such as meditation, can help maintain emotional balance throughout the preparation journey.

8.3 Dealing with Difficult Topics

When encountering challenging topics, focus on understanding core concepts rather than memorizing formulas. Break complex ideas into smaller, manageable parts and revisit foundational material if needed. Use multiple study resources, such as textbooks and online tutorials, to gain different perspectives. Practice problems regularly, starting with simpler questions and gradually increasing difficulty. Teach the concept to someone else or explain it aloud to reinforce your understanding. Seek guidance from study groups or mentors to clarify doubts and stay persistent in mastering tough areas.

8.4 Staying Motivated Throughout the Preparation

Staying motivated during Exam P preparation requires setting realistic goals and celebrating small milestones. Break your study plan into manageable chunks and track your progress to maintain a sense of achievement. Surround yourself with a supportive network, such as study groups or mentors, to share challenges and successes. Regular breaks and a healthy lifestyle can prevent burnout and keep energy levels high. Remind yourself of your long-term career goals and the benefits of becoming an actuary. Consistency and patience are key to staying motivated throughout the journey.

Exam Day Strategies

Develop a time management plan, prioritize questions, and stay calm. Use elimination techniques for unsure answers and review your work if time permits. Maintain focus throughout.

9.1 Time Management During the Exam

Effective time management is crucial during Actuary Exam P. Allocate a set amount of time to each question, ensuring you leave some for review. Skip difficult questions initially and return to them later. Prioritize questions you are confident about to secure early points. Avoid spending too long on a single problem, as this can jeopardize your ability to attempt others. Use the remaining time to review your answers and make necessary corrections. Stay calm and systematic to maximize your score efficiently.

9.2 Approaching Different Types of Questions

Approach multiple-choice questions by eliminating incorrect options first, increasing the likelihood of selecting the right answer. For numerical questions, ensure all calculations are shown step-by-step to avoid errors. When faced with complex probability problems, break them down into simpler components and apply fundamental concepts systematically. Always read questions carefully to understand what is being asked. Practice recognizing common question patterns from past papers to build familiarity and confidence in your approach.

9.3 Strategies for Guessing and Elimination

When guessing, prioritize questions where you can eliminate one or more options. Use the process of elimination to reduce uncertainty and maximize scoring potential. If unsure, select the most plausible answer based on your understanding of probability concepts. Avoid random guessing, as it can lower your overall score. Instead, allocate time to review and make educated guesses on challenging questions. Mark skipped questions for later review to ensure no opportunities are missed. Strategic guessing and elimination can significantly improve your exam performance.

9.4 Maintaining Focus and Calmness

Maintaining focus and calmness during the exam is crucial for optimal performance. Practice deep breathing exercises to manage anxiety and stay composed. Break down complex problems into manageable steps to avoid feeling overwhelmed. Regularly glance at the clock to ensure timely progress without rushing. Stay hydrated and energized with light snacks beforehand. Trust your preparation and avoid second-guessing answers excessively. Keep a positive mindset and remind yourself of your readiness. A calm and focused approach will enhance your ability to think clearly and make sound decisions during the exam.

Post-Exam Actions

After the exam, review your performance, understand the scoring process, and plan next steps, whether passing or needing to retake, to continue your actuarial journey effectively.

10.1 Reviewing Exam Performance

After receiving your Exam P results, thoroughly review your performance to identify strengths and areas for improvement. Analyze the score breakdown to understand where you excelled and where additional focus is needed. If you passed, consider how your study strategies contributed to your success; If you did not pass, examine the scoring process and pinpoint weak areas. Use this feedback to refine your approach for future exams or retakes, ensuring a more targeted and effective study plan moving forward.

10.2 Understanding the Scoring Process

The scoring process for Actuary Exam P involves a detailed evaluation of your performance. Each question is weighted based on its difficulty, ensuring fairness and consistency. The passing score is typically around 6 on a 10-point scale, though exact thresholds may vary. Candidates receive a pass/fail designation rather than a numerical score. Understanding this process helps clarify expectations and aids in interpreting your results. This knowledge is crucial for assessing your readiness for advanced exams or determining areas needing improvement if retaking Exam P.

10.3 Next Steps After Passing or Failing

If you pass Exam P, celebrate your achievement and proceed to the next exam in your actuarial journey, such as Exam FM. Review the syllabus for the upcoming exam and begin preparing early. If you fail, analyze your mistakes, identify weak areas, and adjust your study plan. Retake the exam when you feel more confident. Regardless of the outcome, stay motivated and continue working toward your actuarial certification. Taking a short break to recharge can also help maintain focus and avoid burnout. Seek guidance if needed to refine your strategy.

stokke tripp trapp instruction manual

The Stokke Tripp Trapp is an iconic‚ ergonomic high chair designed for adaptability and sustainability‚ offering a durable solution for growing families․

1․1 Overview of the Stokke Tripp Trapp Chair

The Stokke Tripp Trapp Chair is a Norwegian-designed‚ ergonomic high chair crafted from durable‚ sustainable materials like solid beech wood․ It is non-toxic‚ easy to clean‚ and built to last‚ supporting children from infancy to adulthood․ The chair’s adjustable height and seat position ensure proper posture and comfort․ It is compatible with the Tripp Trapp Newborn Set and harness‚ making it versatile for different stages of growth․ Its timeless design and sturdy construction make it a popular choice for families seeking a safe‚ long-lasting solution for dining and interaction․

1․2 Importance of Following the Instruction Manual

Following the Stokke Tripp Trapp instruction manual is crucial for ensuring safety‚ proper assembly‚ and optimal use․ The manual provides clear guidelines for assembling and adjusting the chair‚ which are essential for stability and security․ Incorrect assembly can lead to safety hazards‚ while proper use ensures the chair meets its intended functionality․ Additionally‚ the manual outlines maintenance tips to preserve the chair’s durability and hygiene․ Adhering to the instructions also helps maintain the product’s warranty‚ as deviations may void it․ By following the manual‚ users can ensure a safe‚ comfortable‚ and long-lasting experience for their child․

Essential Features of the Stokke Tripp Trapp

The Stokke Tripp Trapp features an adjustable design‚ durable materials‚ and compatibility with the Newborn Set and harness‚ ensuring comfort‚ safety‚ and versatility for growing children․

2․1 Adjustable Height and Seat Position

The Stokke Tripp Trapp offers an adjustable height mechanism‚ allowing the chair to grow with your child․ The seat can be raised or lowered to accommodate different stages of development‚ from infancy to toddlerhood․ This feature ensures that your child can always sit at a comfortable height relative to the table‚ promoting good posture and ease of access for feeding․ The seat position can also be tilted to provide optimal support‚ making mealtime more enjoyable and ergonomic for your little one․ This adaptability ensures the chair remains functional for years‚ making it a long-lasting investment for families․

2․2 Durable and Sustainable Materials

The Stokke Tripp Trapp is crafted from high-quality‚ durable materials‚ ensuring longevity and safety for your child․ Made from solid beech wood‚ the chair is both sturdy and sustainable‚ aligning with eco-friendly values․ The wood finish is non-toxic‚ making it safe for children․ The design emphasizes ease of cleaning‚ with smooth surfaces that can be wiped down effortlessly․ This robust construction ensures the chair can withstand years of use‚ supporting children from infancy through toddlerhood and beyond․ The materials are chosen to promote sustainability‚ reflecting Stokke’s commitment to environmental responsibility while maintaining exceptional quality and durability․

2․3 Compatibility with Newborn Set and Harness

The Stokke Tripp Trapp is designed to accommodate the Newborn Set and Harness‚ providing optimal support for infants․ The Newborn Set attaches seamlessly‚ offering a snug and comfortable space for younger babies‚ while the 4-point harness ensures safety․ The chair’s adaptability allows for easy integration of these accessories‚ promoting a secure and cozy environment․ This compatibility ensures that the Tripp Trapp grows with your child‚ transitioning smoothly from infancy to toddlerhood․ The harness system is simple to install and adjust‚ offering peace of mind for parents while maintaining the chair’s sleek design․

Assembly Instructions

Assembly of the Stokke Tripp Trapp requires careful attention to the provided instructions․ Begin by unpacking and preparing all components‚ then follow the step-by-step guide to ensure proper assembly․ The chair is designed for durability and adaptability‚ making it essential to align parts correctly for safety and longevity․

3․1 Unpacking and Preparing Components

Begin by carefully unpacking the Stokke Tripp Trapp chair and all accompanying parts․ Ensure all components‚ such as the seat‚ footplate‚ legs‚ and hardware‚ are included and undamaged․ Organize the pieces to avoid losing small items like screws or bolts․ Refer to the manual’s component list to verify completeness․ Before assembly‚ clean and prepare the workspace to ensure a smooth process․ Familiarize yourself with the instructions and visualize the assembly steps․ Proper preparation ensures a safe and efficient assembly experience‚ aligning with the product’s durable and sustainable design․ Always follow the manual’s guidance for optimal results․

3․2 Step-by-Step Assembly Process

Begin by attaching the chair legs to the base using the provided screws; Align the seat and backrest with the frame‚ ensuring proper fit․ Secure these components using the Allen key․ Next‚ attach the footplate by aligning its holes with the chair’s base and tightening firmly․ Use the adjustment levers to set the seat height and footplate position․ Tighten all screws thoroughly to ensure stability․ Finally‚ attach any accessories‚ such as the harness‚ following the manual’s instructions․ Double-check all connections for safety․ Refer to the manual’s diagrams for visual guidance to ensure accurate assembly․

3․3 Common Mistakes to Avoid During Assembly

When assembling the Stokke Tripp Trapp chair‚ ensure all screws are tightened firmly to avoid instability․ Misaligning the seat or backrest with the frame can lead to improper fit․ Avoid forcing connections‚ as this may damage components․ Always use the provided Allen key‚ as other tools may strip screws․ Do not skip steps or overlook adjustments for the footplate and seat height․ Failing to secure the harness correctly can compromise safety․ Double-check all connections before use․ Refer to the manual for guidance to prevent errors and ensure a sturdy‚ safe assembly․

Adjusting and Configuring the Chair

The Stokke Tripp Trapp chair offers versatile adjustments to accommodate growing children․ Its ergonomic design allows for height and seat position customization‚ ensuring proper posture and comfort․ The footplate adjusts to support various leg lengths‚ while the backrest can be modified for optimal support․ The chair’s harness system ensures safety‚ with easy-to-use straps that secure your child․ Regular adjustments are essential to maintain comfort and stability․ Always refer to the manual for precise guidance on configuring the chair to meet your child’s needs‚ ensuring a safe and enjoyable dining experience․ Proper configuration enhances both functionality and longevity of the chair․

4․1 Adjusting the Height of the Chair

To adjust the height of the Stokke Tripp Trapp chair‚ locate the height adjustment mechanism‚ typically found under the seat or on the side․ Pull the lever to release the lock‚ allowing the seat to move up or down․ Ensure the chair is on a stable surface before making adjustments․ After finding the desired height‚ re-engage the locking mechanism to secure the seat in place․ The footplate should also be adjusted to support your child’s feet‚ keeping their knees at a 90-degree angle․ Always refer to the manual for specific guidance to ensure safety and proper configuration․

4․2 Customizing the Seat and Footplate Position

The Stokke Tripp Trapp chair allows for precise customization of the seat and footplate to ensure optimal comfort and support for your child․ To adjust the seat depth‚ locate the release button under the seat and slide it forward or backward to fit your child’s size․ The footplate can be adjusted separately by loosening the screws or using the adjustment lever‚ ensuring your child’s feet are supported with knees at a 90-degree angle․ These adjustments are independent of the chair’s height setting‚ enabling a tailored fit as your child grows․ Always refer to the manual for specific guidance․

4․3 Securing the Harness System

Securing the harness system on the Stokke Tripp Trapp is essential for your child’s safety․ Begin by ensuring all straps are free from twists and properly aligned․ Place your child in the chair and fasten the 4-point harness‚ adjusting the straps to fit snugly around their torso and thighs․ Tighten the harness until it feels secure but not restrictive‚ ensuring proper movement․ Regularly check the harness for wear and tear‚ and tighten any loose connections․ Always refer to the manual for precise guidance on harness installation and adjustment to ensure maximum safety and comfort for your child․ Proper securing is vital for stability and protection․

Safety Guidelines

Always follow the manual’s safety instructions․ Regularly inspect the chair for damage‚ ensure proper assembly‚ and supervise your child․ Never leave them unattended while seated․

5․1 Proper Use of the Harness System

The harness system is essential for ensuring your child’s safety while using the Stokke Tripp Trapp․ Always secure the 4-point straps tightly around your child’s shoulders and hips‚ following the manual’s guidance․ The harness should be snug but comfortable‚ allowing freedom of movement without compromising stability․ Regularly inspect the straps for wear and tear‚ and ensure all buckles are securely fastened․ The harness should be used until your child can sit up unassisted and no longer requires additional support․ Never alter or add accessories to the harness system‚ as this could compromise its safety features․

5․2 Weight and Age Recommendations

The Stokke Tripp Trapp is designed for children from birth up to adulthood‚ with a maximum weight capacity of 136kg․ For newborns‚ the chair requires the Newborn Set‚ suitable from 0–6 months․ Without the Newborn Set‚ it is recommended for children aged 6 months and older․ Always ensure the child’s weight and age align with the product’s specifications․ Regularly inspect the chair and adjust its configuration to accommodate your child’s growth․ The chair’s adjustable design ensures longevity‚ but proper usage and maintenance are essential for safety and durability․ Follow the manual for specific guidelines tailored to your child’s developmental stage․

5․3 Maintenance and Cleaning Tips

To maintain the Stokke Tripp Trapp‚ clean it regularly with a soft‚ damp cloth and mild soap․ Avoid harsh chemicals or abrasive cleaners‚ as they may damage the finish․ Dry the chair thoroughly after cleaning to prevent moisture buildup․ For wooden parts‚ occasional oiling is recommended to preserve the finish․ Inspect the chair periodically for loose screws or wear and tear‚ and tighten or replace parts as needed․ Avoid exposing the chair to direct sunlight for extended periods‚ as it may cause discoloration․ Proper maintenance ensures the chair remains durable and safe for your child‚ extending its lifespan for years of use․

Using the Stokke Tripp Trapp Newborn Set

The Stokke Tripp Trapp Newborn Set is designed to provide optimal support and comfort for infants‚ ensuring safe and comfortable seating from birth onwards‚ adapting as your baby grows․

6․1 Attaching the Newborn Set to the Chair

To attach the Stokke Tripp Trapp Newborn Set‚ align the set’s hooks with the chair’s designated attachment points․ Securely fasten using the provided clips or straps‚ ensuring a snug fit․ Follow the manual’s visual guide for proper alignment and tightness․ Double-check that all connections are locked to prevent shifting․ This ensures your baby’s safety and comfort․ Always refer to the official instructions for specific details‚ as improper attachment may compromise stability․ Proper installation is crucial for optimal performance and safety․

6․2 Adjusting the Newborn Set for Comfort

Adjust the Stokke Tripp Trapp Newborn Set by loosening the side straps to customize the fit for your baby’s comfort․ Ensure proper head and neck support by positioning the cushion correctly․ Tighten the harness securely but not overly snug to allow for natural movement․ Refer to the manual for precise height and angle adjustments․ Check the footrest positioning to prevent pressure points․ Ensure the seat depth is appropriate for your baby’s size‚ following the guidelines provided․ Inspect the fabric for comfort and stability‚ making adjustments as needed․ After each modification‚ test the setup gently to confirm safety and comfort․

6․3 Safety Considerations for the Newborn Set

Always follow the Stokke Tripp Trapp manual to ensure the newborn set is securely attached; Use the 4-point harness correctly to prevent sliding or tipping․ Verify that all straps and buckles are tightly fastened․ Never leave your baby unattended while using the chair․ Regularly inspect the newborn set for wear or damage․ Ensure the chair is placed on a stable‚ flat surface away from hazards․ Adhere to the weight and age limits specified in the manual․ Clean the set with non-abrasive materials to avoid damaging the fabric․ Supervise your baby during meals to prevent choking hazards․ Always maintain the chair’s stability by following assembly guidelines precisely․

Troubleshooting Common Issues

Address wobbling by tightening loose parts․ If adjustments are difficult‚ refer to the manual․ For harness issues‚ ensure proper alignment and secure buckling․ Consult support if unresolved․

7․1 Difficulty in Adjusting the Chair

If adjusting the chair is challenging‚ ensure all parts are properly aligned and free from obstructions․ Use the provided Allen key correctly and refer to the manual for diagrams․ If the seat plate doesn’t move smoothly‚ check for misalignment․ Tighten any loose components and verify the chair is on a level surface․ Consult the troubleshooting section for guidance or contact Stokke customer support for assistance․ Proper adjustment ensures stability and safety for your child․

7․2 Harness Not Securing Properly

If the harness is not securing properly‚ check that all straps are correctly routed and the buckle is fully engaged․ Ensure the harness is tightly fastened and adjust the straps to fit your child snugly․ If issues persist‚ verify that the harness is properly attached to the chair using the provided hardware․ Refer to the manual for diagrams or troubleshooting steps․ If the problem continues‚ contact Stokke customer support for assistance․ Proper harness use is critical for safety‚ so never use the chair without it being securely fastened․

7․3 Wobbling or Instability of the Chair

If the chair wobbles or feels unstable‚ check that all components are tightly assembled and properly aligned․ Ensure the legs are evenly placed on a flat‚ stable surface․ If instability persists‚ verify that no parts are loose or missing․ Refer to the manual for assembly instructions or contact Stokke support for assistance․ A stable chair is essential for safety‚ so address any wobbling immediately to prevent accidents; Regularly inspect the chair’s condition to maintain its durability and ensure your child’s safety during use․

The Stokke Tripp Trapp chair offers exceptional adaptability‚ safety‚ and durability‚ making it a timeless choice for families․ Follow the manual for optimal use and maintenance․

8․1 Summary of Key Points

The Stokke Tripp Trapp chair is a versatile‚ ergonomic‚ and durable high chair designed to grow with your child‚ from infancy to adulthood․ Its adjustable height‚ seat‚ and footplate ensure optimal comfort and support․ The chair is made from sustainable materials‚ emphasizing eco-friendliness and longevity․ Proper assembly and adjustment‚ as outlined in the manual‚ are crucial for safety and functionality․ Regular maintenance and cleaning are recommended to preserve its quality․ The Tripp Trapp is a timeless investment for families‚ offering adaptability‚ safety‚ and style‚ making it a trusted choice for generations․

8․2 Final Tips for Optimal Use

For optimal use‚ regularly inspect bolts and hinges for tightness and lubricate if needed․ Clean the chair with mild detergents‚ avoiding harsh chemicals․ Always follow the recommended weight and age guidelines․ Ensure the harness is properly secured for safety․ Adjust the chair height and seat position as your child grows․ Customize the chair with compatible accessories like the Newborn Set for added comfort․ Register your product for warranty updates and refer to the manual for maintenance tips․ By following these guidelines‚ you can ensure long-lasting durability and safety for your child․

Additional Resources

Visit the official Stokke website for downloadable manuals‚ customer support‚ and warranty details․ Contact their support team for assistance or additional guidance on using your Tripp Trapp chair․

9․1 Where to Find the Official Instruction Manual

The official Stokke Tripp Trapp instruction manual can be downloaded from the Stokke website or through authorized retailers․ It’s also available as a PDF on various online platforms․ Ensure you access the manual from trusted sources to avoid incorrect or outdated information․ The manual covers assembly‚ adjustments‚ and maintenance‚ providing clear‚ step-by-step guidance․ Additionally‚ Stokke’s customer support team can assist with any questions or provide a replacement manual if needed․ Always refer to the official manual for accurate instructions to ensure safe and proper use of your Tripp Trapp chair․

9․2 Stokke Customer Support and Warranty Information

Stokke offers comprehensive customer support‚ including a dedicated website section for FAQs‚ troubleshooting‚ and contact details․ The Tripp Trapp chair is backed by a one-year warranty covering manufacturing defects․ For inquiries or issues‚ customers can reach out via email‚ phone‚ or live chat․ Additionally‚ the warranty can be extended under certain conditions‚ as outlined in the official instruction manual․ Stokke’s commitment to quality and customer satisfaction ensures assistance is readily available to address any concerns‚ providing peace of mind for users of their premium products like the Tripp Trapp high chair․