Pork Schnitzel Roll Cooking is a beloved dish featuring tender pork cutlets pounded thin, breaded, and fried to a golden crisp. Originating from German cuisine, it combines simplicity with rich flavor, offering a versatile meal perfect for both home cooks and professional chefs.
1.1 What is Pork Schnitzel Roll?
Pork Schnitzel Roll is a dish featuring thinly pounded pork cutlets coated in a crispy breading, typically made with flour, eggs, and breadcrumbs. The cutlets are fried to achieve a golden, crunchy exterior while maintaining juicy, tender meat inside. This classic German-inspired recipe is both flavorful and versatile, offering a satisfying meal that can be enjoyed with a variety of sides and sauces, making it a popular choice for home cooking and special occasions alike.
1.2 Brief History and Origin
Pork Schnitzel Roll traces its roots to traditional German cuisine, where thinly pounded pork cutlets are breaded and fried. The dish evolved from the classic schnitzel, which has been a staple in European cooking for centuries. Originating in Austria and Germany, it gained popularity for its simplicity and flavorful outcome. Over time, the roll variation emerged, offering a unique presentation while maintaining the crispy exterior and juicy interior that define this beloved dish.
1.3 Popularity and Versatility
Pork Schnitzel Roll has gained widespread popularity for its crispy exterior and tender interior, making it a family favorite. Its versatility shines through various cooking methods like pan-frying, oven-baking, and air-frying, catering to different tastes and dietary preferences. This dish is celebrated globally, often served with classic sides like lemon wedges, fries, or salads. Its adaptability allows for creative twists, such as stuffing or pairing with sauces, ensuring it remains a timeless and enjoyable meal for all ages.
Ingredients and Tools Needed
Key ingredients include pork cutlets, flour, eggs, breadcrumbs, seasonings, oil, and butter. Essential tools are a meat mallet, skillet, tongs, and parchment-lined trays for cooking. These elements ensure crispy, juicy pork schnitzel rolls every time.
2.1 Essential Ingredients
The core ingredients for pork schnitzel rolls include fresh pork cutlets, all-purpose flour, eggs, breadcrumbs, and neutral oil for frying. Additional items like butter, salt, and pepper enhance flavor. Optional seasonings such as garlic powder, paprika, or herbs can be added for extra taste. Fresh lemon wedges and garnishes like parsley are popular for serving. These components ensure a crispy exterior and juicy interior, making the dish both satisfying and flavorful. Proper ingredient selection is key to achieving authentic schnitzel roll quality.
2.2 Breading Components
The breading mixture for pork schnitzel rolls typically consists of all-purpose flour, beaten eggs, and breadcrumbs. The flour provides a base coat, while eggs act as a binder, ensuring the breadcrumbs adhere evenly. Breadcrumbs, preferably Panko for lightness, create a crispy exterior. Seasonings like garlic powder, paprika, or herbs can be added to the flour or breadcrumbs for extra flavor. Some recipes include a light dusting of butter or oil in the breading for golden browning. This layered coating ensures a crunchy, flavorful crust around the tender pork.
2.3 Kitchen Tools and Equipment
Essential tools for preparing pork schnitzel rolls include a meat mallet or rolling pin for pounding the cutlets thin. A large, shallow dish is needed for the flour, while separate bowls are required for the eggs and breadcrumbs. A skillet or frying pan is ideal for pan-frying, and a baking sheet lined with parchment paper is useful for oven-baking. Additional tools like a sharp knife, cutting board, and tongs or spatula aid in preparation and cooking. These tools ensure efficient and effective cooking of the schnitzel roll.
Preparation Steps
Preparation involves selecting the right pork cut, pounding it thin, seasoning, assembling the roll, and applying the breading. These steps ensure a crispy exterior and juicy interior.
3.1 Selecting the Right Pork Cut
Selecting the right pork cut is crucial for a tender and flavorful schnitzel roll. Opt for boneless pork chops or loin cuts, ensuring they are thin and even in thickness. Avoid fatty cuts, as they can make the dish greasy. Look for cuts labeled “pork cutlets” or “pork scallopini,” which are ideal for pounding thin. If using thicker chops, slice them horizontally before pounding to achieve the desired thinness; Freshness and quality of the meat will directly impact the final result.
3.2 Pounding the Meat to Perfection
Pounding the pork cutlets to uniform thinness is essential for even cooking and a tender texture. Place the meat between plastic wrap or parchment paper to prevent tearing. Use a meat mallet or rolling pin to gently pound the cutlets to about 1/4 inch thickness. Avoid over-pounding, as it can make the meat mushy. Ensure the edges are evenly thin to prevent uneven breading and frying. This step ensures the schnitzel cooks evenly and remains juicy, with a crisp exterior.
3.4 Seasoning the Pork Cutlets
Seasoning the pork cutlets is a crucial step to enhance flavor. Sprinkle both sides with salt, pepper, and optional spices like garlic powder or paprika. For added depth, marinate the cutlets in a mixture of salt, caraway seeds, and a touch of brown sugar for up to 30 minutes. Lightly pat dry before breading to ensure the seasoning adheres. This step ensures the pork remains flavorful and juicy, complementing the crispy breading. Proper seasoning elevates the dish, making it a delightful culinary experience.
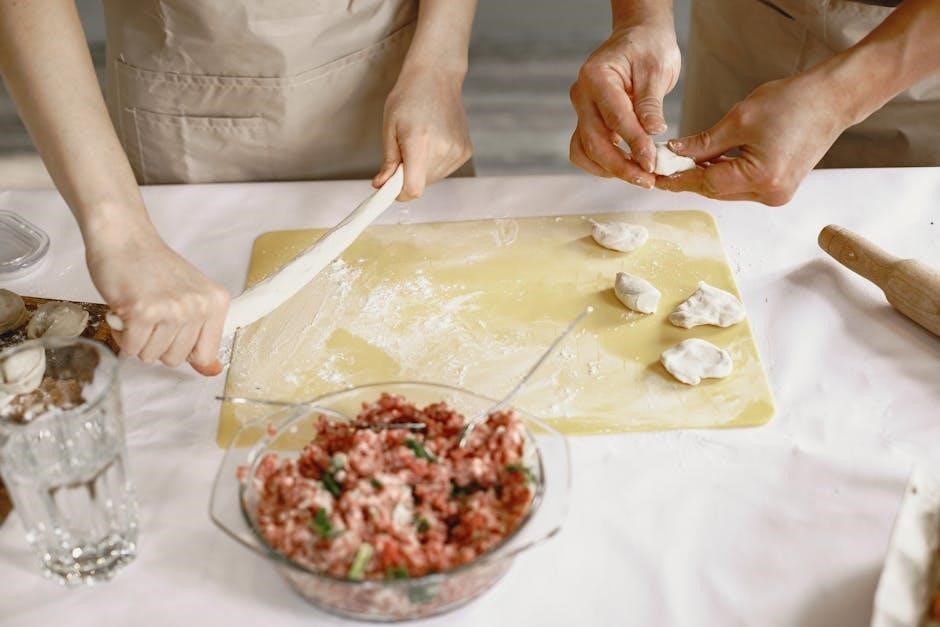
3.5 Assembling the Schnitzel Roll
To assemble the schnitzel roll, place the seasoned pork cutlets side by side on a clean surface, slightly overlapping each cutlet to form a large rectangle. Align the edges evenly and sprinkle any desired fillings, such as herbs or spices, across the center. Roll the cutlets tightly from one end to the other, ensuring a compact shape. Secure the roll with kitchen twine or toothpicks to maintain its form during cooking. This step ensures even cooking and a uniform presentation.
Breading Techniques
Breading involves coating pork cutlets in flour, egg, and breadcrumbs for crispiness. Gently coat both sides, ensuring even coverage, and fry immediately for a golden, crunchy exterior.
4.1 The Role of Flour
The first step in breading, flour provides a base coat, ensuring the egg and breadcrumbs adhere evenly. It helps create a light, crispy texture when fried, preventing sogginess.
4.2 Using Eggs for Binding
Eggs serve as a critical binding agent in the breading process, ensuring the flour and breadcrumbs adhere securely to the pork. Beaten eggs create a moist, sticky surface for the breadcrumbs to cling to, enhancing the breading’s durability during cooking. Properly coating the meat with egg prevents the breading from separating, resulting in a cohesive, crispy exterior. Lightly dipping the pork in egg also helps maintain the breading’s integrity, ensuring a golden, even finish when fried or baked.
4.3 Breading with Breadcrumbs
Breadcrumbs are essential for achieving the signature crispy exterior of pork schnitzel. Lightly coat the egg-dipped pork cutlets in breadcrumbs, pressing gently to ensure adhesion. Using Panko breadcrumbs yields a lighter, crunchier texture, while regular breadcrumbs provide a denser crust. Seasoned breadcrumbs with herbs or spices can enhance flavor. Allow excess crumbs to fall off to avoid a heavy coating. This step ensures a golden, crispy exterior that complements the tender pork, creating a delightful texture contrast in every bite.
4.4 Tips for Crispy Breading
To achieve crispy breading, coat the pork cutlets gently but evenly, avoiding excess pressure that can compact the breadcrumbs. Use Panko breadcrumbs for a lighter, crisper texture. Fry immediately after breading to prevent the coating from becoming soggy. Ensure the oil is hot enough (around 350°F) and avoid overcrowding the pan, as this lowers oil temperature and results in greasy breading. For extra crispiness, pat the breaded cutlets dry before frying and drain on paper towels after cooking.
Cooking Methods
Pork Schnitzel Roll Cooking offers versatile techniques, including pan-frying for crispiness, oven-baking for a healthier option, air frying for reduced oil, and deep-frying for authentic texture.
5.1 Pan-Frying for Crispiness
Pan-frying is a classic method for achieving crispy pork schnitzel. Heat a skillet over medium-high with oil or butter, ensuring it’s hot before adding breaded cutlets. Fry 3-4 minutes per side until golden brown. Avoid overcrowding the pan to maintain crispiness. Once cooked, place on paper towels to drain excess oil. Serve immediately for the best texture. Pro tip: Don’t press the meat with a spatula while frying, as it can damage the breading and make it soggy.
5.2 Oven-Baking for Healthier Option
Oven-baking offers a healthier alternative to frying while maintaining crispiness. Preheat the oven to 400°F (200°C). Place breaded pork cutlets on a parchment-lined baking sheet, ensuring they don’t overlap. Bake for 15-20 minutes, flipping halfway, until golden brown. For extra crispiness, broil for 2-3 minutes. This method reduces fat and calories without sacrificing flavor. Serve hot with lemon wedges or your favorite sauce for a guilt-free, delicious meal.
5.3 Air Fryer Method
Cooking pork schnitzel in an air fryer is a healthier, mess-free alternative to frying. Preheat the air fryer to 375°F (190°C) for 5 minutes. Place breaded cutlets in a single layer in the basket, cooking in batches if necessary. Cook for 10-12 minutes, flipping halfway, until golden and crispy. The result is a crispy exterior and juicy interior. For extra crispiness, lightly spray with oil before cooking. This method delivers a delicious, guilt-free schnitzel with minimal effort and less oil.
5.4 Deep-Frying for Authentic Taste
Deep-frying is the traditional method for achieving an authentic pork schnitzel roll. Heat vegetable oil to 350°F (175°C) in a deep pan. Carefully place the breaded cutlets in the oil, ensuring they don’t overlap. Fry for 3-4 minutes per side until golden and crispy. Remove with a slotted spoon and drain on paper towels. This method ensures a crunchy exterior and juicy interior, capturing the classic flavor and texture of schnitzel. Avoid overcrowding the pan to maintain oil temperature and prevent sogginess.
Serving Suggestions
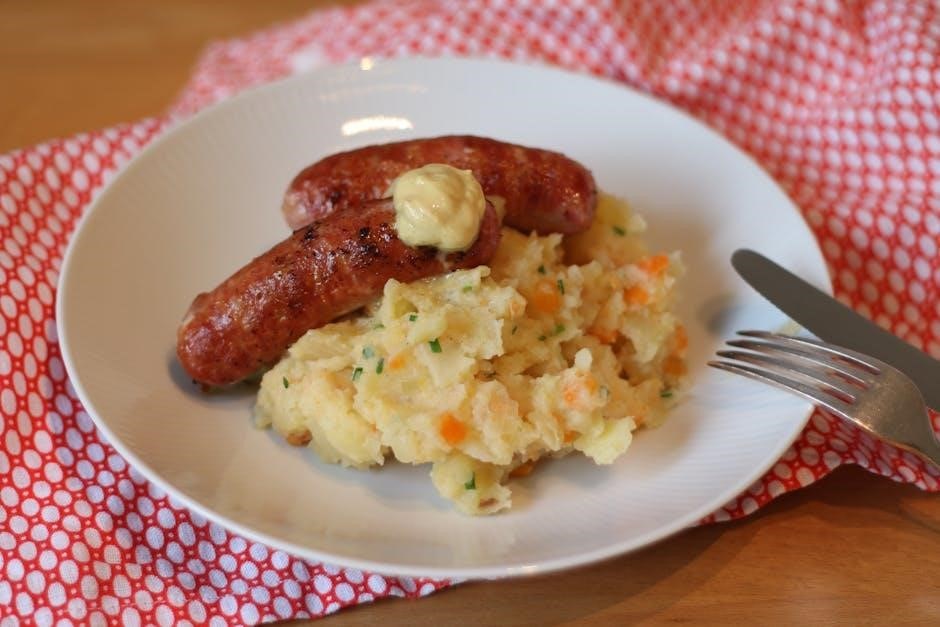
Pork Schnitzel Roll is best served with a squeeze of lemon, classic sides like fries or salad, and garnished with fresh parsley. Serve with tangy mustard or mushroom gravy for added flavor.
6.1 Classic Side Dishes
Classic side dishes for Pork Schnitzel Roll include golden French fries, a fresh green salad, or a creamy potato salad. Traditional options like braised Sauerkraut or boiled potatoes with herbs also pair perfectly. For a balanced meal, serve with a side of tangy coleslaw or roasted vegetables. A squeeze of fresh lemon and a dollop of tartar sauce on the side elevate the dish, offering a delightful contrast to the crispy, savory schnitzel.
6.2 Modern Twists and Accompaniments
Modern twists for Pork Schnitzel Roll include lighter sides like quinoa or roasted vegetables, adding a fresh spin to the classic dish. Serve with a zesty mango salsa or spicy kimchi slaw for a bold contrast. For a gourmet touch, pair the schnitzel with truffle aioli or a tangy herb yogurt sauce. Experimenting with panko breadcrumbs or gluten-free coatings offers a contemporary crunch. Air fryer versions are also gaining popularity for a healthier, crispy texture, appealing to modern dietary preferences while preserving flavor.
6.3 Sauces and Gravies
Enhance your Pork Schnitzel Roll with a variety of sauces and gravies. Classic options include mushroom gravy or Jägerschnitzel with a creamy, savory flavor. For a lighter touch, try a lemon-caper sauce or herb-infused yogurt. Modern twists like spicy sriracha mayo or truffle aioli add a contemporary flair. Alternatively, pair the dish with a honey-mustard dip or garlic-parmesan sauce for added richness. These accompaniments elevate the dish, offering both tradition and innovation to suit any palate.
6.4 Garnishing Ideas
Elevate your Pork Schnitzel Roll with fresh and flavorful garnishes. A squeeze of fresh lemon wedges adds a bright, citrusy note. Sprinkle chopped parsley or dill for a vibrant, herby touch. For a pop of color, top with microgreens or pomegranate seeds. Serve alongside a dollop of sour cream or a sprinkle of grated cheese for added richness. Garnishing with fresh herbs or a side of marinated sauerkraut complements the dish beautifully, enhancing both appearance and flavor.
Tips for Success
Ensure the oil reaches the right temperature for crispiness. Pat meat dry before breading and use Panko breadcrumbs for extra crunch. Don’t overcrowd the pan and fry until golden. Let the Schnitzel rest briefly after cooking to retain juiciness.
7.1 Avoiding Soggy Breading
To prevent soggy breading, ensure the pork cutlets are completely dry before coating. Use Panko breadcrumbs for a lighter, crisper texture. Avoid pressing the breadcrumbs into the meat, as this can create a dense layer. Fry immediately after breading to prevent moisture from seeping into the coating. Cook in batches to avoid overcrowding the pan, which can lower oil temperature and lead to sogginess. Drain excess oil on paper towels after frying for a crunchier result.
7.2 Maintaining Juiciness
To keep pork schnitzel juicy, ensure the cutlets are pounded evenly and not over-thinned. Fry at the correct oil temperature (around 350°F) to prevent overcooking. Avoid overcrowding the pan, as this lowers oil temperature and can dry out the meat. Don’t press down on the schnitzel while frying, as this squeezes out juices. Cook until golden and just done, then let rest for a few minutes to retain moisture. This ensures a tender, juicy interior beneath the crispy breading.
7;3 Preventing Oil Splatter
To minimize oil splatter when frying pork schnitzel, start with medium heat and gradually increase as needed. Pat the breaded cutlets dry with paper towels to remove excess moisture. Gently place the schnitzel into the oil, avoiding droplets. Use a splatter guard if available. Don’t overcrowd the pan, as this can cause oil to splash. Fry in batches if necessary, and tilt the pan away from you when adding the schnitzel. This helps contain the oil and ensures a safer cooking process.
7.4 Timing and Temperature Control
Proper timing and temperature control are essential for achieving crispy, juicy pork schnitzel. Use a thermometer to ensure the oil reaches 350°F for frying. Cook cutlets 3-4 minutes per side or until golden brown. Adjust heat as needed to maintain temperature. For oven-baking, preheat to 375°F and cook for 15-20 minutes. Always use a meat thermometer to confirm internal doneness of 145°F. Avoid overcrowding pans to prevent temperature drops, ensuring even cooking and a perfect crust every time.
Advanced Variations
Explore stuffed schnitzel rolls, low-fat versions, vegetarian alternatives, and international twists, offering creative and diverse takes on the classic dish while maintaining its signature crispiness and flavor.
8.1 Stuffed Schnitzel Roll
A creative twist on the classic, stuffed schnitzel rolls involve filling tender pork cutlets with ingredients like cheese, herbs, or ham before rolling and breading them. This variation adds layers of flavor and texture, making it a hearty and satisfying dish. The key is to ensure the filling is evenly distributed and the roll is sealed tightly to prevent leakage during cooking.
After stuffing, the roll is typically pan-fried or oven-baked until golden and crispy. This method not only enhances the dish’s visual appeal but also retains the meat’s juiciness and the filling’s flavor, offering a delightful surprise with each bite.
8.2 Low-Fat Versions
For a healthier take, low-fat pork schnitzel rolls can be achieved by using leaner cuts of pork and reducing oil. Baking or air frying is recommended to minimize fat content while maintaining crispiness. Lighter breading techniques, such as using whole-grain breadcrumbs or skipping the egg wash, further reduce calories. Herbs and spices enhance flavor without added fat. This version is ideal for those seeking a guilt-free, delicious meal that retains the dish’s classic appeal and texture.
8.3 Vegetarian Alternatives
Vegetarian alternatives to pork schnitzel rolls offer creative twists while maintaining the dish’s appeal. Options include using portobello mushrooms, eggplant slices, or zucchini as substitutes for pork. These ingredients are pounded thin, breaded, and cooked similarly to traditional schnitzel. Tofu can also be marinated and breaded for a protein-rich option. Baking or air frying these alternatives reduces fat and calorie content. Serve with classic sides like lemon wedges or sauces for a flavorful, plant-based meal that satisfies both vegetarians and meat-eaters alike.
8.4 International Inspirations
Pork schnitzel roll cooking can be enriched with international flavors, offering diverse culinary experiences. Japanese-inspired variations might use panko breadcrumbs for a lighter crunch, while Italian recipes could incorporate herbs like basil or oregano. Mexican twists might add spices like cumin or chili powder, served with salsa. Korean-style marinades can add a sweet and savory dimension. These global influences allow for creative experimentation, making the dish adaptable to various taste preferences while maintaining its classic appeal. Each region’s unique twist enhances the pork schnitzel roll’s versatility and flavor profile.
Common Mistakes to Avoid
Over-pounding the meat can make it too thin and lose its texture. Insufficient breading may result in a lack of crispiness. Overcrowding the pan can lower oil temperature, causing sogginess. Incorrect oil temperature can lead to greasy or undercooked schnitzel. Avoid these mistakes for a perfectly cooked dish.
9.1 Over-Pounding the Meat
Over-pounding the pork cutlets can make them too thin, leading to a loss of texture and flavor. This mistake can cause the meat to tear or become uneven, affecting the final roll’s structure. To avoid this, pound gently and evenly, stopping once the meat reaches an optimal thickness for rolling. Using plastic wrap or parchment paper can help prevent tearing. Monitor the thickness to ensure it remains consistent, as overly thin cutlets may not hold fillings well or cook evenly.
9.2 Insufficient Breading
Insufficient breading can result in a lackluster exterior, reducing crispiness and flavor. To prevent this, ensure even coating by gently pressing breadcrumbs onto the meat without overpacking. Using a mixture of flour, egg, and breadcrumbs ensures proper adhesion. Avoid skipping the flour or egg steps, as they are crucial for binding. Lightly tapping off excess coating helps maintain an even layer. Proper breading ensures a crispy texture, making it essential for achieving the perfect schnitzel roll. This step requires patience to coat evenly and thoroughly.
9.3 Overcrowding the Pan
Overcrowding the pan is a common mistake that prevents even cooking and leads to steaming instead of frying. This causes the breading to become soggy. To avoid this, cook the schnitzel rolls in batches, ensuring there is ample space for each piece. Use a rack to keep cooked rolls warm in the oven while frying subsequent batches. Maintaining proper oil temperature and avoiding overcrowding ensures a crispy exterior and juicy interior. Patience is key for achieving the perfect texture and flavor in each roll.
9.4 Incorrect Oil Temperature
Incorrect oil temperature is a critical mistake that can ruin the schnitzel roll. If the oil is too hot, the exterior burns before the meat cooks through. If too cold, the breading becomes greasy and soggy. Ideal frying temperatures range between 325°F and 350°F. Adjust the heat as needed to maintain this range. Proper temperature control ensures a golden, crispy crust and a juicy interior. Always test the oil with a small piece of bread to gauge readiness before frying the schnitzel rolls.
Reheating and Storage
Reheat pork schnitzel rolls in the oven at 375°F for 10-12 minutes until crispy. Store cooked rolls in airtight containers for up to 3 days. Freeze for up to 2 months; reheat directly from frozen. Always pat excess moisture before reheating to maintain crispiness and ensure food safety.
10.1 Best Reheating Methods
To maintain crispiness, reheat pork schnitzel rolls in the oven at 375°F (190°C) for 10-12 minutes. Place them on a wire rack-lined baking sheet to ensure airflow. For a crisper texture, pat dry with paper towels before reheating. Alternatively, use an air fryer at 300°F (150°C) for 5-7 minutes, shaking halfway. Avoid microwaving to prevent sogginess. If pan-reheating, use medium heat with a small amount of oil to revive the breading without burning.
10.2 Freezing Instructions
Pork schnitzel rolls can be frozen to preserve freshness. Place them on a baking sheet lined with parchment paper, ensuring they don’t touch, and freeze until solid. Transfer to an airtight container or freezer bag for up to 3 months. For best results, freeze before cooking. When reheating, bake frozen rolls in a preheated oven at 375°F (190°C) for 15-20 minutes, or until crispy and cooked through. Proper packaging prevents freezer burn and maintains flavor.
10.3 Shelf Life and Safety
Cooked pork schnitzel rolls can be stored in the fridge for up to 3 days in an airtight container. For longer storage, freeze them at 0°F (-18°C) for up to 3 months. Always check for signs of spoilage, such as an off smell or slimy texture, before consuming. Reheat cooked rolls to an internal temperature of 165°F (74°C) to ensure food safety. Proper storage and reheating techniques help maintain quality and prevent foodborne illness.