La La Land’s enchanting melodies have captivated audiences worldwide, making its piano sheet music highly sought after by fans and pianists alike․ The film’s magical soundtrack, composed by Justin Hurwitz, features iconic pieces like “City of Stars” and “Mia & Sebastian’s Theme,” which have been beautifully transcribed into piano arrangements․ These sheets allow musicians to recreate the movie’s emotional depth and charm, offering a timeless connection to its artistic brilliance․
1․1 Overview of the Movie and Its Music
La La Land is a modern musical romantic comedy-drama directed by Damien Chazelle, starring Ryan Gosling as Sebastian, a jazz pianist, and Emma Stone as Mia, an aspiring actress․ The film seamlessly blends jazz, classical, and contemporary music, creating a captivating soundtrack that drives the narrative․ Composed by Justin Hurwitz, the music features memorable pieces like “City of Stars” and “Mia & Sebastian’s Theme,” which have become iconic in contemporary cinema․ The interplay of music and visuals in the film elevates its emotional depth, making it a celebration of art, love, and dreams;
1․2 Importance of Piano Sheet Music in the Film
Piano sheet music plays a pivotal role in La La Land, as it underscores the film’s emotional journey and central themes․ The piano-driven soundtrack, composed by Justin Hurwitz, is integral to the narrative, with pieces like “Mia & Sebastian’s Theme” and “Epilogue” serving as the heartbeat of the story․ These compositions not only highlight Sebastian’s passion for jazz but also mirror Mia’s aspirations․ The availability of piano sheet music for these tracks allows fans and musicians to engage deeply with the film’s artistic essence, preserving its musical legacy for years to come․

Popular Songs from La La Land
La La Land features iconic tracks like “City of Stars” and “Mia & Sebastian’s Theme,” which have become beloved piano sheet music favorites, captivating pianists worldwide with their timeless melodies․
2․1 “City of Stars” Sheet Music
“City of Stars” is one of the most iconic and beloved songs from La La Land, with its enchanting melody and emotional depth․ The sheet music for this duet, featuring Ryan Gosling and Emma Stone, is widely available in various arrangements, from solo piano to duet versions․ Fans and pianists alike can find both free and premium PDF downloads, allowing them to recreate the magic of this Academy Award-winning song․ Its timeless appeal makes it a favorite among musicians of all skill levels, ensuring its place in the hearts of music lovers worldwide․
2․2 “Mia & Sebastian’s Theme” Sheet Music
“Mia & Sebastian’s Theme” is a captivating composition that serves as the emotional cornerstone of La La Land․ This beautiful piece, composed by Justin Hurwitz, has been transcribed into various piano arrangements, including solo and duet versions․ The sheet music is available in PDF format, with options for both free downloads and premium purchases․ Its intricate melody and romantic harmony make it a favorite among pianists, allowing them to bring the film’s magical moments to life through their performances, resonating deeply with anyone who plays or listens to it․
2;3 “Epilogue” Sheet Music
The “Epilogue” from La La Land is a poignant and emotionally resonant piece that beautifully concludes the film’s musical journey․ Composed by Justin Hurwitz, this sheet music captures the bittersweet essence of Mia and Sebastian’s story․ Available in PDF format, it offers pianists the opportunity to recreate the film’s hauntingly beautiful finale․ The arrangement is suitable for solo piano and features a moderate level of difficulty, making it accessible to intermediate players․ Fans of the movie will appreciate how the sheet music preserves the emotional depth and complexity of this memorable piece․
Where to Find La La Land Piano Sheet Music PDF
La La Land piano sheet music PDFs are widely available online, with options for free downloads and premium purchases․ Websites like Musicnotes and Piano Nanny offer high-quality arrangements, ensuring accessibility for pianists of all skill levels․
3․1 Free Download Options
Several websites offer free PDF downloads of La La Land piano sheet music, providing access to popular tracks like “City of Stars” and “Mia & Sebastian’s Theme․” Platforms such as freepiano․com and musescore․com feature user-friendly arrangements suitable for both solo and duet performances․ These free downloads are ideal for beginners and enthusiasts alike, allowing them to explore the film’s iconic melodies without cost․ However, always ensure that the sources respect copyright laws and offer legitimate content for personal use․
3․2 Premium Sheet Music Sources
Premium sheet music sources provide high-quality, professionally arranged PDFs of La La Land songs․ Websites like musicnotes․com and sheetmusicplus․com offer accurate transcriptions, including advanced pieces like the “Epilogue” and “City of Stars․” These platforms ensure adherence to copyright standards, supporting composers and artists․ Premium options often include additional features such as performance tips and backing tracks, making them invaluable for serious pianists seeking precise and polished arrangements of the film’s beloved soundtrack․
3․3 Websites Offering Piano Arrangements
Websites like MuseScore, Piano Nanny, and Free Piano Sheets offer a wide range of piano arrangements from La La Land․ These platforms provide both free and premium sheet music, catering to pianists of all skill levels․ From solo arrangements of “City of Stars” to duet versions of “Mia & Sebastian’s Theme,” these sites ensure that musicians can access high-quality, accurately transcribed pieces․ They often feature user-friendly interfaces and diverse arrangement styles, making them popular choices for enthusiasts and professionals alike․
Features of La La Land Piano Sheet Music
La La Land piano sheet music offers diverse arrangements, catering to solo and duet performances, with varying difficulty levels and clear musical notation for seamless playability and artistic expression․
4․1 Difficulty Levels for Piano Players
La La Land piano sheet music caters to a wide range of skill levels, from intermediate to advanced players․ The arrangements are carefully crafted to maintain the emotional depth of the original scores while ensuring playability․ Beginners can start with simplified versions of iconic themes like “City of Stars,” while more experienced pianists can explore complex arrangements that reflect the film’s nuanced melodies․ The sheet music often includes dynamic markings and tempo indications, guiding players to capture the essence of each piece effectively․
4․2 Arrangements for Solo and Duet Performances
La La Land’s piano sheet music offers versatile arrangements for both solo and duet performances, enhancing its accessibility and appeal․ Solo arrangements allow pianists to shine with intricate melodies, while duet versions provide a harmonious collaboration experience․ Pieces like “Mia & Sebastian’s Theme” and “Epilogue” are particularly well-suited for duets, capturing the film’s romantic essence․ These arrangements are designed to preserve the emotional depth and complexity of the original compositions, making them perfect for both personal enjoyment and public performances․
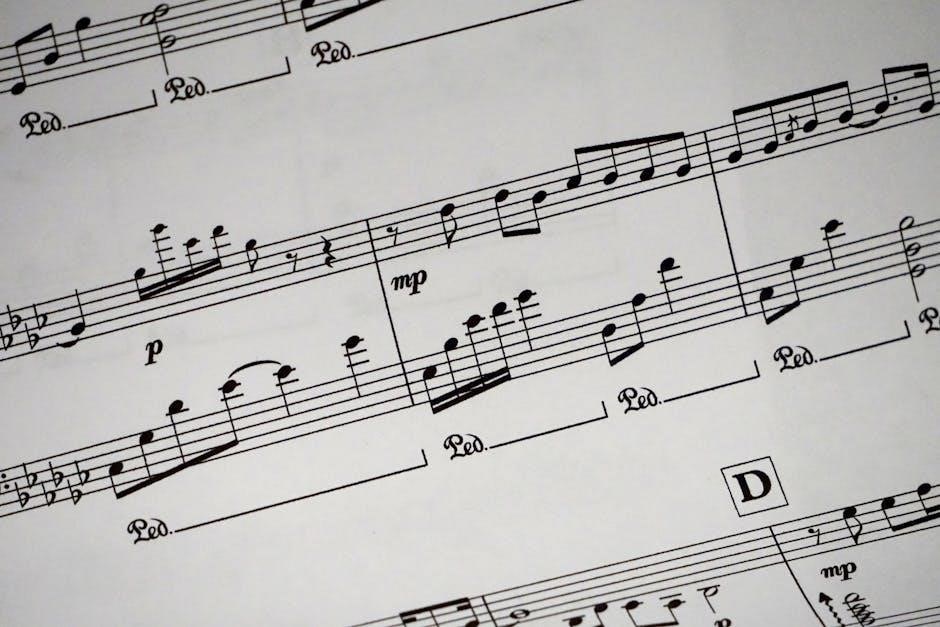
4․3 Musical Notation and Formatting
The piano sheet music for La La Land is meticulously notated, ensuring clarity and precision for pianists․ Tempo markings, dynamics, and expressive annotations are clearly indicated, allowing for faithful interpretations of the original score․ The formatting is clean and organized, with measures and staves spaced for readability․ Pieces like “City of Stars” and “Epilogue” feature intricate harmonies and melodies, while others, such as “Mia & Sebastian’s Theme,” include flowing arpeggios and emotional crescendos․ The notation captures the film’s musical essence, making it accessible for both intermediate and advanced pianists to master and enjoy․

Learning to Play La La Land Songs on Piano
Mastering La La Land’s piano pieces requires dedication and practice․ Tutorials and guides offer step-by-step lessons, while sheet music provides precise notation for intricate melodies and harmonies․
5․1 Tutorials and Guides for Beginners
Beginners can explore numerous online tutorials and guides dedicated to La La Land’s piano music․ Platforms like YouTube offer step-by-step lessons for songs such as City of Stars and Mia & Sebastian’s Theme․ These tutorials often include slow-tempo versions and detailed fingering guides, making complex pieces more accessible․ Additionally, websites provide free PDF downloads of simplified arrangements, allowing learners to practice at their own pace․ These resources are ideal for those new to piano, offering a gentle introduction to the film’s magical soundtrack․
5․2 Advanced Techniques for Experienced Players
Experienced pianists can delve into advanced techniques to master La La Land’s intricate scores․ Pieces like Epilogue and City of Stars feature complex harmonies and nuanced pedaling․ Video masterclasses and sheet music annotations offer insights into dynamics, rubato, and arpeggio patterns․ Advanced players can explore jazz improvisation, emulating Sebastian’s style, and refine their touch for emotionally charged passages․ Detailed tutorials and performance analyses provide deeper understanding, helping musicians achieve a polished, professional rendition of the film’s iconic music․
5․3 Practice Tips for Mastering the Scores
To master La La Land’s piano scores, start with slow practice, focusing on intricate arpeggios and chord progressions․ Break challenging sections into smaller phrases and gradually increase tempo․ Utilize metronomes to refine rhythm and timing․ Record sessions to identify areas for improvement․ Incorporate emotional expression by studying the film’s context․ Practice hands separately before combining them․ Leverage MIDI files or backing tracks for accompaniment․ Dedicate time to perfecting dynamics and pedaling techniques․ Consistent, focused practice will help achieve a polished performance of these iconic pieces․

The Role of Jazz in La La Land
Jazz is the heartbeat of La La Land, shaping its narrative and musical identity․ The film celebrates jazz as a timeless art form, blending tradition with modernity through its vibrant soundtrack and Sebastian’s passionate journey as a jazz purist․ Improvisation and spontaneity reflect the genre’s soul, making it central to the film’s emotional and cultural resonance․
6․1 Jazz Influences in the Film’s Music
La La Land’s soundtrack, composed by Justin Hurwitz, draws heavily from classic jazz influences, blending improvisation and harmonic complexity․ The film’s score captures the essence of traditional jazz while incorporating contemporary elements, creating a unique sound that resonates with both nostalgics and modern audiences․ Sebastian’s character, played by Ryan Gosling, embodies the spirit of jazz purism, with piano-driven pieces like “Mia & Sebastian’s Theme” reflecting the genre’s emotional depth and spontaneity․ This fusion of old and new defines the film’s musical identity and contributes to its timeless appeal․
6․2 Sebastian’s Character and Jazz Tradition
Sebastian, portrayed by Ryan Gosling, is a jazz purist striving to preserve traditional jazz in a modern world․ His character’s passion for authentic jazz is reflected in the film’s score, particularly through piano pieces like “Mia & Sebastian’s Theme․” The music, composed by Justin Hurwitz, mirrors Sebastian’s journey, blending classic jazz harmonies with contemporary arrangements․ This duality not only underscores Sebastian’s artistic struggle but also highlights the enduring relevance of jazz in today’s musical landscape, making his character a resonate figure for jazz enthusiasts and newcomers alike․
6․3 Modern Interpretations of Jazz in the Movie
La La Land reimagines jazz for the modern era, blending traditional harmonies with contemporary arrangements․ The film’s score, particularly pieces like “City of Stars” and “Epilogue,” showcases a fresh yet respectful approach to jazz․ Sebastian’s journey reflects this duality, as he navigates between preserving classic jazz and embracing innovative expressions․ The piano sheet music captures this blend, offering arrangements that appeal to both jazz purists and new generations of musicians, ensuring the genre’s relevance in today’s musical landscape․
Ryan Gosling’s Piano Skills in the Film
Ryan Gosling spent three months learning piano for his role, performing all on-screen pieces․ His dedication added authenticity, making Sebastian’s musical journey more compelling and believable to audiences․
7․1 Gosling’s Preparation for the Role
Ryan Gosling immersed himself in intensive piano training for three months to portray Sebastian․ He learned to perform complex pieces, ensuring authenticity in his on-screen performances․ His dedication not only enhanced the film’s credibility but also allowed him to connect deeply with the character’s passion for jazz․ Gosling’s commitment to mastering the piano showcased his versatility as an actor and added depth to the musical narrative of La La Land․
7․2 Authenticity of Piano Performances
Ryan Gosling’s piano performances in La La Land were remarkably authentic, as he played many scenes himself after extensive training․ This authenticity added depth to Sebastian’s character, making the musical moments feel genuine and heartfelt․ Gosling’s ability to perform complex pieces live enhanced the film’s emotional impact and contributed to its acclaim․ The realness of his piano skills resonated with audiences, making the musical elements of the story even more captivating and memorable․
7․3 Impact of Gosling’s Performance on the Film
Ryan Gosling’s dedication to mastering the piano significantly elevated La La Land’s artistic credibility․ His authentic performances not only enhanced the film’s musical sequences but also brought depth to Sebastian’s character, making him more relatable․ Gosling’s ability to convincingly portray a jazz pianist added a layer of realism that captivated audiences and critics alike, contributing to the film’s critical acclaim and enduring popularity․ His efforts seamlessly integrated music and storytelling, leaving a lasting impression on the movie’s legacy․
The Legacy of La La Land’s Music
La La Land’s music left a lasting impression, inspiring countless fan covers and arrangements․ Its enchanting melodies continue to resonate emotionally, shaping modern piano culture and creativity;
8․1 Cultural Impact of the Film’s Soundtrack
La La Land’s soundtrack has had a profound cultural impact, revitalizing interest in jazz and musical cinema․ Its timeless melodies, crafted by Justin Hurwitz, have transcended generations, resonating deeply with audiences․ The piano-driven scores, such as “City of Stars” and “Mia & Sebastian’s Theme,” have become iconic, inspiring countless covers and arrangements․ This cultural phenomenon has not only influenced music but also redefined modern cinematic storytelling, leaving an indelible mark on the entertainment industry․
8․2 Influence on Contemporary Piano Music
La La Land’s piano music has significantly influenced contemporary compositions, blending jazz and classical elements․ Its emotive, intricate arrangements have inspired pianists to explore similar styles․ The film’s success brought jazz back into the mainstream, encouraging modern composers to incorporate its nuances․ Sheet music from the soundtrack, such as “City of Stars” and “Mia & Sebastian’s Theme,” has become a benchmark for blending tradition with innovation, shaping today’s piano music landscape and inspiring a new generation of artists․
8․3 Fan Creations and Covers
Fans have embraced La La Land’s music by creating their own arrangements and covers, sharing them widely․ Platforms like Musescore offer user-generated sheet music, fostering a vibrant community․ Enthusiasts have reimagined tracks like “City of Stars” in various styles, from solo piano to duets, showcasing creativity․ These interpretations not only celebrate the original compositions but also highlight the timeless appeal of La La Land’s musical legacy, inspiring further artistic expression and keeping its magic alive․
Legal and Ethical Considerations
Respecting copyright laws is crucial when using La La Land piano sheet music․ Licensed sheets ensure ethical use, supporting composers and avoiding legal consequences for unlicensed distribution․
9․1 Copyright Issues with Sheet Music
Downloading or distributing unlicensed La La Land piano sheet music violates copyright laws, posing legal risks․ Composers like Justin Hurwitz and publishers hold exclusive rights, requiring proper licensing for legitimate use․ Unauthorized sharing can lead to penalties, as it deprives creators of rightful compensation․ Ensuring legal access respects intellectual property and supports the music industry’s sustainability․ Always opt for licensed sources to avoid infringement and uphold ethical standards in music sharing and performance․
9․2 Licensed vs․ Unlicensed Sheet Music
Licensed La La Land piano sheet music ensures legal and ethical access, supporting creators and publishers․ It guarantees high-quality, accurate arrangements, often with exclusive content․ Unlicensed versions, while tempting, risk copyright infringement and may lack accuracy․ Licensed options, available from reputable sites like Musicnotes or Alfred Music, provide peace of mind and contribute to the music industry’s growth․ Choosing licensed sheets respects the work of composers like Justin Hurwitz and ensures a premium musical experience for pianists worldwide․
9․4 Respect for Composer Rights
Respecting composer rights is essential when using La La Land piano sheet music․ Purchasing licensed sheets supports creators like Justin Hurwitz and ensures legal compliance․ It promotes the value of original work and sustains the music industry․ Unlicensed use undermines artists’ efforts and violates copyright laws․ By choosing licensed options, pianists contribute to the creation of future musical masterpieces while enjoying high-quality, accurate arrangements․ Respect for composer rights fosters a culture of appreciation for artistic labor and intellectual property․