
Horizontal fence plans offer a modern, versatile solution for outdoor spaces, providing privacy and aesthetic appeal. PDF guides simplify construction with detailed instructions and designs.
1.1 What is a Horizontal Fence?
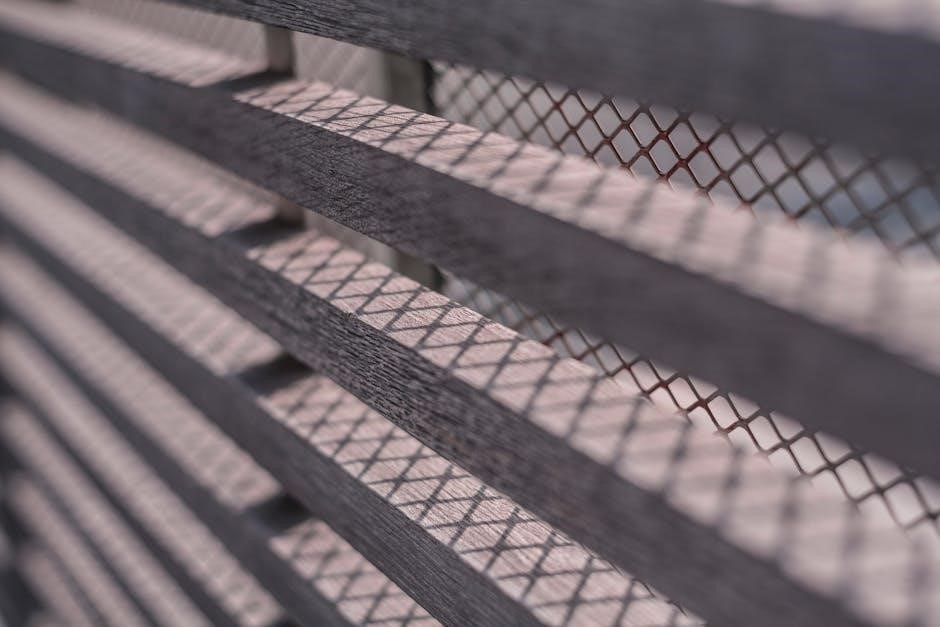
A horizontal fence is a modern and sleek fencing option where horizontal boards or slats are attached to vertical posts, creating a contemporary design. Unlike traditional vertical fences, horizontal fences emphasize width and can enhance the aesthetic of outdoor spaces. They are often used for privacy, security, and decorative purposes, with materials like wood, metal, or composite. The horizontal layout provides a unique visual appeal, making it a popular choice for homeowners seeking a minimalist or rustic look. It is also versatile, suitable for various settings, from residential yards to commercial properties, offering both functionality and style.
1.2 Benefits of Using Horizontal Fence Plans
Horizontal fence plans offer numerous benefits, including enhanced visual appeal and modern design. They provide privacy and security while adding value to your property. Durability is another advantage, as horizontal fences can withstand various weather conditions. Additionally, these plans are customizable, allowing homeowners to choose materials like wood, metal, or composite. The horizontal layout can also make spaces appear larger. PDF guides simplify the construction process with step-by-step instructions, making it easier for DIY enthusiasts to achieve professional results. Overall, horizontal fences are a practical and stylish solution for outdoor spaces, combining functionality with aesthetics to meet diverse needs and preferences.
Materials and Tools Needed for Horizontal Fence Construction
Cedar or pressure-treated wood, posts, horizontal panels, weather-resistant screws, post-hole diggers, drills, saws, measuring tapes, levels, and safety gear are essential for building a horizontal fence.
2.1 List of Required Materials
To construct a horizontal fence, you’ll need durable materials like cedar or pressure-treated wood for posts and panels. Additional materials include weather-resistant screws, post-hole diggers for digging, drills for pre-drilling holes, saws for cutting wood, measuring tapes for accurate measurements, levels to ensure even installation, and safety gear like gloves and goggles. Concrete or quick-set mix is essential for securing posts. Weather-resistant wood stain or sealant can be applied for protection. For gates, hinges and latches are necessary. All materials should align with local building codes and be suitable for outdoor conditions to ensure longevity and stability of the fence structure.
2.2 Essential Tools for the Project
Building a horizontal fence requires specific tools to ensure precision and efficiency. A post-hole digger or power auger is necessary for digging holes for fence posts. A drill with drill bits is needed for pre-drilling screw holes to avoid splitting wood. A circular or hand saw is essential for cutting posts and panels to the required lengths. Measuring tape and level tools are crucial for accurate measurements and ensuring the fence is evenly aligned. A hammer or impact wrench is used for securing screws and bolts. Safety gear like gloves and goggles should be worn throughout the process. Sandpaper may be needed to smooth rough wood edges, and a concrete mixer or trowel is required for setting posts in concrete.
2.3 Cost Estimate for Materials
Estimating material costs is essential for budgeting your horizontal fence project. Cedar or pressure-treated lumber for posts and panels can range from $10 to $20 per board, depending on length and quality. Metal or vinyl materials may cost more but offer durability. Screws, bolts, and brackets typically add $50 to $100. Concrete for post footings can cost around $40 per bag, with sand or gravel adding another $30 to $50. Decorative elements like post caps or stain may add $20 to $50. Overall, the cost for a 50-foot fence can range from $500 to $1,500, averaging $10 to $30 per linear foot, depending on material choices and design complexity.

Planning and Design Considerations
Planning a horizontal fence involves understanding property lines, local regulations, and design preferences. Measure your space accurately and choose a style that complements your landscape and meets codes.
3.1 Understanding Property Lines and Regulations
Before building a horizontal fence, it’s crucial to identify property lines to avoid legal disputes. Check local building codes and regulations, as they dictate fence height, material usage, and setback requirements. Some areas may require permits, especially if the fence is near public streets or shared boundaries. Ensure compliance with neighborhood covenants or homeowners’ association rules to prevent potential issues. Proper planning helps avoid costly modifications or removals later. Always verify with local authorities to understand specific restrictions and ensure your project adheres to all legal standards for a smooth construction process.
3.2 Choosing the Right Design for Your Space
Choosing the right horizontal fence design involves measuring your space and selecting styles that complement your property. Consider the spacing between panels, height, and material to ensure functionality and aesthetics. Factor in local climate conditions and desired privacy levels. Ensure the design aligns with your home’s architecture and neighborhood guidelines. Use PDF plans to visualize layouts and select finishes like stained wood or metal for a modern look. Blending practicality with style ensures your fence enhances your outdoor space while meeting specific needs. Always consult local resources for inspiration tailored to your area.
3.3 Measuring and Layout Tips
Accurate measuring and layout are crucial for a successful horizontal fence project. Start by drawing a detailed layout plan, marking property lines and fence dimensions. Use post supports and pre-drill holes to ensure alignment. Measure twice to confirm spacing and angles, especially for corners. Set the bottom of the fence 2 inches above the ground to prevent moisture damage. Use a level to ensure posts are straight and panels are evenly spaced; Refer to PDF guides for specific measurements and diagrams to visualize your project. Proper planning prevents costly mistakes and ensures a professional finish. Always double-check local regulations before starting.
Step-by-Step Construction Guide
Start by preparing the site, marking property lines, and installing posts. Attach horizontal panels securely, ensuring proper alignment. Build and install the gate, then add finishing touches like staining or sealing.
4.1 Preparing the Site
Preparing the site is the first critical step in building a horizontal fence. Start by clearing the area of debris, vegetation, and obstructions. Mark the property lines using stakes and string to ensure accurate placement. Check for underground utilities to avoid damage during digging. Level the ground to create an even surface, removing any uneven terrain. Handle materials carefully to prevent damage. Ensure compliance with local building codes and regulations. Measure and layout the fence design according to your plan. Having a well-prepared site ensures a smooth and successful construction process. Proper preparation is key to achieving professional-looking results.
4.2 Installing Posts and Supports
Installing posts and supports is a crucial step in building a horizontal fence. Start by digging holes for the posts, ensuring they are deep enough to provide stability. Set the posts in place, using concrete to secure them firmly. For horizontal fence designs, line posts are often used as corner posts, while gate posts are specifically designed to accommodate vertical nailers. Pre-drill holes for supports and attach them to the posts. Ensure all posts are level and aligned properly before proceeding. Proper installation of posts and supports ensures the structural integrity of your fence. Follow the PDF guide for precise measurements and alignment.
4.3 Attaching Horizontal Panels
Attaching horizontal panels is a straightforward process that requires precision. Start by aligning the pre-notched horizontal slats with the routed holes in the posts. Secure each panel using screws or nails, ensuring a snug fit. For added stability, use vertical nailers between the panels and posts. Make sure the panels are evenly spaced and level. If using a frame, attach the panels to the frame first before securing it to the posts. Leave a small gap at the bottom for drainage and to comply with local building codes. Once all panels are in place, inspect the fence for alignment and stability. Tighten any loose fasteners and ensure all edges are smooth for safety. Properly attaching the panels ensures a durable and visually appealing fence. Follow the PDF guide for precise spacing and alignment tips.
4.4 Building and Installing the Gate
Building and installing the gate is a critical step in completing your horizontal fence. Begin by constructing the gate frame using the same materials as your fence panels. Attach the horizontal panels to the frame, ensuring they are evenly spaced and securely fastened. Install the gate post separately, using a 2×4 vertical nailer for added stability. Mount the gate to the post using hinges and secure it with a latch or lock. Ensure the gate aligns perfectly with the fence and is level. Finish by staining or sealing the gate to match the fence. Proper installation ensures smooth operation and longevity. Follow PDF guides for precise measurements and hardware recommendations.
4.5 Finishing Touches and Inspection
After constructing your horizontal fence and gate, apply finishing touches for a polished look. Sand any rough edges or splinters and clean the entire structure. Apply a stain, sealant, or paint to protect the materials and enhance aesthetics. Inspect the fence for even spacing, secure attachments, and proper alignment. Check the gate’s hinges and latch for smooth operation. Ensure all hardware is tightened and the structure is stable. Review local building codes to confirm compliance. Finally, walk along the fence to ensure there are no gaps or damages. Address any issues promptly to ensure longevity and safety. Refer to your PDF guide for final inspection checklists.

PDF Resources for Horizontal Fence Plans
Download free PDF guides for horizontal fence plans, featuring detailed DIY instructions, Sketchup files, and customizable designs to help you build your perfect fence.
5.1 Free Downloadable PDF Guides
Access a variety of free PDF guides for horizontal fence plans, offering step-by-step instructions and detailed diagrams. These resources cover materials, tools, and construction methods, ensuring a smooth project execution. Many guides include customizable designs, allowing you to tailor your fence to fit your space and style. Whether you’re a DIY novice or an experienced builder, these PDFs provide comprehensive support. Download templates, measurement tips, and design inspiration to create a stunning horizontal fence that enhances your property’s curb appeal and functionality. Start your project confidently with these accessible and informative resources.
5.2 Detailed Instructions in PDF Format
Detailed PDF guides provide comprehensive step-by-step instructions for constructing horizontal fences. Each guide includes lists of required materials, precise measurements, and clear diagrams. Instructions cover post installation, panel attachment, and gate construction, ensuring accuracy. Many PDFs offer customizable designs, allowing you to adapt plans to your specific needs. Troubleshooting tips and safety precautions are also included to help avoid common mistakes. These resources are ideal for both DIY enthusiasts and professionals, offering a user-friendly approach to building a durable and visually appealing horizontal fence. With these detailed plans, you can achieve a professional-grade result with ease and confidence.
5.3 Sketchup and CAD Files for Advanced Designs
For professionals and enthusiasts seeking intricate designs, SketchUp and CAD files provide advanced templates for horizontal fences. These files offer detailed 3D models and precise measurements, enabling customization. Users can modify designs to fit specific spaces or materials, ensuring a seamless integration with outdoor aesthetics. CAD files include layers for posts, panels, and gates, while SketchUp models allow real-time visualization. These resources are perfect for creating unique and complex fence layouts, offering unmatched flexibility and precision. They cater to those who want to push creative boundaries and achieve a bespoke fencing solution tailored to their property’s architecture and landscape.
Legal and Safety Considerations
Ensure compliance with local building codes and obtain necessary permits before construction. Always follow safety guidelines to avoid accidents during the fencing process.
6.1 Obtaining Necessary Permits
Before starting your horizontal fence project, verify local regulations and obtain required permits. Contact your local building department to ensure compliance with zoning laws and property line restrictions. Some areas may require submissions of detailed plans or inspections. Failure to secure permits can result in fines or project halts. Plan ahead and allow time for approvals, as processing times vary. Proper documentation, including PDF plans, will facilitate the permit application process. Remember, compliance ensures safety and avoids legal issues. Always check with authorities to confirm specific requirements for your area.
6.2 Compliance with Local Building Codes
Compliance with local building codes is crucial for a safe and legally approved horizontal fence. Verify height restrictions, setback requirements, and material guidelines. Some areas may require specific designs or inspections. Ensure your fence aligns with neighborhood aesthetic standards and structural integrity. Review local ordinances to understand restrictions on materials, spacing, and styles. Submit detailed PDF plans if necessary for approval. Non-compliance can lead to fines or removal. Always consult local authorities to confirm specifications before construction. This ensures your project meets safety standards and avoids legal complications, providing peace of mind and a durable, long-lasting fence.
6.3 Safety Tips During Construction
Ensure safety during horizontal fence construction by wearing protective gear like gloves and safety glasses. Use proper lifting techniques to avoid injuries. Keep tools sharp and in good condition to prevent accidents. Maintain a clean work area to reduce tripping hazards. When using power tools, follow manufacturer guidelines and ensure proper ventilation. Never leave sharp objects or materials unattended. Inspect equipment regularly for damage. Ensure all helpers are aware of safety protocols. For high structures, use sturdy ladders and always have a spotter. Properly secure panels and posts to avoid collapse. Follow local safety codes and best practices to ensure a safe and successful project.
Maintenance and Repair Tips
Regularly inspect for damage, clean debris, and protect your fence from weather. Repair damaged panels promptly to maintain structural integrity and extend lifespan.
7.1 Regular Inspection Checklist
To ensure your horizontal fence remains sturdy, conduct regular inspections. Check for loose panels, rotting wood, or rusted hardware. Look for signs of weather damage, such as warping or discoloration. Verify that posts are secure and the foundation remains stable. Inspect gate hinges and latches for proper function. Clean debris accumulated between panels to prevent moisture buildup. Address minor issues promptly to avoid costly repairs. Keep a checklist to track inspections and maintain a record for future reference. Regular checks help preserve the fence’s appearance and longevity, ensuring it continues to provide privacy and security for years to come.
7.2 Repairing Damaged Panels and Posts
Begin by assessing the extent of damage to panels or posts. For minor cracks or splits, use wood sealant or filler to reinforce the material. Replace severely damaged panels with new ones, ensuring they match the original design. Check post stability; if loose, re-anchor them with concrete or adjust the footing. Address rotting wood by treating with preservatives or replacing sections. Tighten any loose screws or bolts and inspect for rust, replacing hardware if necessary. For extensive damage, consult a professional to ensure structural integrity. Regular repairs maintain the fence’s functionality and appearance, preventing further deterioration over time.
7.3 Protecting the Fence from Weather Damage
To protect your horizontal fence from weather damage, apply a waterproof sealant or stain, especially to wood surfaces. Use materials like cedar or treated lumber for natural resistance to rot and moisture. Regularly inspect for signs of wear, such as warping or discoloration, and address issues promptly. Ensure the fence is set at least 2 inches above ground to prevent water pooling. Trim nearby plants to reduce moisture exposure and avoid using harsh chemicals that may degrade materials. For metal fences, apply rust-resistant coatings. By maintaining these protective measures, your fence will withstand harsh weather conditions and retain its structural integrity and appearance over time.
Creative Ideas for Customization
Enhance your horizontal fence with decorative elements, lighting, or mixed materials for a unique and personalized look that complements your outdoor space.
8.1 Adding Decorative Elements

Enhance your horizontal fence with decorative elements like intricate wood carvings, metal accents, or lattice panels. These details add visual interest and personality to your design. Consider adding post caps or ornamental hardware for a polished look. Incorporating plants or vines can also blend natural beauty with your fence’s structure. For a modern touch, integrate LED lighting into the panels or posts to create a striking evening display. These decorative elements not only personalize your fence but also increase your property’s curb appeal and value. Explore various styles in PDF guides to find the perfect embellishments for your project.
8.2 Incorporating Lighting
Incorporating lighting into your horizontal fence enhances both functionality and aesthetics. Solar-powered lights or LED strips can be embedded into posts or panels for a subtle glow. String lights woven through the slats create a warm, inviting ambiance. Motion-sensitive lights add security, while decorative post caps with built-in lights provide a elegant touch. PDF guides offer step-by-step instructions for safe and effective installation. Lighting not only highlights your fence’s design but also improves visibility and safety at night. Choose from various styles and placements to match your home’s exterior and create a welcoming outdoor space.
8.3 Mixing Materials for Unique Designs
Mixing materials is a great way to create a one-of-a-kind horizontal fence. Combine wood with metal accents or vinyl for durability and style. Incorporating natural stone or brick posts adds elegance, while recycled materials offer an eco-friendly touch. Contrast textures, like smooth metal slats with rustic wood frames, for visual interest. PDF guides provide inspiration and instructions for blending materials seamlessly. Experiment with color combinations, such as dark metal against light wood, to enhance curb appeal. This approach allows you to personalize your fence, ensuring it complements your home’s architecture while standing out in the neighborhood.
Horizontal fence plans offer a rewarding DIY project, transforming outdoor spaces with style and functionality. These guides make building manageable, ensuring a beautiful and durable result for years.
9.1 Final Thoughts on Building a Horizontal Fence
Building a horizontal fence is a rewarding project that enhances your property’s curb appeal and functionality. With detailed PDF plans, you can achieve professional-like results. Ensure compliance with local regulations and use high-quality materials for durability. Regular maintenance will keep your fence looking its best. Whether for privacy, security, or aesthetics, a horizontal fence offers versatility and style, making it a great addition to any home or garden. Take pride in your DIY accomplishment and enjoy the benefits of your new fence for years to come.
9.2 Encouragement to Start Your Project
Embarking on your horizontal fence project is an exciting journey that can transform your outdoor space. With the right tools and a clear PDF guide, you can confidently bring your vision to life. Don’t hesitate to begin—each step, from planning to completion, is manageable and rewarding. Remember, patience and attention to detail will ensure a beautiful and durable result. Gather your materials, follow the instructions, and watch your project unfold. The sense of accomplishment you’ll feel upon finishing will make every effort worthwhile. Start today and create the perfect fence for your home or garden!