The 2017 Chevrolet Equinox Manual is an essential guide for owners‚ providing detailed information on operation‚ maintenance‚ and troubleshooting. It ensures optimal performance and safe driving experiences.
Importance of the Owner’s Manual
The 2017 Chevrolet Equinox Manual is a vital resource for owners‚ offering comprehensive guidance on vehicle operation‚ maintenance‚ and troubleshooting. It ensures safe and efficient use of the SUV‚ providing detailed instructions for optimizing performance and addressing common issues. The manual covers essential information‚ from routine maintenance schedules to advanced safety features‚ helping owners maximize their driving experience. By referring to the manual‚ users can avoid costly repairs‚ understand diagnostic codes‚ and make informed decisions about upgrades or modifications. It also serves as a reference for warranty details and proper care practices‚ making it an indispensable tool for both new and experienced owners of the 2017 Chevrolet Equinox.
What the Manual Covers
The 2017 Chevrolet Equinox Manual provides a comprehensive overview of the vehicle’s features‚ maintenance requirements‚ and troubleshooting procedures. It covers essential topics such as engine operation‚ transmission details‚ and safety systems. The manual also includes guidelines for routine maintenance‚ like oil changes and tire pressure checks‚ as well as detailed instructions for understanding diagnostic trouble codes. Additionally‚ it offers insights into the SUV’s advanced technologies‚ such as the infotainment system and driver assistance features. With sections on fuel efficiency‚ emissions‚ and technical specifications‚ the manual serves as a complete reference guide for optimizing the performance and longevity of the 2017 Chevrolet Equinox.
Key Features of the 2017 Chevrolet Equinox
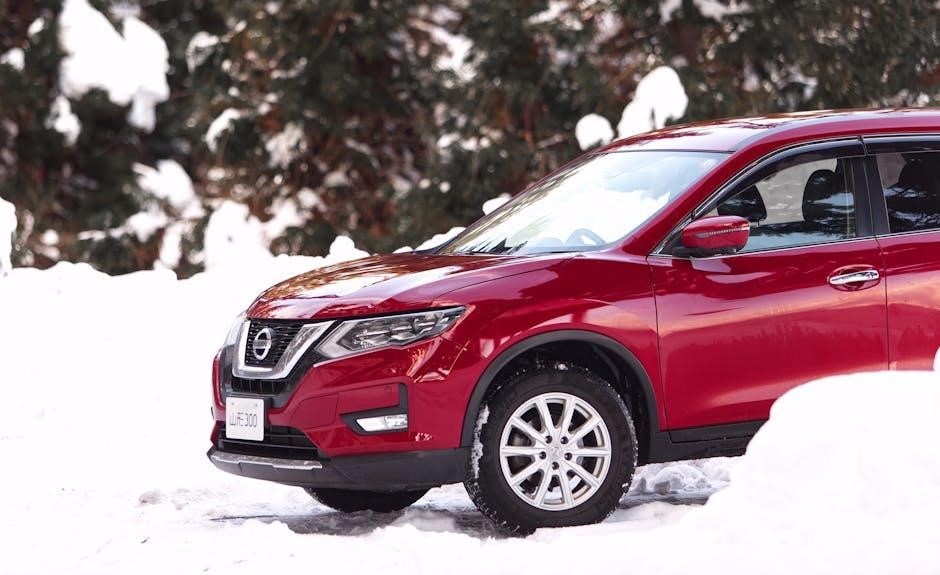
The 2017 Chevrolet Equinox features a sleek exterior‚ spacious interior‚ advanced safety technologies‚ and efficient engine options‚ blending comfort‚ performance‚ and modern tech seamlessly for a versatile driving experience.
Exterior Design and Updates
The 2017 Chevrolet Equinox boasts a contemporary exterior design with a refreshed front grille and updated styling cues. Its aerodynamic profile enhances visual appeal while improving efficiency. The front-end updates include new headlights and a restructured bumper‚ giving it a bold stance. Available wheel designs‚ ranging from 17-inch to 18-inch alloy wheels‚ complement the vehicle’s modern look; The rear features a sleek design with LED taillights‚ adding to its sophisticated appearance. These updates ensure the Equinox stands out as a stylish and practical compact SUV‚ blending functionality with aesthetic appeal seamlessly.
Interior Comfort and Technology
The 2017 Chevrolet Equinox offers a spacious and refined interior‚ designed for comfort and practicality. Premium materials and ergonomic seating provide a comfortable cabin environment. The infotainment system features a 7-inch touchscreen display‚ supporting Bluetooth connectivity and smartphone integration. Optional upgrades include a rear-seat entertainment system and a premium audio setup. Ample cargo space and versatile seating configurations make it ideal for families or road trips. The interior combines functionality with modern technology‚ ensuring a seamless and enjoyable driving experience while catering to both passenger comfort and technological convenience.
Engine Options and Performance
The 2017 Chevrolet Equinox offers two engine options for diverse performance needs. The standard 2.4-liter ECOTEC four-cylinder engine delivers efficient fuel economy and sufficient power for everyday driving. For those seeking more power‚ the available 3.6-liter V6 engine provides robust acceleration and towing capability. Both engines are paired with a smooth-shifting six-speed automatic transmission‚ ensuring responsive handling and a refined driving experience. The Equinox balances performance with efficiency‚ making it suitable for both city commutes and highway adventures. Its powertrain options cater to a wide range of driver preferences‚ offering a blend of capability and reliability.
Fuel Efficiency and Environmental Impact
The 2017 Chevrolet Equinox is designed to deliver impressive fuel efficiency‚ reducing its environmental footprint. Equipped with a 2.4-liter ECOTEC engine‚ it achieves an estimated EPA rating of up to 21 MPG in the city and 31 MPG on the highway. The optional 3.6-liter V6 engine‚ while more powerful‚ still offers respectable fuel economy. The vehicle incorporates technologies like direct fuel injection and variable valve timing to optimize performance while minimizing emissions. Additionally‚ the Eco mode available in the manual enhances fuel-saving capabilities. These features ensure the Equinox remains environmentally conscious without compromising on performance‚ making it a practical choice for eco-minded drivers.
Safety Features and Ratings
The 2017 Chevrolet Equinox prioritizes safety with a comprehensive suite of features. It includes a total of six airbags‚ anti-lock braking systems (ABS)‚ and electronic stability control to enhance traction and prevent skidding. The vehicle also offers optional advanced safety technologies like Forward Collision Alert and Lane Departure Warning‚ providing additional protection for drivers. The Equinox has earned a 4-star overall safety rating from the National Highway Traffic Safety Administration (NHTSA) and is recognized as a Top Safety Pick by the Insurance Institute for Highway Safety (IIHS). These features and ratings underscore Chevrolet’s commitment to delivering a secure driving experience‚ ensuring peace of mind for both drivers and passengers.

Technical Specifications of the 2017 Chevrolet Equinox
The 2017 Chevrolet Equinox features a 2.4L 4-cylinder engine or optional 3.6L V6‚ paired with a 6-speed automatic transmission. It offers FWD or AWD‚ seating for five‚ and a 112.5-inch wheelbase.
Engine Details and Capabilities
The 2017 Chevrolet Equinox is powered by a standard 2.4-liter Ecotec four-cylinder engine‚ delivering 182 horsepower and 172 lb-ft of torque. This engine offers excellent fuel efficiency and smooth performance for daily driving. For those seeking more power‚ an optional 3;6-liter V6 engine is available‚ producing 301 horsepower and 272 lb-ft of torque‚ ideal for towing or hauling. Both engines are paired with a 6-speed automatic transmission‚ ensuring seamless shifting and responsive acceleration. The V6 model also supports a maximum towing capacity of up to 3‚500 pounds when properly equipped. With these engine options‚ the Equinox balances efficiency and capability for diverse driving needs.
Transmission and Drivetrain Options
The 2017 Chevrolet Equinox features a 6-speed automatic transmission‚ designed for smooth shifting and optimal performance. It is available with front-wheel drive (FWD) as the standard configuration‚ offering improved fuel efficiency for everyday driving. For enhanced traction and control‚ an all-wheel drive (AWD) system is optional. The AWD system automatically transfers power to the rear wheels when needed‚ providing better stability on slippery or uneven surfaces. This combination of transmission and drivetrain options ensures a balance of efficiency‚ capability‚ and driving confidence in various conditions. The system is seamlessly integrated with the engine‚ delivering a responsive and refined driving experience.
Performance Metrics and Handling
The 2017 Chevrolet Equinox delivers solid performance with its 2.4L 4-cylinder engine‚ producing 182 horsepower and 172 lb-ft of torque‚ suitable for city and highway driving. The available 3.6L V6 engine boosts power to 301 horsepower and 272 lb-ft of torque‚ ideal for towing and demanding scenarios. Handling is refined with a tuned suspension system that balances comfort and responsiveness. The electric power steering offers precise control‚ while the optional all-wheel drive (AWD) enhances traction on slippery surfaces. Overall‚ the Equinox provides a smooth and capable driving experience‚ making it versatile for various road conditions. Its performance metrics ensure efficiency and reliability for everyday use.
Fuel Capacity and Economy
The 2017 Chevrolet Equinox features a fuel tank capacity of 18.8 gallons‚ ensuring extended range for both city and highway driving. With the standard 2.4L 4-cylinder engine‚ the Equinox achieves an EPA-estimated 21 MPG city‚ 31 MPG highway‚ and 25 MPG combined for front-wheel-drive models. All-wheel-drive variants see slightly reduced efficiency at 20 MPG city‚ 28 MPG highway‚ and 23 MPG combined. The available 3.6L V6 engine offers higher power but lower fuel economy‚ with ratings of 17 MPG city‚ 24 MPG highway‚ and 20 MPG combined. These figures make the Equinox a practical choice for drivers seeking a balance between performance and efficiency. Proper maintenance‚ as outlined in the manual‚ can help optimize fuel economy further.
Emissions and Environmental Specifications
The 2017 Chevrolet Equinox is designed to meet stringent emissions standards‚ reducing its environmental impact. The vehicle features advanced emissions control technologies‚ including a catalytic converter and exhaust gas recirculation system‚ to minimize harmful emissions. The Equinox also incorporates fuel-efficient engine options‚ such as the 2.4L Ecotec engine‚ which helps lower greenhouse gas emissions. Additionally‚ the SUV supports the use of E85 ethanol-blend fuel‚ further reducing dependence on fossil fuels. Chevrolet ensures compliance with U.S. Environmental Protection Agency (EPA) standards‚ making the Equinox a more eco-friendly choice for drivers seeking a balance between performance and environmental responsibility.
Maintenance Schedule and Tips
Regular maintenance is crucial for the 2017 Chevrolet Equinox. Follow the recommended schedule for oil changes‚ tire rotations‚ and inspections to ensure optimal performance and longevity of your vehicle.
Recommended Maintenance Intervals
For the 2017 Chevrolet Equinox‚ regular maintenance is essential to ensure optimal performance. Oil changes are recommended every 5‚000 to 7‚500 miles‚ depending on driving conditions. Tire rotations should occur every 7‚500 miles to maintain even tread wear. Brake pads and rotors should be inspected every 15‚000 miles‚ while spark plugs need replacement at 30‚000 miles. The engine air filter should be replaced every 15‚000 miles‚ and the cabin air filter every 12‚000 miles. Additionally‚ coolant and transmission fluid should be checked and replaced as specified in the manual. Adhering to these intervals ensures reliability and extends the vehicle’s lifespan.
Tire Pressure and Rotation Guidelines
Proper tire maintenance is crucial for the 2017 Chevrolet Equinox. Tire pressure should be checked monthly and before long trips‚ using a tire pressure gauge. The recommended pressure can be found on the driver’s side doorjamb or in the owner’s manual. Under-inflation can reduce fuel efficiency and tire life. Tire rotation is recommended every 7‚500 miles to ensure even tread wear and extend tire lifespan. A rearward cross pattern is suggested for rotation. Uneven wear may indicate misalignment or improper rotation. Always refer to the manual for specific guidelines tailored to your vehicle’s configuration and driving conditions to maintain optimal performance and safety.
Oil Change and Fluid Requirements
The 2017 Chevrolet Equinox requires regular oil changes to maintain engine performance. Use 0W-20 synthetic oil for optimal fuel efficiency and engine protection. Oil changes are recommended every 7‚500 to 10‚000 miles‚ depending on driving conditions. Always check the owner’s manual for specific intervals. Other essential fluids‚ such as coolant‚ transmission‚ and brake fluids‚ should be inspected and replaced as needed. Proper fluid levels ensure smooth operation and prevent damage. For coolant‚ a 50/50 mix of DEX-COOL® and water is recommended. Transmission fluid should be checked every 30‚000 miles‚ while brake fluid is typically replaced every 5 years or as indicated by the manual. Always use high-quality fluids to maintain your vehicle’s performance and longevity.
Brake Maintenance and Inspection
Regular brake maintenance is crucial for safety and performance. The 2017 Chevrolet Equinox Manual recommends inspecting brake pads every 12‚500 miles and replacing them when worn below 1/8-inch thickness. Brake rotors should be checked for excessive wear or warping and resurfaced or replaced as needed. Brake fluid levels should be checked every 12‚500 miles‚ and fluid should be replaced every 5 years or as specified. Look for signs of brake component wear‚ such as cracks in hoses or excessive dust on wheels. If any issues are detected‚ consult a certified technician to ensure proper repairs and maintain reliable braking performance.

Using the 2017 Chevrolet Equinox Manual Effectively
The 2017 Chevrolet Equinox Manual is designed to help owners understand and maintain their vehicle. Use the table of contents for quick navigation and reference diagnostic codes for troubleshooting common issues.
Navigating the Manual’s Table of Contents
Understanding Diagnostic Trouble Codes
The 2017 Chevrolet Equinox Manual explains how diagnostic trouble codes (DTCs) are used to identify issues with your vehicle. These codes are stored in the car’s computer when a problem is detected‚ such as engine or emissions issues. The manual provides a list of common DTCs‚ like P0171 (system too lean) or P0300 (random misfire)‚ and explains their meanings. It also guides you on how to retrieve these codes using an OBD-II scanner or the instrument cluster. Understanding these codes helps you diagnose and address problems promptly‚ ensuring your vehicle runs efficiently and safely. Always consult the manual or a certified technician for accurate interpretations and repairs.
Troubleshooting Common Issues
The 2017 Chevrolet Equinox Manual provides guidance for troubleshooting common issues‚ such as the Check Engine light‚ tire pressure warnings‚ or Bluetooth connectivity problems. For example‚ if the Check Engine light illuminates‚ the manual advises using an OBD-II scanner to retrieve diagnostic trouble codes (DTCs) and explains possible causes‚ like a loose gas cap or faulty oxygen sensor. For tire pressure issues‚ it recommends checking tire pressures against the specifications in the door jamb and resetting the system if needed. The manual also offers solutions for infotainment system glitches‚ such as restarting the system or updating software. Regular checks and maintenance‚ as outlined in the manual‚ can help prevent many of these issues. If problems persist‚ consulting a certified technician is recommended to ensure proper repairs and maintain vehicle performance. The manual empowers owners to identify and resolve common issues efficiently‚ saving time and reducing stress.
DIY Repair and Maintenance Guides
The 2017 Chevrolet Equinox Manual offers detailed DIY guides for routine maintenance and minor repairs. Owners can learn how to change engine oil‚ replace air filters‚ and inspect brakes. The manual also provides step-by-step instructions for tasks like headlight bulb replacement and tire pressure checks. DIY guides are complemented by illustrations and torque specifications‚ ensuring accuracy. For more complex repairs‚ the manual recommends consulting a certified technician. By following these guides‚ owners can save money and maintain their vehicle’s performance. The manual encourages regular checks to prevent issues and extend the vehicle’s lifespan. DIY maintenance fosters a deeper connection with the vehicle and enhances overall ownership experience.

Advanced Features and Technologies
The 2017 Chevrolet Equinox features advanced technologies like a touchscreen infotainment system‚ smartphone integration‚ and driver-assistance systems‚ enhancing connectivity‚ safety‚ and overall driving convenience for users.
Infotainment System and Connectivity
The 2017 Chevrolet Equinox features a user-friendly infotainment system with a 7-inch touchscreen display‚ offering seamless connectivity options. It supports Bluetooth for pairing smartphones‚ enabling hands-free calls and audio streaming. The system also includes USB ports and an auxiliary input for versatile media connections. For enhanced entertainment‚ an optional premium audio system and rear-seat entertainment system are available‚ providing a richer audio experience and keeping passengers entertained during long drives. These technologies ensure a connected and enjoyable driving experience‚ making the Equinox a modern and convenient choice for daily commutes or family trips.
Smartphone Integration and Bluetooth Setup
The 2017 Chevrolet Equinox supports seamless smartphone integration and Bluetooth connectivity. To pair your device‚ navigate to the infotainment system’s settings menu‚ select Bluetooth‚ and follow the on-screen pairing instructions. Once connected‚ you can enjoy hands-free calls‚ audio streaming‚ and voice command functionality. This feature enhances convenience and safety while driving‚ allowing you to stay connected without distractions. The system is compatible with most smartphones‚ ensuring compatibility and ease of use. This integration is a key part of the Equinox’s modern tech offerings‚ making it a practical and enjoyable vehicle for everyday use.
Driver Assistance and Safety Technologies
The 2017 Chevrolet Equinox is equipped with advanced driver assistance and safety technologies. Standard features include antilock brakes‚ stability control‚ and a comprehensive airbag system. Optional technologies like rearview cameras‚ lane departure warnings‚ and forward collision alerts enhance safety. These systems work together to provide a secure driving environment‚ offering peace of mind for drivers and passengers. The Equinox also features sensors and alerts designed to prevent accidents and improve visibility. These technologies contribute to its reputation as a reliable and protective vehicle‚ making it a top choice for safety-conscious drivers seeking a blend of innovation and dependability on the road.
Downloading and Accessing the Manual
The 2017 Chevrolet Equinox Manual is available as a free PDF download from official sources like ManualsLib and Chevrolet’s website‚ ensuring easy access for owners and enthusiasts.
Official Sources for the Manual
Official sources for the 2017 Chevrolet Equinox Manual include Chevrolet’s website and trusted platforms like ManualsLib. These sources provide authentic‚ free PDF downloads‚ ensuring reliability and accuracy. Owners can access the manual through the Chevrolet owner’s portal or by visiting authorized service websites. Additionally‚ platforms like ManualsLib offer comprehensive databases of vehicle manuals‚ making it easy to find and download the 2017 Chevrolet Equinox Manual without registration or fees. Always verify the source to ensure the manual is genuine and specific to the 2017 model year for accurate information.
Free PDF Downloads and Viewing Options
The 2017 Chevrolet Equinox Manual is available for free download as a PDF from reputable sources like ManualsLib and OwnersManuals2.com. These platforms offer direct access to the full manual without registration or fees. Users can view the manual online in full screen or download it to their devices for offline access. The PDF format ensures compatibility with computers‚ smartphones‚ and tablets‚ making it convenient for owners to reference the manual anytime. Additionally‚ the manual is searchable‚ allowing users to quickly find specific topics or troubleshooting guides. Free PDF downloads provide an eco-friendly and cost-effective way to access essential information for maintaining and operating the vehicle.

Frequently Asked Questions
Common inquiries about the 2017 Chevrolet Equinox Manual include resetting the tire pressure light‚ identifying engine cylinders‚ and troubleshooting CD eject issues. The manual addresses these topics clearly.
Common Issues and Solutions
Common issues with the 2017 Chevrolet Equinox include the tire pressure warning light staying on‚ the Check Engine light illuminating‚ and CD eject problems. For the tire pressure light‚ check and adjust tire pressure to recommended levels. If the issue persists‚ have the TPMS inspected. The Check Engine light may indicate engine or emissions issues‚ requiring professional diagnosis. For CD eject problems‚ consult the manual or contact a technician. Additionally‚ some users report issues with automatic seat movement‚ which may require resetting the seat controls or checking for obstructions. Always refer to the manual for specific troubleshooting steps.
Manual-Specific Queries and Clarifications
Users often inquire about accessing and interpreting the 2017 Chevrolet Equinox Manual. The manual is available in English as a free PDF download from official sources. It covers features like optional equipment variations and model-specific details. Clarifications include understanding diagnostic codes and troubleshooting steps. The manual also addresses frequently asked questions‚ such as resetting the tire pressure light or resolving CD eject issues. Users can navigate the table of contents for quick access to specific sections. For unresolved queries‚ additional resources like online forums or Chevrolet support are recommended. Ensure to refer to the manual for accurate information tailored to your vehicle.