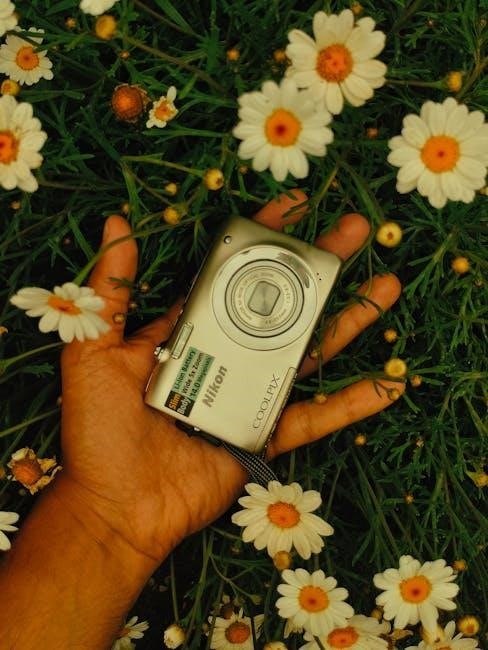
The Nikon Coolpix P900 is a versatile bridge camera offering an 83x optical zoom and 4K video recording, designed for enthusiasts and beginners seeking advanced features in a compact design.
1.1 Key Features of the Nikon Coolpix P900
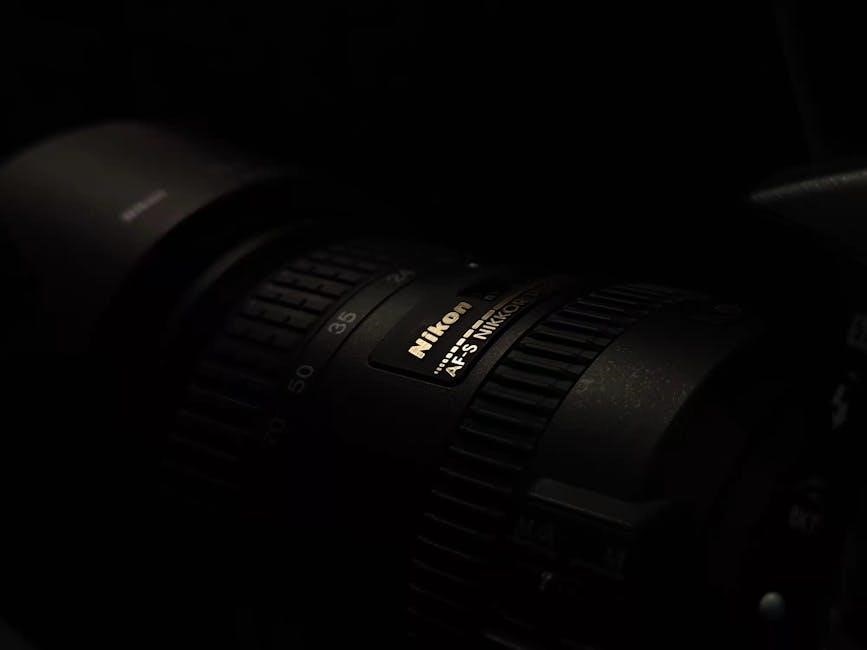
The Nikon Coolpix P900 boasts an impressive 83x optical zoom lens, covering a focal range of 24-2000mm, making it ideal for capturing distant subjects with exceptional detail. It features a 16MP CMOS sensor, ensuring high-quality images even in low-light conditions. The camera supports 4K Ultra HD video recording, allowing users to capture stunning footage. A vari-angle 3-inch LCD monitor provides flexibility in framing shots from various angles, while the electronic viewfinder offers precise composition. Built-in Wi-Fi and NFC enable seamless image transfer and remote shooting via a smartphone. The P900 also includes a range of automatic and manual controls, catering to both beginners and advanced photographers. Its ergonomic design and intuitive interface make it user-friendly, while the long battery life supports extended shooting sessions. These features combine to make the P900 a powerful tool for versatile photography.
1.2 Target Audience and Usage Scenarios
The Nikon Coolpix P900 is designed for photography enthusiasts and hobbyists seeking a balance between portability and advanced features. It appeals to travelers, wildlife photographers, and those capturing outdoor events, thanks to its powerful zoom capabilities; Beginners benefit from its automatic modes, while experienced shooters can leverage manual controls for creative freedom. The camera is ideal for capturing distant subjects, such as birds, landscapes, or sports, without the need for bulky equipment. Its compact design and intuitive interface make it suitable for casual users, while the range of shooting modes and customization options cater to more advanced photographers. Whether for personal projects or professional use, the P900’s versatility makes it a reliable choice for various photography needs. Its user-friendly nature ensures it serves both as a learning tool and a high-performance camera.

Essential Camera Controls and Settings
The Nikon Coolpix P900 features intuitive controls, including buttons, dials, and an LCD monitor, designed to simplify access to camera functions and settings for seamless photography experiences.
2.1 Understanding Buttons and Dials
The Nikon Coolpix P900 features a user-friendly interface with strategically placed buttons and dials for quick access to essential functions. The mode dial on top allows switching between Auto, Scene, Aperture Priority, Shutter Priority, and Manual modes. The zoom rocker around the shutter button controls the 83x optical zoom, enabling precise framing. Dedicated buttons for ISO, white balance, and autofocus modes simplify adjustments. The multi-selector on the rear facilitates menu navigation and focus point selection. The ergonomic design ensures intuitive operation, with buttons logically arranged to minimize hand movement. This layout enhances usability, making it easier for photographers to focus on capturing moments rather than navigating complex controls. Understanding these buttons and dials is key to unlocking the camera’s full potential for both beginners and advanced users.
2;2 Utilizing the LCD Monitor
The Nikon Coolpix P900’s 3-inch LCD monitor provides a clear and vibrant display, essential for composing shots and reviewing images. It adjusts for settings like white balance and exposure, ensuring accurate previews. The monitor offers touch functionality, allowing users to set focus points or trigger the shutter with a tap. In playback mode, it displays detailed image information, including histograms and shooting data. The LCD’s brightness can be adjusted to suit lighting conditions, and an anti-reflective coating reduces glare outdoors. Additionally, the monitor button toggles between the LCD and electronic viewfinder, offering flexibility in shooting environments. Utilizing these features effectively enhances both composition and post-shot analysis, making the LCD a crucial tool for photographers aiming to capture high-quality images consistently.
2.3 Navigating the Menu System
The Nikon Coolpix P900 features an intuitive menu system designed to help users quickly access and adjust camera settings; Access the menu by pressing the Menu button, and navigate using the multi-selector or OK button. The menu is divided into tabs, including Shooting, Setup, and Playback, each containing options tailored to specific functions. Users can customize settings like image quality, autofocus modes, and ISO sensitivity directly from the menu. The My Menu option allows saving frequently used settings for quick access. The menu also includes a help feature, providing brief explanations for complex settings. By mastering the menu system, photographers can optimize camera performance and tailor settings to their creative vision, ensuring the best results in various shooting scenarios.
The Nikon Coolpix P900 offers various shooting modes, including Auto, Scene, Aperture Priority, Shutter Priority, and Manual. These modes cater to different skill levels and photography needs. The Auto Mode on the Nikon Coolpix P900 is designed for users who want to capture high-quality images without adjusting complex settings. This mode automatically selects optimal camera settings, including aperture, shutter speed, and ISO, ensuring sharp and well-exposed photos. It is ideal for beginners or those who prefer a hassle-free shooting experience. The camera analyzes the scene and adjusts parameters to suit the subject, whether it’s a landscape, portrait, or close-up. Additionally, the Auto Mode often engages scene detection, recognizing common shooting scenarios like night portraits or action shots, and tailors settings accordingly. This mode is perfect for learning photography basics while allowing the camera to handle technical details. Users can rely on Auto Mode to deliver consistent results while they explore more advanced features later. The Scene Mode on the Nikon Coolpix P900 allows users to capture specific types of images by optimizing camera settings for particular scenarios. Common scene modes include Portrait, Landscape, Night Portrait, and Action, each tailored to enhance results in different conditions. For example, Portrait mode softens backgrounds to emphasize subjects, while Landscape mode sharpens details for scenic shots. Night Portrait balances flash with ambient light, and Action mode freezes fast-moving subjects. These modes simplify photography by automatically adjusting ISO, aperture, and shutter speed based on the selected scene. Users can quickly access Scene Mode via the camera menu or mode dial, making it ideal for intermediate photographers who want more control over their shots without switching to manual settings. This feature helps achieve professional-looking results with minimal effort. Aperture Priority Mode (A/Av) on the Nikon Coolpix P900 allows users to manually set the aperture while the camera automatically adjusts the shutter speed to ensure proper exposure. This mode is ideal for controlling depth of field, enabling photographers to isolate subjects or ensure more of the image is in focus. A lower f-stop value (like f/2.8) creates a shallow depth of field, blurring the background, while a higher f-stop (like f/8) keeps more of the image sharp. The camera’s aperture range (f/2.8 to f/8) provides flexibility for various shooting scenarios. Users can adjust the aperture using the control dial, making it easy to experiment with different effects. This mode is particularly useful for portraits, group shots, and landscapes, offering creative control without the complexity of full manual mode. Shutter Priority Mode (S/Tv) on the Nikon Coolpix P900 lets users manually set the shutter speed, with the camera automatically adjusting the aperture to maintain proper exposure. This mode is perfect for capturing motion effects, such as freezing fast-moving subjects or creating artistic motion blur. Faster shutter speeds (like 1/1000th of a second) are ideal for sports or wildlife photography, while slower speeds (like 1 second) can create a sense of movement in water or clouds. The camera’s shutter speed range (from 1/4000 to 30 seconds) offers extensive control. Users can adjust the shutter speed using the control dial, allowing for precise adjustments based on the scene. This mode is especially useful for dynamic shots, providing a balance between creative control and automated adjustments. It’s a great choice for photographers looking to experiment with motion and light effects. Manual Mode (M) on the Nikon Coolpix P900 offers full creative control, allowing users to independently adjust aperture, shutter speed, and ISO sensitivity. This mode is ideal for experienced photographers who want precise control over their images. By manually setting these parameters, users can achieve specific artistic effects, such as shallow depth of field or intentional motion blur. The camera’s control dials make it easy to adjust settings on the fly, while the LCD monitor provides real-time feedback on exposure levels. Customizable settings enable photographers to tailor their shots to unique lighting conditions or creative visions. While it requires a deeper understanding of photography principles, Manual Mode unlocks the camera’s full potential for capturing professional-quality images. Regular practice with this mode helps refine skills and ensures optimal results in various shooting scenarios. Adjust ISO for low-light performance, set white balance for accurate colors, and use autofocus modes to ensure sharp images. Fine-tune settings for optimal image quality and clarity. ISO sensitivity is crucial for capturing images in varying light conditions. On the Nikon Coolpix P900, ISO can be adjusted between 100 to 6400. Lower ISO settings (e.g., ISO 100-400) are ideal for bright lighting, ensuring minimal noise and sharp images. In low-light conditions, higher ISO settings (e.g., ISO 1600-6400) allow more light into the sensor, but may introduce noise. For best results, increase ISO gradually and review images to balance brightness and noise. The camera also features an Auto ISO mode, which automatically adjusts sensitivity based on the scene, though manual control is recommended for precise results. Experiment with different ISO levels to achieve optimal image quality in various shooting scenarios. White balance ensures accurate color representation by adjusting the camera to match the lighting conditions of the scene. The Nikon Coolpix P900 offers multiple white balance settings, including Auto, Daylight, Cloudy, Fluorescent, Incandescent, and Custom. Auto mode automatically detects and adjusts the white balance, while preset modes like Daylight or Cloudy are ideal for specific lighting scenarios. For precise control, use the Custom white balance setting by capturing a white object in the scene, ensuring neutral colors in your photos. Adjusting white balance helps eliminate unwanted color casts, such as the yellow tone of indoor lighting or the blue tint of shade. Experiment with different settings to achieve natural-looking colors in your images. Proper white balance enhances overall image quality and ensures your photos look their best in any lighting environment. The Nikon Coolpix P900 features multiple autofocus modes to suit various shooting scenarios. Single AF is ideal for stationary subjects, locking focus instantly. Continuous AF is designed for moving subjects, adjusting focus as the subject moves. Manual focus allows precise control, useful for macro photography or low-light conditions. Each mode ensures sharp images by accurately capturing subject details. Experiment with these settings to optimize focus for your shots. Proper use of autofocus modes enhances image clarity and overall quality. The Nikon Coolpix P900 supports various accessories to enhance its capabilities, including compatible lenses, tripods, and extra batteries. These tools improve stability, extend shooting range, and ensure longevity. The Nikon Coolpix P900 features a built-in lens with an 83x optical zoom, eliminating the need for interchangeable lenses. However, compatible accessories like teleconverters can extend its zoom range. External flashes, such as the Nikon Speedlight series, enhance low-light photography. A tripod is essential for stabilizing the camera, especially at maximum zoom or during long exposures. Additionally, extra batteries and memory cards are recommended for extended shooting sessions. Nikon also offers a range of optional accessories, including lens hoods and camera bags, to protect and enhance your photography experience. Always use Nikon-approved accessories to ensure compatibility and maintain the camera’s performance. These tools help maximize the P900’s potential for capturing stunning images in various conditions. To ensure the Nikon Coolpix P900’s longevity, regular maintenance is crucial. Start by cleaning the lens and LCD monitor with a soft, dry cloth to prevent smudges and scratches. Avoid using harsh chemicals or abrasive materials that could damage the surfaces. Store the camera in a cool, dry place, away from direct sunlight and moisture. Use a protective case or bag to shield it from dust and physical damage. Additionally, update the firmware periodically to maintain optimal performance. For battery care, avoid extreme temperatures and charge the battery as needed, but avoid overcharging. Proper handling and storage will help maintain the camera’s functionality and image quality over time. By following these steps, you can ensure your P900 remains in excellent condition for years to come. Regular maintenance is key to preserving its advanced features and reliability. Understand composition, lighting, and zoom techniques to capture stunning images. Experiment with angles and focus to enhance creativity, ensuring every shot tells a story with precision and clarity. Mastering composition is key to creating visually appealing images. Start by understanding the rule of thirds, leading lines, and framing to add depth and balance. Use natural or man-made elements like horizons, paths, or archways to guide the viewer’s eye. Pay attention to symmetry and patterns, which can add intrigue to your shots. Experiment with angles—shoot from low or high perspectives to add drama. Lighting plays a crucial role; natural light during the golden hour often enhances colors and textures. Avoid clutter in the background and focus on your subject. For portraits, ensure your subject’s eyes are sharp, and for landscapes, capture the foreground to create a sense of scale. Practice these techniques to elevate your photography and make your images more engaging and professional. Lighting is a fundamental element in photography, and mastering it can significantly enhance your images. Natural light is often the most flattering, with the golden hour (dawn and dusk) offering soft, warm tones that bring out vibrant colors. Avoid harsh midday sun, as it can create unflattering shadows. When shooting indoors, use softbox lights or diffusers to minimize harsh reflections. For portraits, position your subject near a window to utilize soft, indirect light. Experiment with backlight to create silhouettes or highlight textures. In low-light conditions, use a tripod to stabilize the camera and avoid blur. Adjust the white balance settings on your Nikon Coolpix P900 to ensure accurate color representation. Play with shadows and highlights to add depth and dimension to your photos, making them more dynamic and engaging. Proper lighting can transform ordinary shots into extraordinary ones. The Nikon Coolpix P900’s impressive 83x optical zoom allows for capturing distant subjects with remarkable detail, making it ideal for wildlife, astronomy, and landscape photography. To use the zoom effectively, start by composing your shot to isolate your subject, ensuring it stands out against the background. Experiment with compression techniques to create depth, such as capturing a distant mountain range with a foreground element. Avoid excessive digital zoom, as it can degrade image quality. For sharp results, use a tripod or enable Vibration Reduction (VR) to minimize camera shake, especially at high zoom levels. Practice panning to follow moving subjects, keeping them in focus while blurring the background. Additionally, try zooming during exposure to create dynamic motion effects. Mastering the P900’s zoom capabilities will help you capture stunning, high-impact images with ease and creativity. The Nikon Coolpix P900 offers customizable image and video capture settings, allowing users to adjust resolution, compression, and frame rates. For images, choose from various resolutions and compression levels to suit your needs. For video, select modes like 4K UHD or Full HD, with adjustable frame rates. Customize settings like focus modes and white balance to enhance your content. Experiment with different configurations to achieve optimal results for both stills and videos. Configuring still image settings on the Nikon Coolpix P900 allows you to tailor your photography to specific needs. The camera offers multiple resolution options, from high-quality JPEGs to RAW file capture for advanced editing. Adjust compression levels to balance file size and image quality. Choose from various aspect ratios, such as 4:3 or 16:9, to frame your shots creatively. Additionally, the P900 supports RAW image capture, enabling greater flexibility in post-processing. For optimal results, pair these settings with appropriate ISO and white balance configurations. Experiment with different combinations to achieve the desired aesthetic. Always use Nikon-branded accessories to ensure compatibility and performance. By mastering these settings, you can unlock the full potential of your camera and capture stunning still images. The Nikon Coolpix P900 offers robust video recording capabilities, including 4K Ultra HD resolution at 30p and Full HD at 60p, ensuring crisp and detailed footage. Users can choose from various resolutions and frame rates to suit their creative needs. The camera also features built-in optical image stabilization, reducing camera shake and blur during recording. For enhanced audio, the P900 includes a stereo microphone and supports external microphone input via an optional accessory. Time-lapse and slow-motion modes add creative possibilities. Accessing video settings is straightforward through the menu system, allowing quick adjustments to resolution, frame rate, and autofocus. For optimal results, pair video recording with a tripod for stability and consider using manual focus for precise control. This makes the P900 a versatile tool for both casual and advanced videographers. The Nikon Coolpix P900 allows users to review images on its 3-inch LCD monitor and perform basic editing, such as trimming, resizing, and adjusting brightness and contrast. The Nikon Coolpix P900 allows users to easily review and manage their images using the camera’s 3-inch LCD monitor. After capturing, photos can be viewed in playback mode, where you can scroll through images using the multi-selector. The camera also offers a slideshow feature for viewing your photos in sequence. To manage your images, you can delete unwanted photos, protect favorites, or organize them into albums. Additionally, the camera supports basic image editing, such as resizing and adjusting brightness, directly on the device. This feature simplifies post-shooting adjustments without needing a computer. The LCD monitor also allows you to rotate images and view shooting information, making it easy to review and manage your photos efficiently. The Nikon Coolpix P900 offers a range of basic in-camera editing options, allowing users to enhance their photos without transferring them to a computer. These features include resizing images, adjusting brightness, and applying basic filters. You can also crop photos to focus on specific details or straighten images for better composition. Additionally, the camera provides options to adjust exposure compensation and color balance, enabling subtle fine-tuning of your shots. These editing tools are intuitive and easy to use, making them accessible to both beginners and advanced users. By utilizing these in-camera editing options, you can refine your photos directly on the device, saving time and ensuring your images look their best before sharing or storage. This feature is particularly useful for those who prefer a streamlined workflow. The Nikon Coolpix P900, like any electronic device, may encounter occasional issues. Common problems include the camera freezing, zoom malfunction, or poor image quality. If the camera freezes, resetting it by removing the battery for a few seconds often resolves the issue; For zoom issues, ensure the lens is clean and free from debris. If images appear blurry, check that the autofocus is enabled and the subject is properly framed. Additionally, using non-Nikon accessories can sometimes cause compatibility problems, so sticking to genuine Nikon products is recommended. If these steps don’t resolve the issue, consulting the user manual or contacting Nikon support is advisable. Regular firmware updates can also help maintain optimal performance. By addressing these common issues promptly, you can ensure your camera continues to function smoothly and deliver high-quality results.
Shooting Modes Explained
3.1 Auto Mode for Beginners
3.2 Scene Mode for Specific Shots
3.3 Aperture Priority Mode
3.4 Shutter Priority Mode
3.5 Manual Mode for Advanced Users
Camera Settings for Optimal Results
4.1 Adjusting ISO Sensitivity
4.2 Setting White Balance for Accurate Colors
4.3 Understanding and Using Autofocus Modes

Accessories for Enhanced Functionality
5.1 Compatible Lenses and Accessories
5.2 Maintenance Tips for Longevity

Mastering Shooting Techniques
6.1 Composition Basics for Better Photos
6.2 Lighting Techniques to Enhance Your Shots
6.3 Effective Use of Zoom for Dynamic Images

Image and Video Capture Settings
7.1 Configuring Still Image Settings
7.2 Exploring Video Recording Options

Playback and Editing Features
8.1 Reviewing and Managing Your Images
8.2 Basic In-Camera Editing Options

Troubleshooting Common Issues