
The GE Security System is a comprehensive solution designed to protect residential and commercial properties. It offers advanced features like intrusion detection, fire safety, and remote monitoring. This manual guides users through installation, operation, and troubleshooting, ensuring optimal system performance and reliability.
1.1 Overview of the GE Security System
The GE Security System is a robust, integrated solution designed to protect properties from intruders, fires, and other threats. It includes components like control panels, keypads, motion detectors, door/window sensors, and sirens. The system offers advanced features such as remote monitoring, custom programming, and voice control integration. It ensures reliable performance with backup batteries and real-time alerts for low batteries or system failures. Users can arm/disarm the system using basic commands or special modes, and the monitoring center provides emergency response. Regular maintenance and software updates keep the system functioning optimally. This overview highlights the system’s core elements and its ability to adapt to various security needs.
1.2 Importance of the Manual
This manual is essential for understanding and effectively using the GE Security System. It provides detailed instructions for installation, operation, and troubleshooting, ensuring users can maximize system functionality. The guide covers arming/disarming commands, special modes, and emergency protocols, helping users respond to alerts and alarms. It also outlines maintenance tasks and software updates, crucial for system reliability. By following the manual, users can avoid common issues like low battery alerts and sensor malfunctions. Proper use of the system enhances security and peace of mind, making this manual indispensable for both new and experienced users. It serves as a comprehensive reference for optimal system management and safety.
System Components
The GE Security System includes a control panel, keypads, motion sensors, door/window contacts, sirens, and communication modules. Each component works together to ensure reliable security coverage and alerts.
2.1 Key Components of the GE Security System
The GE Security System comprises essential components that ensure robust protection. The control panel acts as the brain, managing all system operations. Keypads provide user interaction for arming, disarming, and accessing settings. Motion sensors detect movement, while door and window contacts trigger alerts when breaches occur. Sirens produce loud alarms to deter intruders and alert occupants. Communication modules connect the system to monitoring centers for emergency responses. Additional components like glass-break sensors and smoke detectors enhance coverage. Each part is designed to integrate seamlessly, offering a comprehensive security solution tailored to various property types and user needs.
2.2 Understanding Each Component’s Role
Each component of the GE Security System plays a distinct role in ensuring effective security. The control panel coordinates all functions, processing signals from sensors and keypads. Motion sensors monitor areas for unexpected movement, while door and window contacts detect breaches. Sirens alert occupants and deter intruders during an alarm. Communication modules link the system to monitoring centers for rapid emergency responses. Glass-break sensors identify shattered glass, and smoke detectors alert to potential fires. Understanding these roles is crucial for optimal system configuration and usage, ensuring maximum protection and reliability in various scenarios and property types. Proper integration ensures seamless operation, enhancing overall security effectiveness.

Installation and Setup
Installation and setup involve planning, placing components, connecting wires, testing, and programming. Ensure all sensors and panels are correctly positioned and levels are accurate. Follow the manual for a smooth process.
3.1 Pre-Installation Checklist
Before installing the GE Security System, ensure the following steps are completed:
- Identify and locate the correct circuit for the security system.
- Ensure the power supply is compatible and accessible.
- Verify all components are included and undamaged.
- Determine the optimal placement for sensors and panels.
- Program zones and customize settings according to needs.
- Test all devices to ensure proper functionality.
- Consult the manual for specific installation requirements.
This ensures a smooth and efficient installation process.
3.2 Step-by-Step Installation Guide
Begin by identifying and locating the correct circuit for the security system. Switch off the main power supply before starting the installation. Mount the control panel in an accessible location, ensuring all wires are securely connected. Install sensors and keypads according to the predefined zones. Program the system by setting up user codes and zone configurations. Connect all devices to the main panel and test each component to ensure proper functionality. Restore power and perform a final system check to confirm everything operates as expected. Refer to the manual for specific wiring and configuration details to complete the installation successfully.
Arming and Disarming the System
Arm the system using your code to activate protection. Disarm by entering your code to deactivate alarms. Use Level 1 to cancel alarms or stop sirens immediately.
4.1 Basic Arming and Disarming Commands
To arm the system, enter your security code on the keypad and press the “Arm” button. A confirmation beep will sound, indicating the system is active. To disarm, re-enter your code, and the system will deactivate, stopping any alarms. Use Level 1 to cancel alarms or stop sirens immediately. Ensure you understand these commands for smooth operation and security management.
4.2 Special Modes and Features
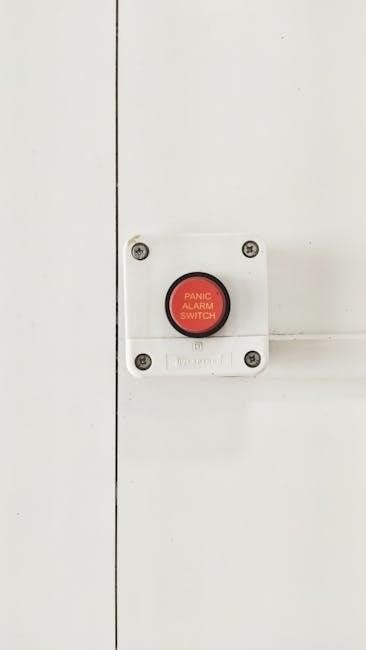
The GE Security System offers special modes to enhance security and convenience. Stay Mode arms only perimeter doors and windows, allowing free movement indoors. Panic Mode triggers immediate alarms by pressing a dedicated button. Silent Mode disables auditory alerts for discreet operation. Temporary Bypass lets you deactivate specific sensors without disarming the entire system. Voice Control Integration allows arming/disarming via voice commands. Chime Mode alerts you to door or window openings. These features provide flexibility and tailored security solutions for various scenarios, ensuring your system adapts to your lifestyle and needs.

Monitoring and Response
The GE Security System continuously monitors for breaches, sending alerts to your monitoring center. Trained professionals verify alarms and contact authorities or you, ensuring prompt response to emergencies.
5.1 How the Monitoring System Works
The GE Security System’s monitoring process begins with sensors detecting breaches, triggering alerts sent to a central monitoring station. These alerts are reviewed by trained professionals to verify legitimacy. Upon confirmation, the monitoring center contacts emergency services or the system owner, ensuring a swift response. The system also provides real-time updates via mobile apps, allowing users to stay informed. This integrated approach ensures maximum security and peace of mind, leveraging advanced technology for reliable protection.
5.2 Emergency Response Protocols
The GE Security System includes predefined emergency response protocols to ensure timely and effective action during breaches. Upon detecting an alert, the system immediately notifies the monitoring center. Trained personnel assess the situation and contact the system owner or emergency services as needed. Protocols may include dispatching police, fire, or medical teams, depending on the alert type. Users can customize responses to suit their needs, such as contacting neighbors or security personnel. The system also provides clear instructions for disarming and resetting post-emergency, ensuring safety and minimizing false alarms. These protocols are designed to maximize efficiency and user confidence in critical situations.
Troubleshooting Common Issues
Trouble beeps indicate system problems, such as low batteries or sensor malfunctions. Resetting the system or replacing batteries often resolves these issues. Contact support if problems persist.
6;1 Identifying Trouble Beeps and Alerts
The GE Security System uses trouble beeps and alerts to indicate potential issues. These signals help users identify problems such as low battery levels, sensor malfunctions, or system failures. Understanding the patterns and meanings of these alerts is crucial for timely resolution. For example, three beeps may signal a low battery, while continuous beeping could indicate a sensor issue. Users can press specific keys on the keypad to retrieve detailed error codes, which are often displayed on the keypad screen. Referencing the manual or contacting support can provide further guidance for addressing these issues effectively. Regular checks can prevent system downtime and ensure optimal security performance.
Addressing low battery warnings and system failures is essential for maintaining security. Replace batteries promptly with compatible ones, ensuring proper installation. For system failures, check connections, restart the panel, and verify power sources. If issues persist, contact a certified technician to diagnose and repair faults. Regular maintenance, such as battery testing, can prevent unexpected failures. Always follow the manual’s guidelines to ensure your system operates efficiently and provides reliable protection. Regular maintenance ensures optimal performance. Inspect sensors, clean components, and test systems monthly. Replace batteries as needed and update software to maintain functionality and security. Schedule professional checks annually. Regular maintenance is essential to ensure the GE Security System operates efficiently. Start by inspecting all components, including sensors, keypads, and power supplies. Clean dust or debris from sensors to maintain accuracy. Test the alarm system monthly to verify proper functionality. Check the control panel for any trouble beeps or alerts, addressing issues promptly. Replace batteries in wireless devices as indicated by low-battery warnings. Review the system’s event log to identify recurring issues. Ensure all software updates are installed to maintain security and functionality. Refer to the manual for specific instructions on testing and updating your system. Regular checks help prevent failures and ensure your security system remains reliable and effective. Updating your GE Security System software ensures optimal performance and security. Regularly check for updates via the control panel or through the GE Security website. Download updates to a USB drive and follow the installation prompts. Always back up your system settings before proceeding. Ensure the system is powered on and avoid interruptions during the update process. Contact your authorized dealer if you encounter issues or require assistance. Keeping your software current protects against vulnerabilities and enhances functionality. Refer to the manual for detailed instructions tailored to your system model. Regular updates are crucial for maintaining advanced features and ensuring your security system remains up-to-date with the latest technologies. The GE Security System offers advanced features like custom zones, smart home integration, and voice control, enhancing security and convenience for tailored protection and seamless operation. The GE Security System allows for custom programming to tailor security settings to specific needs. Users can program unique arming/disarming sequences, create custom zones, and adjust sensor sensitivity. Advanced features include setting entry delays, custom alerts, and integrating with smart devices. This flexibility ensures personalized security solutions, enhancing protection and convenience. Custom programming also enables users to adapt the system to their lifestyle, such as adjusting chime tones or creating temporary access codes. Refer to the installation guide for detailed instructions on configuring these settings. Customization options empower users to maximize their system’s potential for optimal security and ease of use. This feature-rich system ensures tailored protection for any property. Setting up security zones allows you to customize protection for specific areas of your property. Each zone can be configured to monitor doors, windows, or motion sensors. Users can assign unique names to zones for easy identification and set specific responses, such as triggering alarms or sending notifications. Zones can also be programmed to bypass certain sensors temporarily. For example, a “home” zone might exclude outdoor sensors. Adjusting zone sensitivity prevents false alarms, ensuring reliable detection. Properly configured zones enhance system efficiency and provide targeted security. Refer to the manual for step-by-step guidance on zone customization to optimize your security setup and ensure maximum protection. The GE Security System seamlessly integrates with popular smart home systems, enabling voice control and automation. Compatible devices enhance security and convenience, offering remote monitoring and tailored alerts for a unified home experience. The GE Security System is designed to integrate seamlessly with various smart home devices, ensuring enhanced functionality and convenience. Compatibility with systems like Amazon Alexa and Google Home allows users to control their security settings through voice commands. Additionally, GE security systems work with smart thermostats, lights, and door locks, creating a unified smart home experience. This integration enables features such as automated lighting when motion is detected or adjusting thermostat settings based on system status. By connecting GE security with other smart devices, users can enjoy a more streamlined and responsive home security solution. The GE Security System offers seamless voice control integration with popular smart home assistants like Amazon Alexa and Google Home. Users can arm, disarm, or check system status using voice commands, enhancing convenience and accessibility. For example, saying “Alexa, arm my security system” or “Hey Google, is my security system armed?” provides instant control without manual interaction. Voice commands can also trigger custom scenes, such as locking doors or activating lighting. This feature is particularly useful for hands-free operation, ensuring security and efficiency. Proper setup and compatibility with smart home systems are required for optimal performance. Voice control integration elevates the GE Security System’s functionality, offering a modern and intuitive user experience. Future trends include AI, machine learning, IoT integration, biometric authentication, and cloud-based solutions, enhancing security and user experience while ensuring robust cybersecurity measures. Emerging technologies like AI, machine learning, and IoT are revolutionizing security systems. AI-powered video analytics enhance intrusion detection, while IoT enables seamless integration with smart home devices. Biometric authentication, such as facial recognition, improves access control. Cloud-based solutions offer remote monitoring and real-time updates. Cybersecurity advancements protect systems from digital threats. 5G connectivity ensures faster response times, and quantum computing promises future-proof encryption. These innovations are reshaping security, providing smarter, more efficient, and responsive systems. Staying updated with these technologies ensures maximum safety and convenience for users, making security systems more intelligent and adaptable to modern challenges. Upgrading your GE Security System ensures compatibility with the latest technologies and enhances performance. Start by assessing current hardware and software to identify outdated components. Replace legacy devices with modern ones, such as high-resolution cameras or advanced sensors. Software updates can add new features like AI-driven analytics or improved biometric integration. Consider integrating smart home devices for enhanced control. Backup your system data before performing any upgrades. Always follow manufacturer guidelines or consult professionals to avoid disruptions. Regular updates maintain system efficiency, prevent vulnerabilities, and ensure compliance with industry standards. A well-planned upgrade strategy keeps your security system robust and future-ready, safeguarding your property effectively. The GE Security System manual provides a comprehensive guide to understanding and managing your security setup. By following the instructions, users can ensure effective system operation and maintenance, safeguarding their property with confidence and reliability. The GE Security System manual emphasizes understanding system components, proper installation, and regular maintenance for optimal performance. It highlights arming/disarming commands, troubleshooting common issues, and emergency protocols. The guide also covers advanced features like custom programming and smart home integration, ensuring users can tailor their security setup to meet specific needs. By following the manual’s instructions, users can maximize system reliability and effectiveness, ensuring their property’s safety. Regular updates and adherence to maintenance schedules are crucial for long-term functionality. This comprehensive approach ensures users are well-equipped to manage their security systems efficiently and respond promptly to any threats or malfunctions. To ensure optimal performance, regularly check the system status and address any trouble beeps promptly. Keep the software updated to benefit from the latest features and security enhancements. Familiarize yourself with all components and their roles to customize settings according to your needs. Test the system periodically to verify functionality and make adjustments as necessary. For pet owners, consider installing pet-friendly sensors to avoid false alarms. Finally, maintain open communication with your security provider and seek professional assistance when needed. By following these tips, you can maximize your system’s efficiency and enjoy enhanced peace of mind.6.2 Resolving Low Battery and System Failures

Maintenance and Upkeep
7.1 Regular Maintenance Tasks
7.2 Updating System Software

Advanced Features
8.1 Custom Programming Options
8.2 Setting Up Security Zones
Integration with Smart Home Systems
9.1 Compatibility with Smart Home Devices
9.2 Voice Control Integration

Future Trends and Upgrades
10.1 Emerging Technologies in Security Systems
10.2 Upgrading Your Current System
11.1 Summary of Key Points
11.2 Final Tips for Effective System Management